Have you ever found a beautiful piece of antique furniture, only to discover it’s hidden under layers of paint or stain? Don’t let that deter you from restoring its original beauty! Whether you’re a seasoned restorer or a DIY enthusiast, learning how to easily remove paint or stain from fine woodworking can transform your project from overwhelming to achievable. In this guide, I’ll share simple, effective techniques and tips to help you reveal the intricate details of your vintage treasures, ensuring they shine in their true glory once more. Roll up your sleeves, and let’s bring that hidden craftsmanship back to life!
I scooped up the score of my lifetime — this stunning Antique Pine Harvest table and chair set. While I was looking on Facebook Marketplace, I came across this beauty and to me, at $375, I thought that was a steal of a deal.
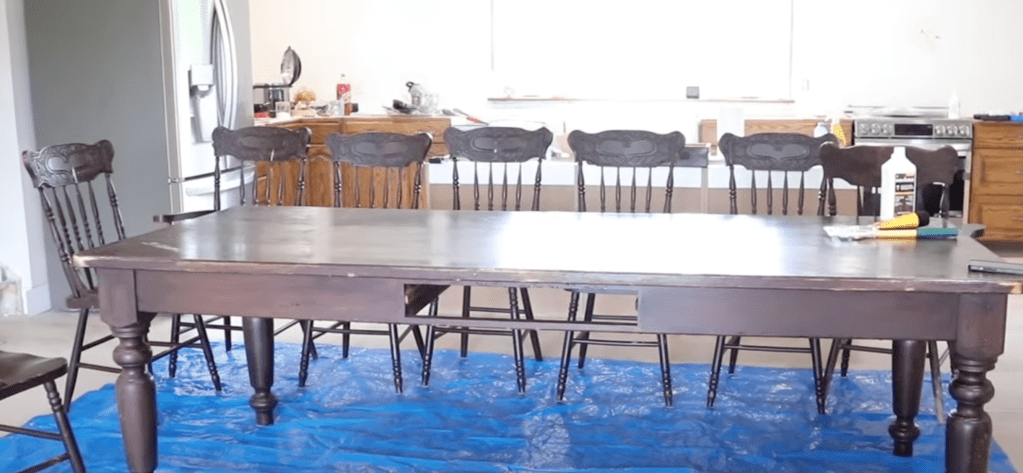
There is one some problem, though. It’s covered in brown paint. I am going to strip this beauty down and restore it to its beautiful glory. There is however, fine detailed woodwork on the head of the chairs, so how does one go about removing paint around fine detail woodworking? I am going to show you in 4 easy steps!
You no longer have to be intimidated by furniture restoration; you just need the right tools! Here is how to easily remove paint or stain from detailed woodworking on furniture.
Materials Needed
Before you begin, gather the following materials:
- Solvable Heavy Duty Paint Stripper: A powerful agent designed to break down paint and stain.
- Plastic Wrap: Helps to keep the paint stripper from drying too quickly.
- Mineral Spirits: Used for cleaning and removing any remaining residue.
- Protective Gear: Gloves, goggles, and a mask to ensure safety.
- Soft Brushes and Scrapers: For gently working on intricate details.
- Cloths or Rags: For wiping and cleaning the surface.
*This post contains affiliate links from Amazon. If you use them, I might be rewarded credit or a commission of the sale. Please note that I only recommend tools that I personally use and love and I always have my viewers’ best interest at heart.

Step-by-Step Process
Step 1: Prepare Your Workspace
- Ventilation: Ensure your workspace is well-ventilated. If possible, work outdoors or in a garage with open windows.
- Protection: Wear gloves, goggles, and a mask to protect yourself from fumes and chemical exposure.
- Covering: Lay down a tarp or protective covering to catch any drips or spills.
Step 2: Apply the Paint Stripper
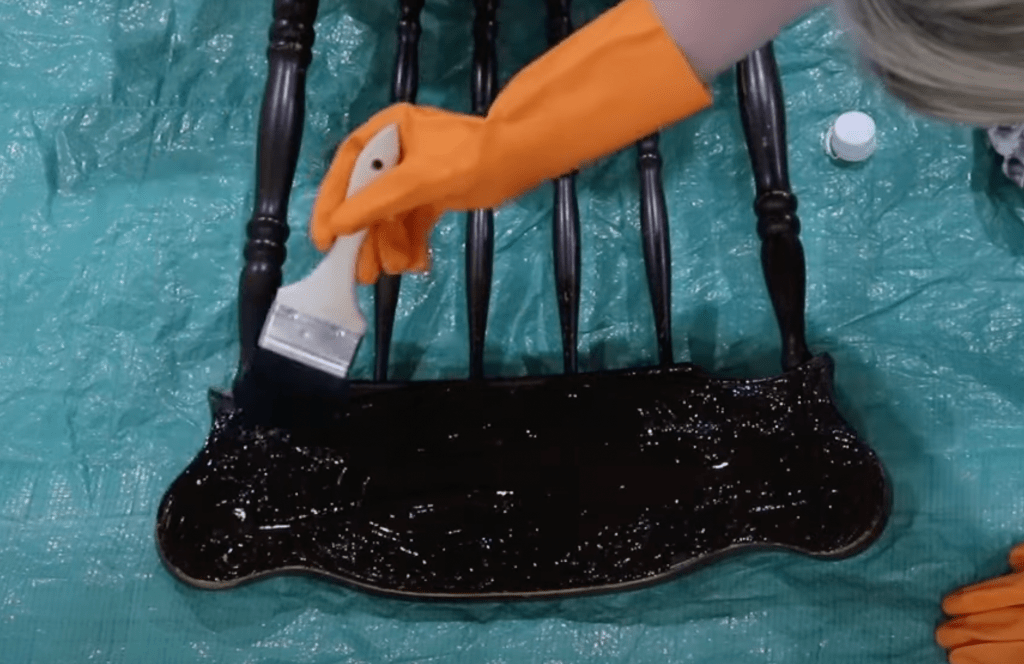
- Application: Using a soft brush, apply a generous layer of Solvable Heavy Duty paint stripper to the woodwork. Focus on small sections at a time to ensure thorough coverage.
- Wrap It Up: Cover the treated areas with plastic wrap. This prevents the stripper from drying out too quickly and allows it to penetrate the paint or stain more effectively.
- Wait Time: Allow the stripper to sit for the time recommended by the manufacturer. This can vary, but with this particular brand, all you need is 5 minutes!
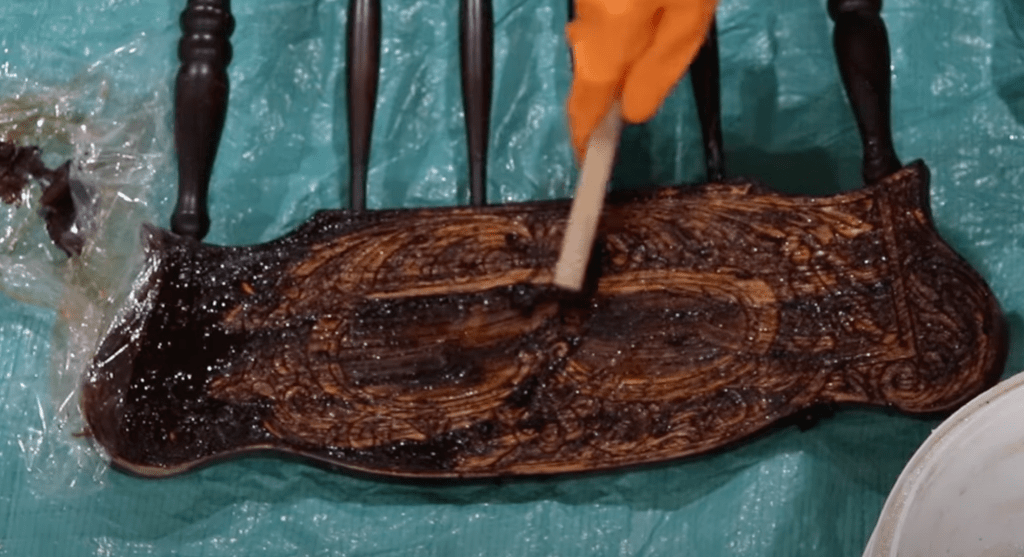
Step 3: Remove the Paint or Stain
- Peel and Scrape: Carefully remove the plastic wrap. Using a soft scraper or brush, gently scrape away the loosened paint or stain. Be cautious not to damage the intricate details of the woodwork.
- Repeat if Necessary: If some areas are still covered, reapply the stripper and repeat the process.
Step 4: Clean the Surface
- Mineral Spirits: Dampen a cloth with mineral spirits and gently wipe the woodwork. This will remove any remaining residue from the paint stripper.
- Final Touches: Use a soft brush to clean out detailed carvings or crevices where residue may have settled.

Step 5: Finishing Up
- Inspection: Once the surface is clean and dry, inspect the woodwork for any missed spots or damage.
- Protection: Consider applying a new finish or clear coat to protect the wood and enhance its natural beauty.

Tips for Success
- Patience is Key: Take your time to ensure each step is done thoroughly. Rushing can lead to mistakes or damage.
- Test First: Always test the stripper on a small, inconspicuous area before applying it to the entire piece.
- Gentle Tools: Opt for soft brushes and plastic scrapers to avoid scratching the wood.
By following these steps, you can restore the original charm of your antique chairs, highlighting their craftsmanship and detail. Not only will you have a beautiful piece of furniture, but you’ll also have the satisfaction of preserving a piece of history. Happy restoring!
If you want to see this method in action, check out my video from my YouTube channel:
If you like this How To, here are some other posts, you may enjoy!
- How To Open A Peony Head Quickly
- How To Paint a Lamp So That It Looks Like It Came From Wayfair
- Painting Fabric Chairs with Country Chic Paint


Leave a Reply