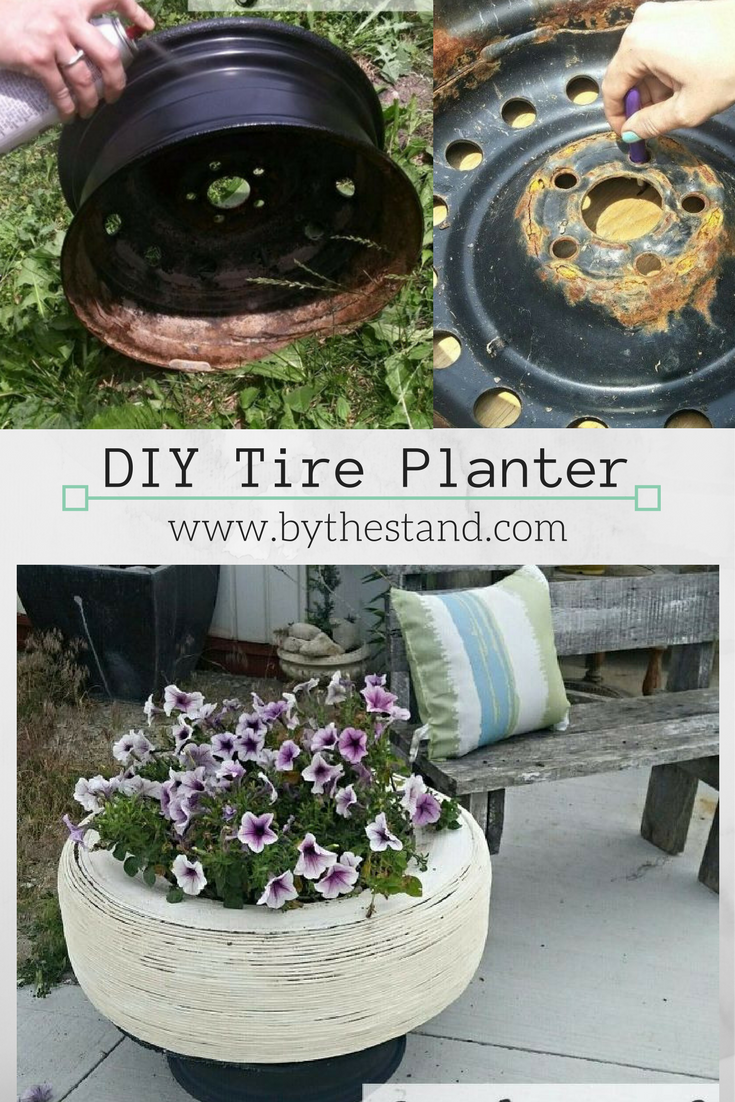
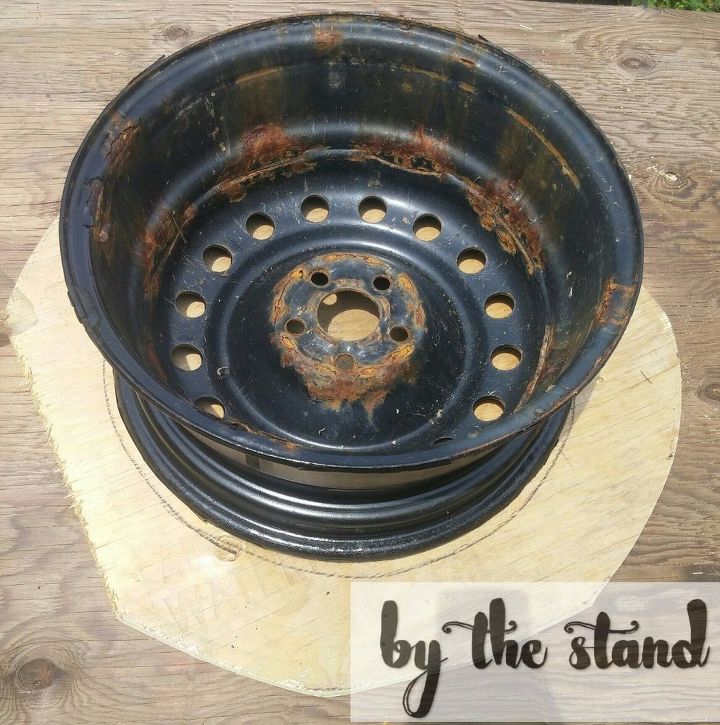
I really like to burn rubber, so pretty much all the tread on two of my tires was gone — it was time for new tires for my little red SUV. We ended up replacing all four tires, and we tossed the two really bad ones, but for some reason decided to hang onto the two that weren’t that bad. The hubs and I were cleaning out the garage the other day and saw the two tires stashed in the corner. My husband was ready to take these two beauts to the dump, when I had a vision — a vision that became a reality this past weekend.
I used an old tire, an old rim and some left over plywood to make this one of a kind garden planter. Let me share with you how I did it!

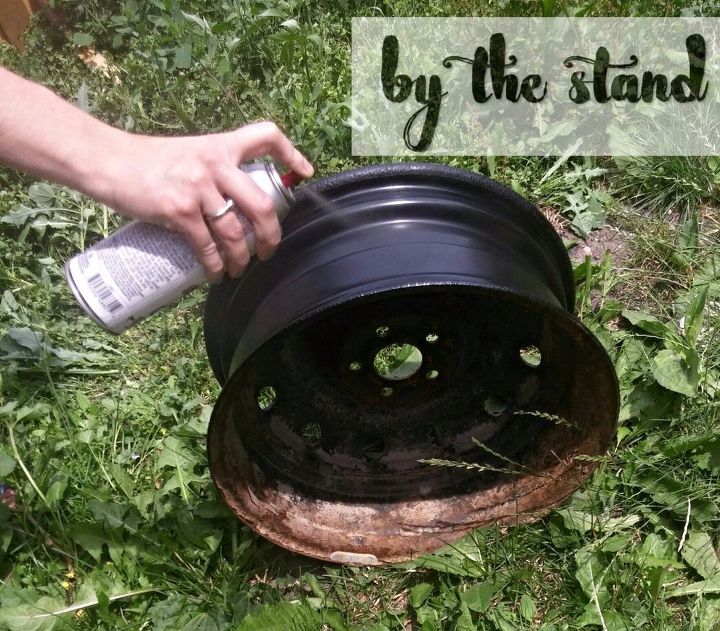
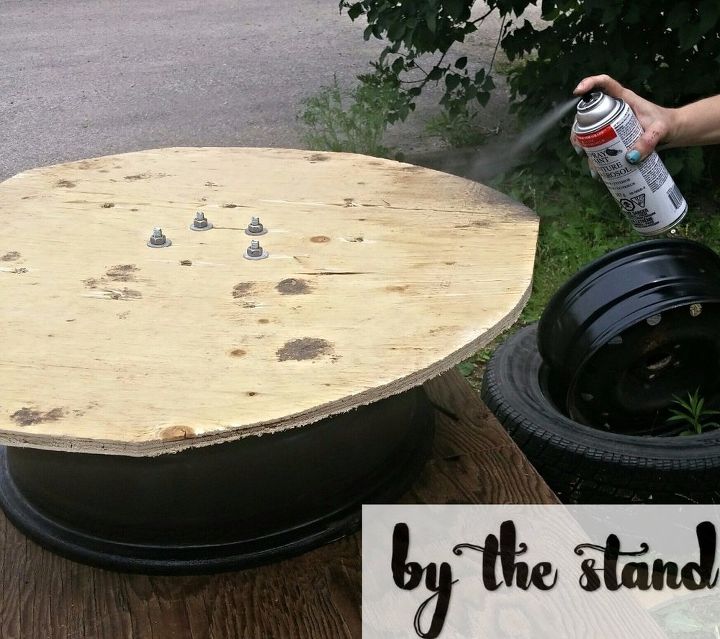
I started of by giving the outer edges of the rim a fresh coat of black paint. I used just regular flat black spray paint for this. I didn’t worry about doing the inside or bottom because this part is not seen.
I needed to put a bottom on the tire to hold dirt, so this is where the plywood came into play. I set my tire on top of my piece of plywood and I traced around the inside with a permanent marker. I angled the marker in a little bit to get under the edge.
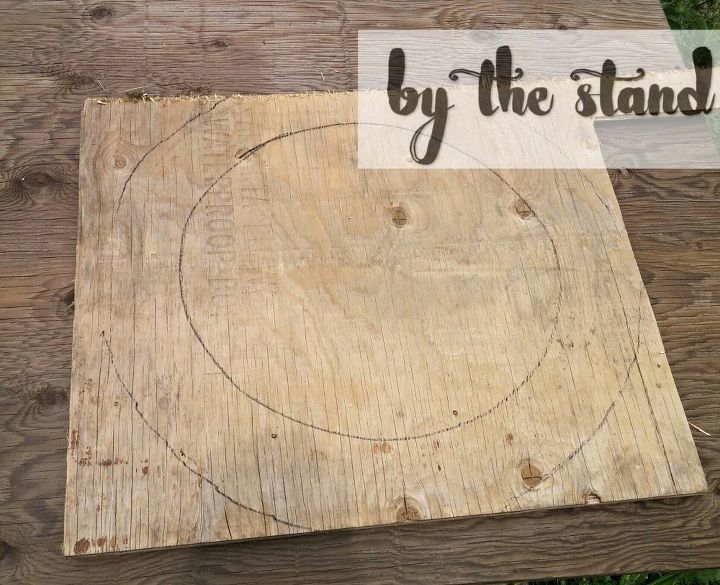
I also traced around the outside of the tire.
I then used my jigsaw to cut around only the outer marks. I only marked the inside so I knew where to place my rim (you will see this in the later steps).
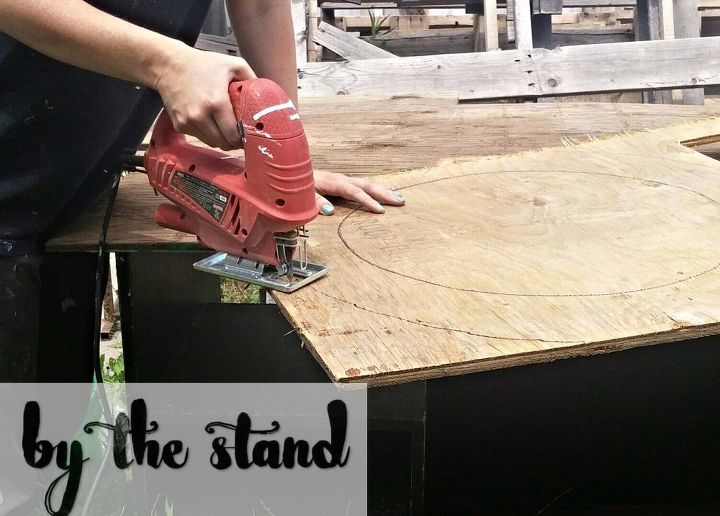
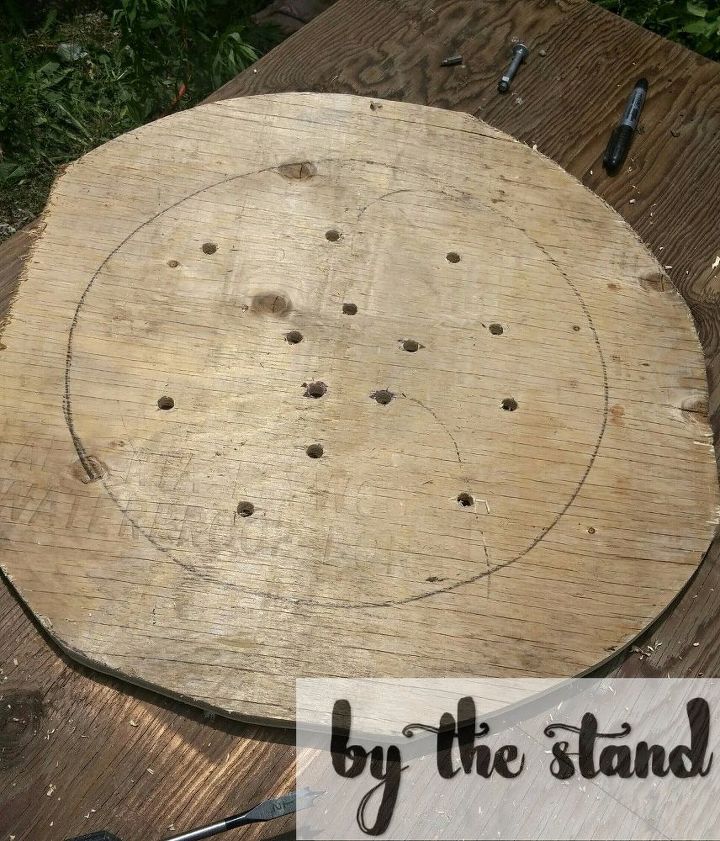
After I got my “circle” all cut out, it wasn’t quite a perfect circle, but I was recycling an old piece of plywood, so I wasn’t too concerned with the shape. Plus, this is hidden under the tire.
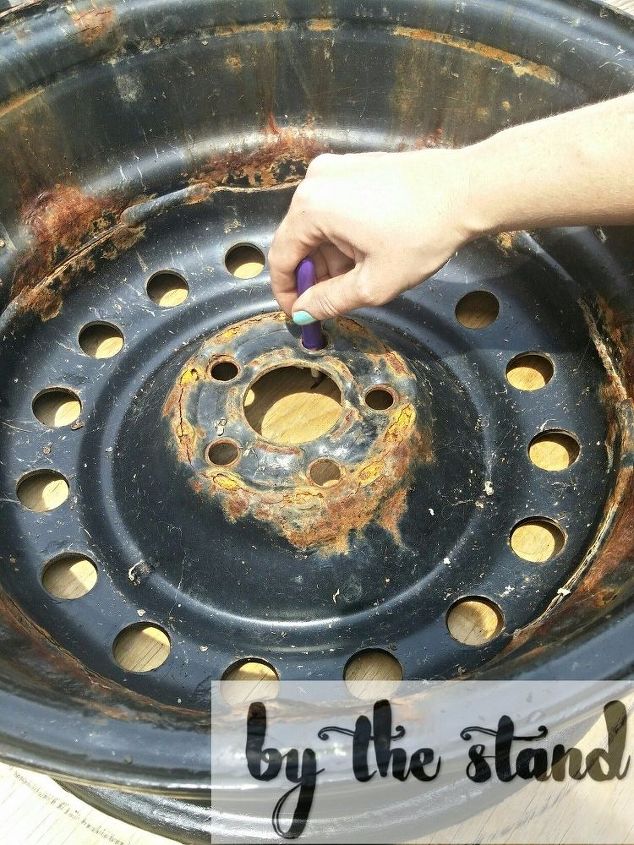
I placed the rim on top of the plywood, making sure the bolt holes (I think that’s what they are called) are closest to the plywood.
Then, taking a marker and sliding it through the bolt holes in the middle, I made some markings.
I used a half inch spade bit to drill holes where I made my marks.
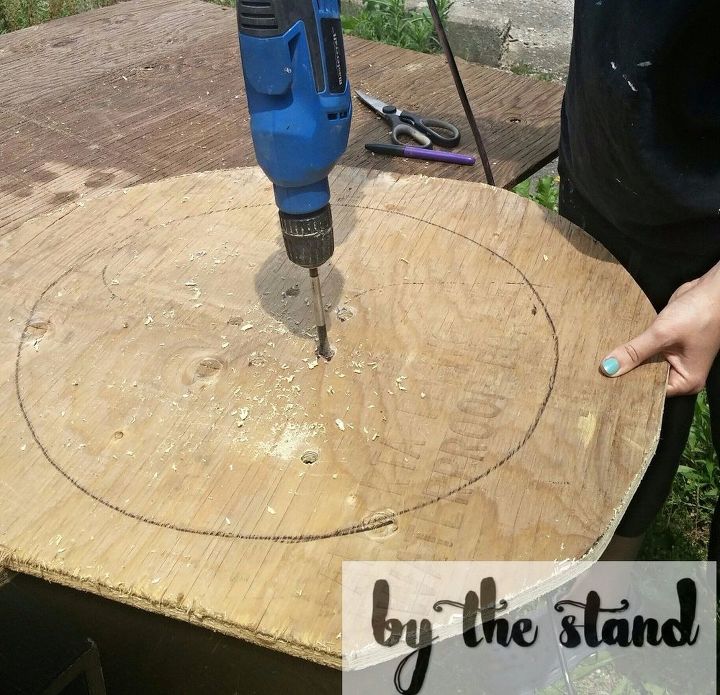
I also drilled some additional drain holes for when I will be watering my flowers or plants.
I used 3″ bolt with a nut and washer on each end to attach my rim to my piece of plywood.
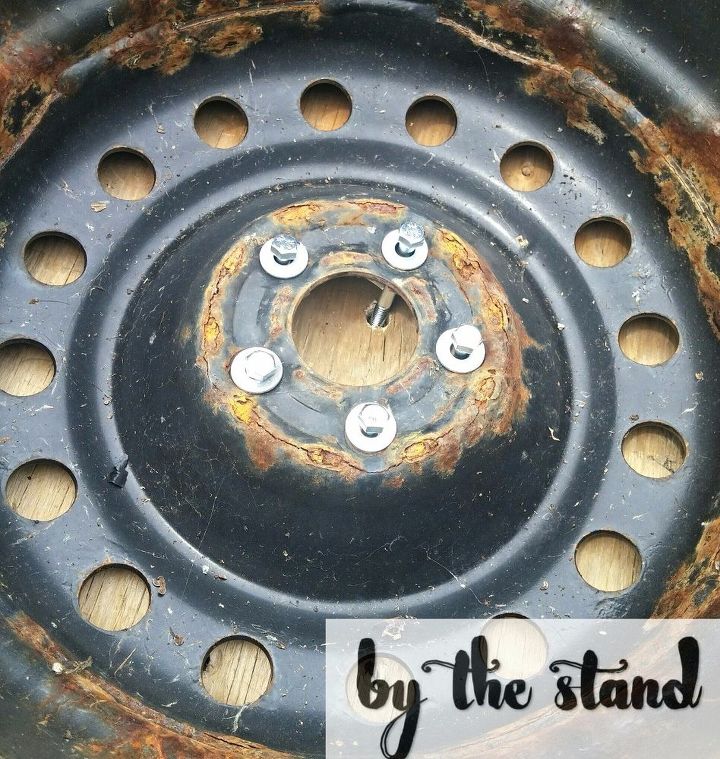
Make sure you use washers on each side for extra durability.
After I had it all bolted together, I spray painted the plywood black to match the rim.
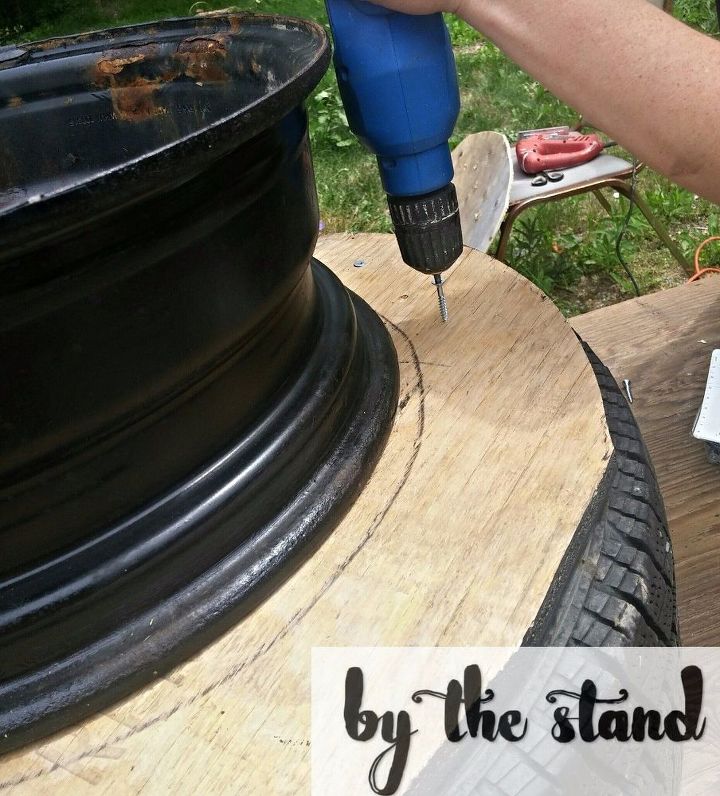
I then put the tire on my work table, and then put my rim/plywood base upside down on top of it. Using screws, I drilled right through the plywood to attach my base to my tire.
Flipped it over to see what I had. It was looking good… but it still looks like a tire, and that is just tacky, so it was time to give this thing a face lift.
I got out some contact cement and got some clothesline rope.
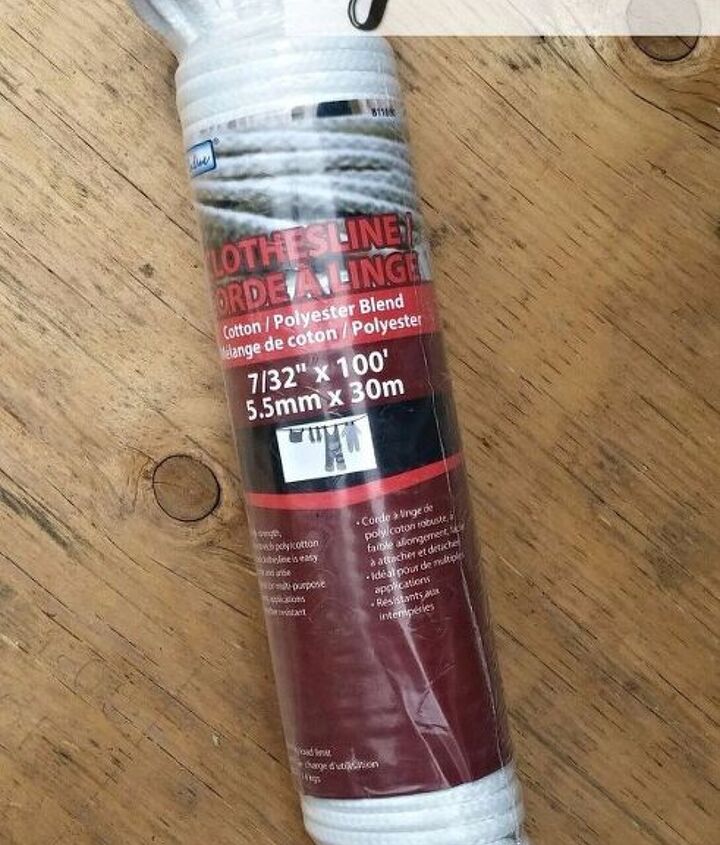
I purchased clothesline rope because it is by far the cheapest, and I used contact cement to adhere the rope to the tire.
To cover the tire I needed an extra set of hands, so I enlisted the help of my mother. I would brush on the contact cement and she would follow me around with the rope.
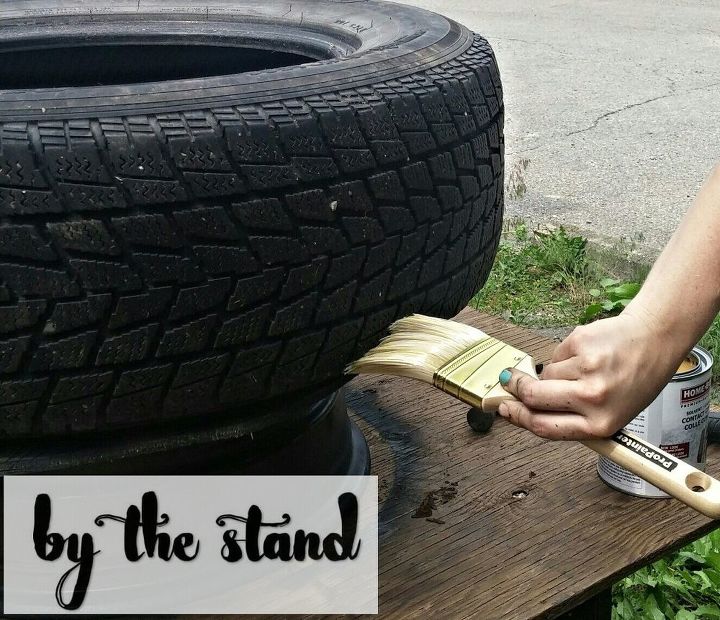
This was the longest part of the project. It took us about 45 minutes – an hour to do this. I don’t have many pictures cause we had to work really quickly. It was a very hot day and the contact cement was setting really fast. This was good in a way because we could wrap really fast rather than waiting for the rope to stick… so I wasn’t complaining!
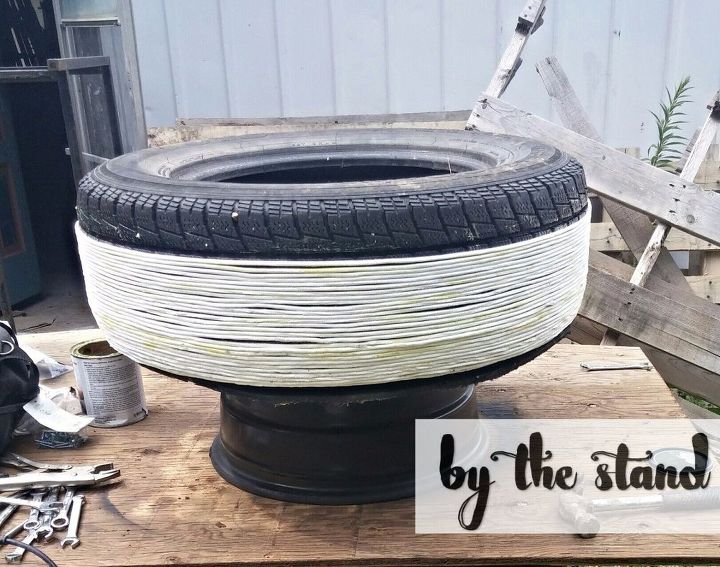
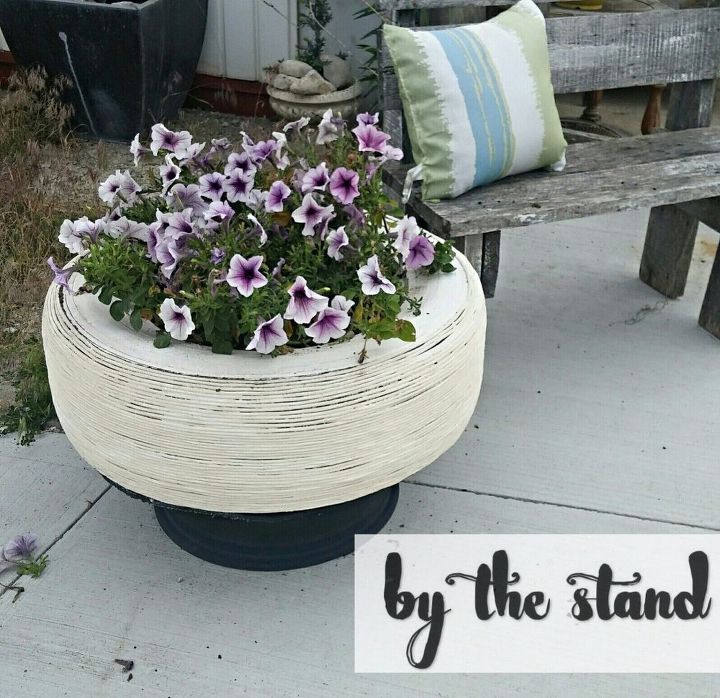
I gave the top of the tire a little coat of white paint just to pull the whole look together.
Here it is out front and center of our store. If you are ever in Thamesford — stop in and see us, and see this planter up close and personal!
I still have one more tire, so I am gonna make another one this weekend. I may try and paint the rope a different color and see what happens!
Let me know what you think about this project! Have you ever done any DIYs with a tire? Share your projects with me!
And in the meantime,


Leave a Reply
Pingback: DIY Twine Wrapped Canister | By The Stand on June 28, 2016
Pingback: 18 Awesome Repurposed DIY Projects For Your Home • DIY Home Decor on June 28, 2016
Pingback: 40+ Repurposed DIY Projects To Upgrade Your Home ⋆ DIY Crafts on June 28, 2016
Pingback: 26 Upcycled Garden Ideas That Someone Could Do - Magical Soil on June 28, 2016
Pingback: 15 Best Old Tire Craft Ideas and Projects for 2022 on June 28, 2016
Pingback: 40 Backyard Ideas On A Budget | Arq:ink on June 28, 2016
Pingback: ≫ 40 ideas de patio trasero en un presupuesto on June 28, 2016
Pingback: 15 DIY Ideas To Reuse Old Tiers for Home Decoration in 2023 on June 28, 2016
Pingback: 15 DIY Old Tire Projects - DIYsCraftsy on June 28, 2016
12 COMMENTS
In Shu's Shoes
10 years agoI love it!!!
It’s beautiful…
hollygrace13
10 years agoThank you!
Sherry Crum
7 years agoAWESOME!!