
Would you believe me if I told you that I made these geometric decor shapes from drinking straws? You don’t have to believe me because I am going to show you!!
This was such a fun little project and now I am left with some stunning decor. I saw these succulent holders on Pinterest the other day and I wanted to make something similar. image source: Lia Griffith
The only problem I was facing was the copper piping. It can be a little on the pricey side, so I racked my brain to think of an alternative, and that is when I remembered that I had an over whelming amount of drinking straws. You see, this summer, I made a whole bunch of these pencil holders for teacher’s gifts.  They are actually drinking straw holders, but I replaced the straws with pencils. Super cute, right?
I hung onto the drinking straws because I knew that I would be able to DIY them into something and today was the day I put them to good use!
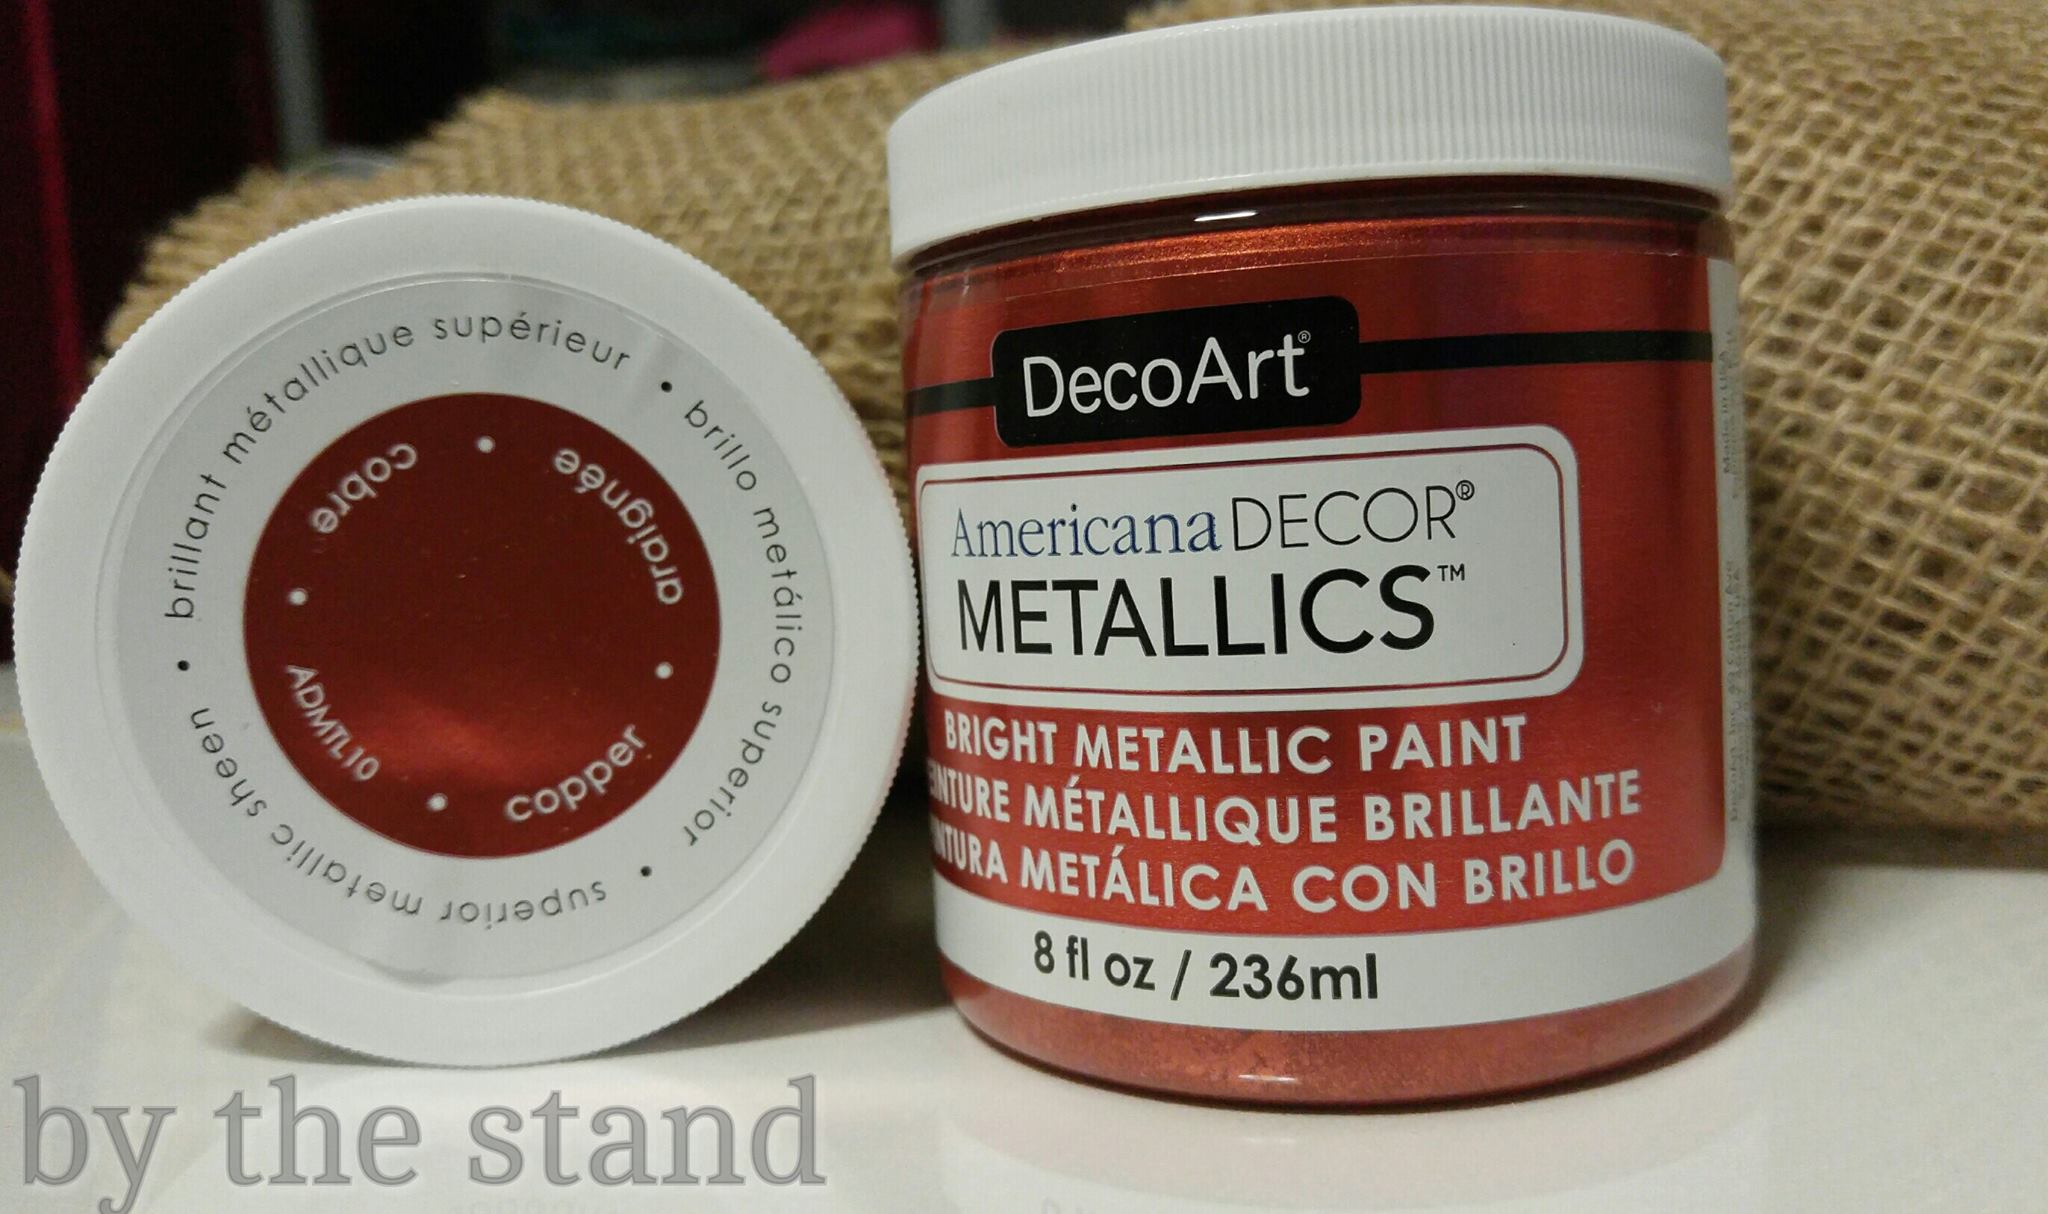
I have also been looking for a project to use this new paint that I got — Americana Decor Metallics in Copper by DecoArt. This paint is great to transform ordinary stuff into a beautiful copper and unless you actually touch the drinking straws you would never know that they are not copper piping. This paint is bang on!
To do this project, I used my drinking straws and some crafting wire. 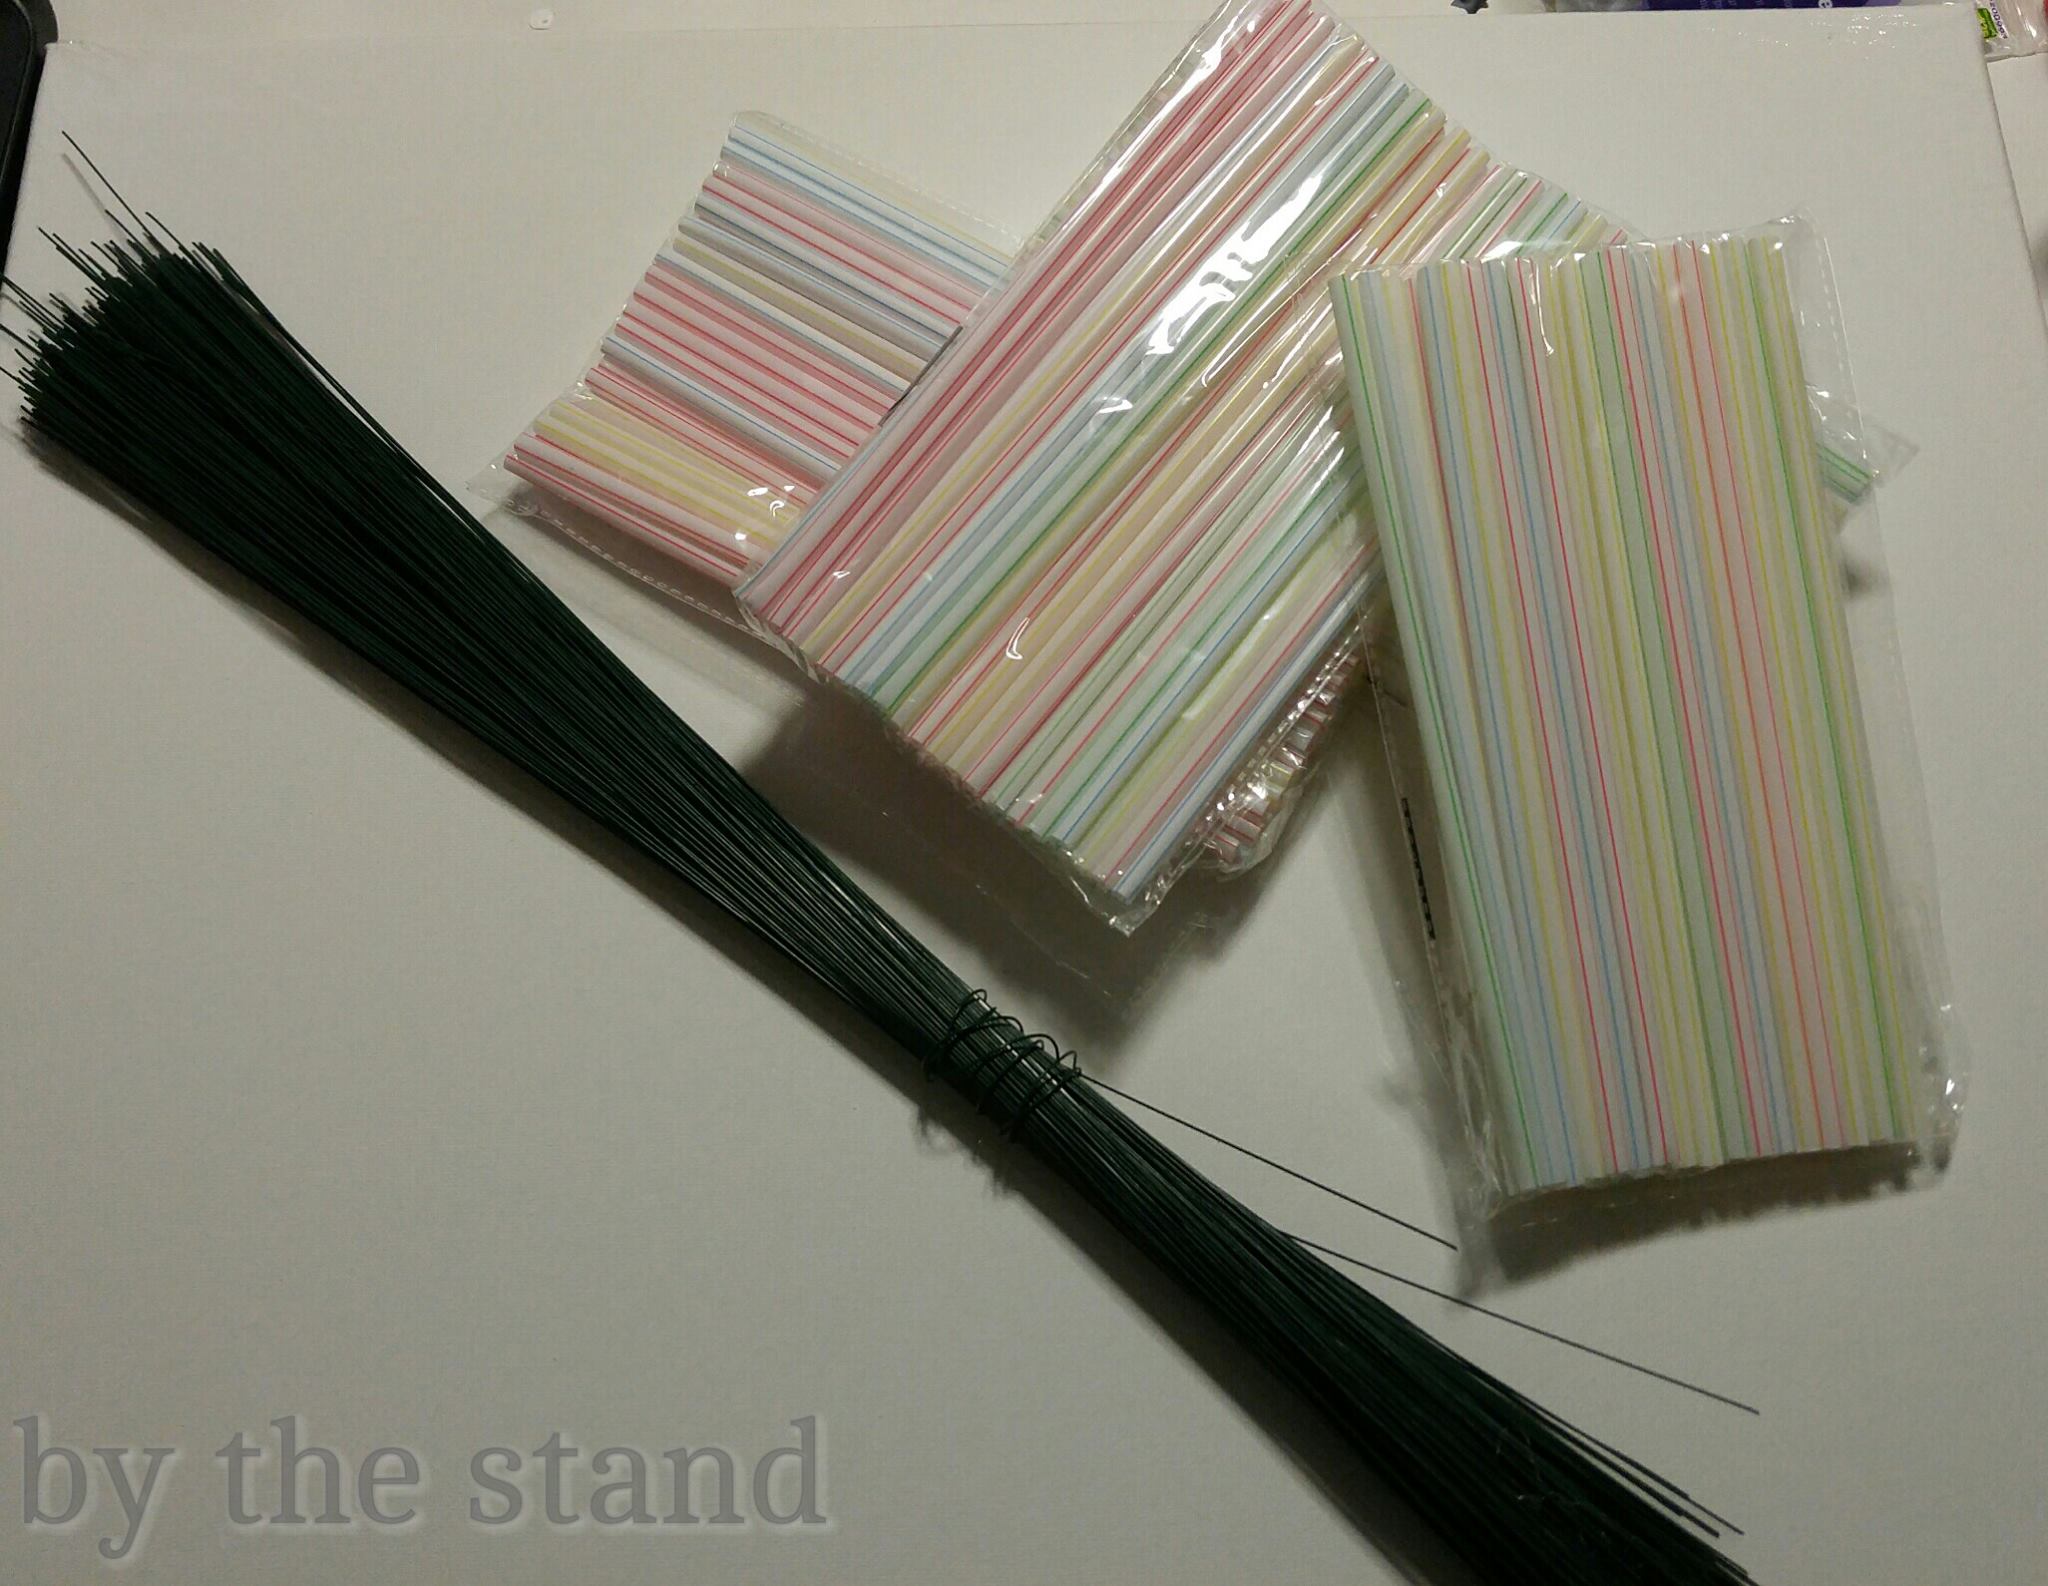
I whipped out my paint brush and started painting as many straws as I could.  I had to do two coats of the paint on the straws.
  Once the paint was dried, I cut off the ends of the straw that weren’t painted. I didn’t paint all the way down to the end just so I could have something to hang onto while I was painting.
Then it was time to start building some shapes. This process was a little bit of trial and error.
I started by sliding the wire through the a single straw. Then, I bent the wire up. I felt that I didn’t have enough wire on the left side so I twisted on another piece of wire.
  It would be a lot easier if I had wire that was on a spool, but I make what I have work.
I slide two more straws on the wire and then formed them into a triangle I slide the extra bit of wire into the straw to hide it.
I kept adding more wire and more straw and then started connecting them.  There really is no rhyme or reason to how I did this. I just started connecting them.
The wire started getting a little flimsy, so I secured the areas where the three straws meet up with a bit of hot glue. 
 You have to be really careful when you are doing this cause the glue is hot and can melt the plastic and the wire. What I did, was I added a dab of the hot glue and immediately blew on it to cool it down. This seemed to work quite well.
I made two different shapes — a large one and a smaller one. 
I set them up on my bookcase.  I thought that they looked pretty good here, but I wanted to play around with them a little bit more.
I put the smaller one inside of the larger one and added a candle. 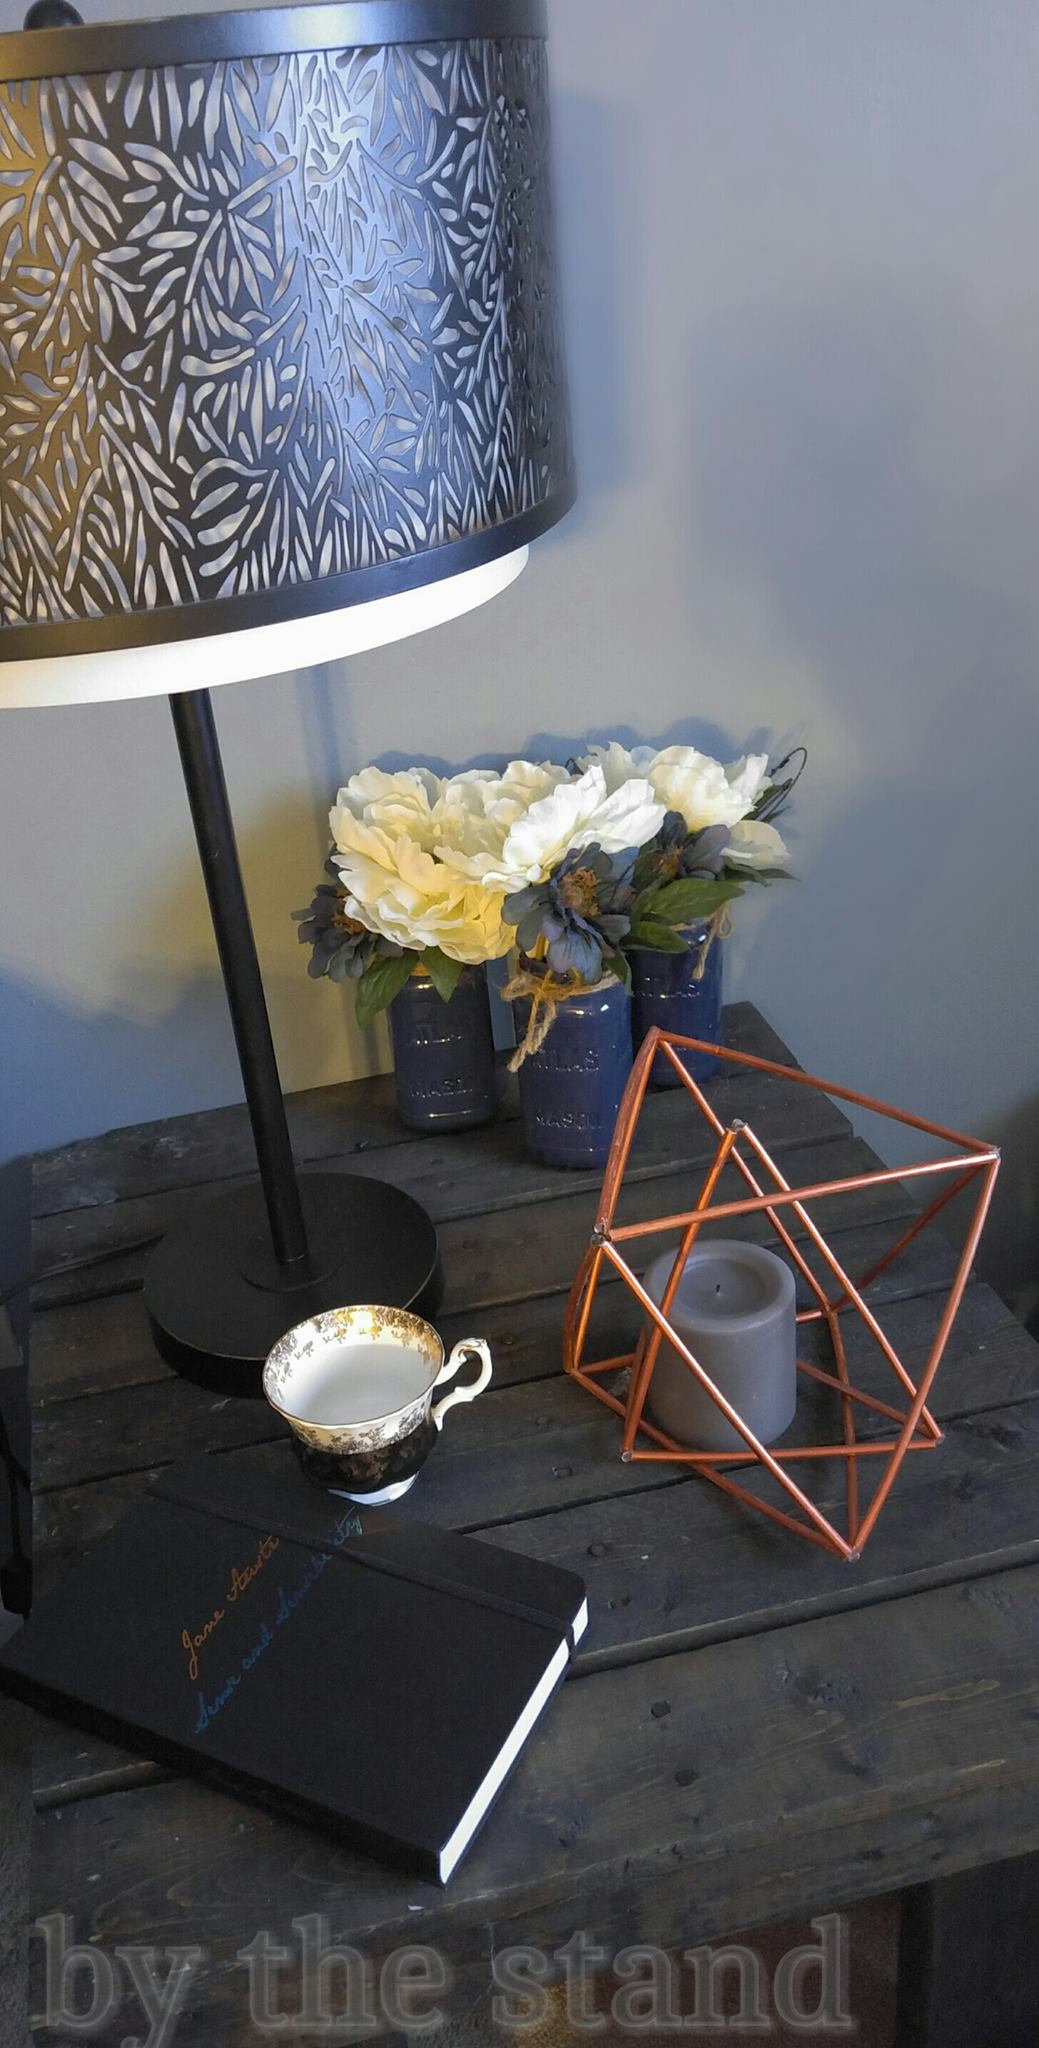 What do you think? Which way do you like better? Let me know!
Either way, I love my new “copper pipe” geometric shapes! 

Share this project if you love it! Or pin it for later!!


Leave a Reply
Pingback: DIY Paint Splatter Art | By The Stand on November 3, 2016
Pingback: Paint some drinking straws to copy this gorgeous home decor idea (+7 projects) - DIY on November 3, 2016
10 COMMENTS
Crazy for D.I.Y.
9 years agoGenius! Great idea and great tutorial! 👍
hollygrace13
9 years agoThank you!! 😀
gebbysmith
9 years agoI’ve been looking for an inexpensive way to get this look. Clever you!!!
hollygrace13
9 years agoThank you Grace!! As always, good to see you back here!! 😀
avila790
9 years agocool
hollygrace13
9 years agoThank you!
Beverly
9 years agoI saw something like your idea in a magazine for air plants. I bought straws, but when I read the tutorial it said to use coffee stirers. After reading your blog using the straws, I can make my air plant holders!
hollygrace13
9 years agoAwesome!! 🙂 Happy crafting!!