
So, I’m pleased to say that we have been making great headway on the house! With every nice weekend we get, we get a ton of stuff done.
There’s just something about nice weather that inspires you to get up off your hiney and get stuff done!
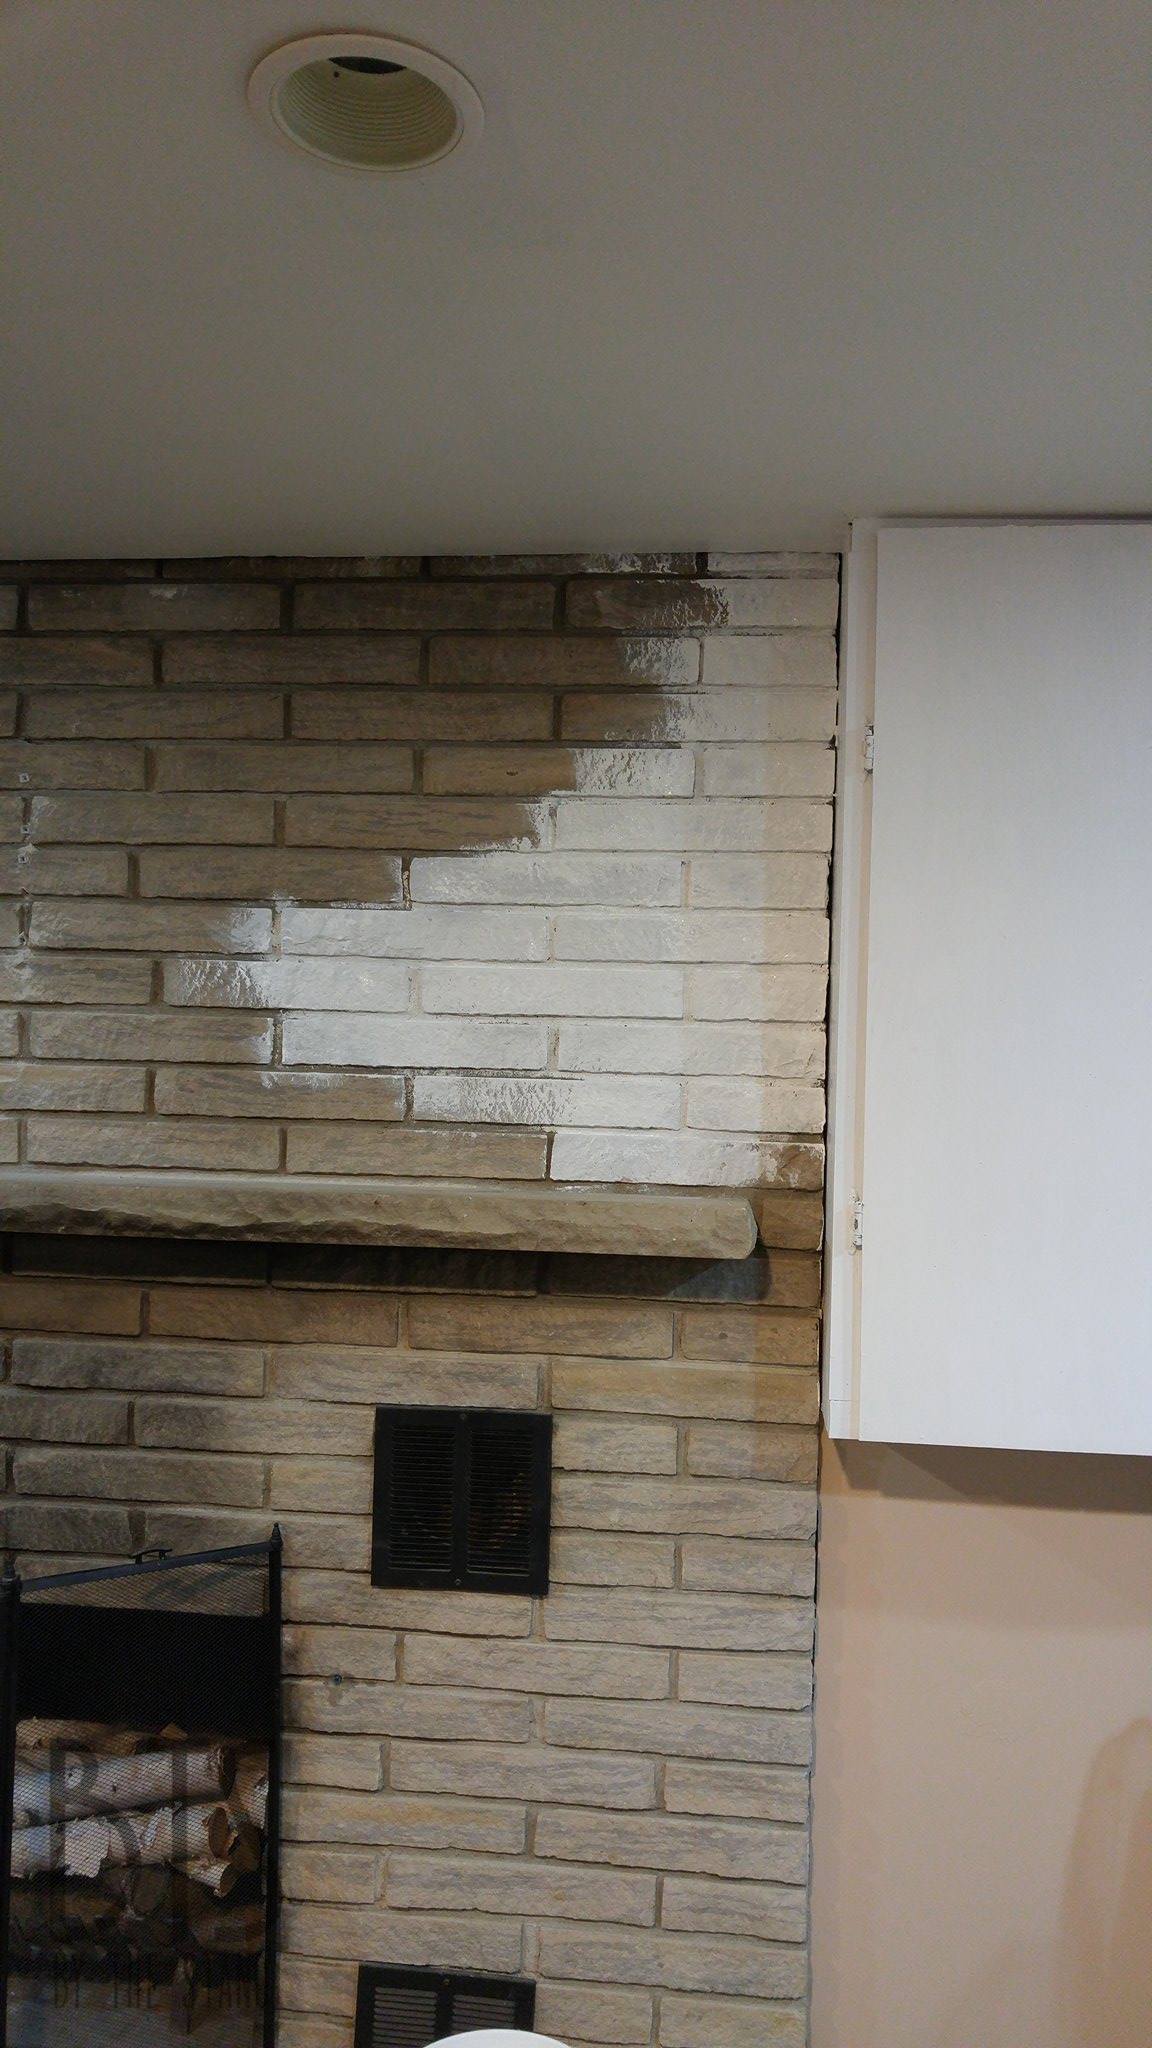
This week, I was able to finally tackle our fireplace — ahhh, that just sounds so wonderful, “our” fireplace.
When we were looking for a home, one thing that I was hoping for but wasn’t an absolute was a fireplace and our home has a great one — that is of course, after I got my hands on it!
Take a look at the beast before…

I mean not the worst thing in the world, but definitely could use a little TLC!
I have always wanted a white fireplace so I got to work painting the brick.

If you have never painted brick before, you’re lucky.
It’s not easy and it really hurts your hand. I suggest using a paint brush that you don’t care if it gets ruined because it helps if you dab the brick to fill in all the little crevices.
So even though my hand felt like it was going to fall off, I just kept painting away.
It was about here that I thought I had done soooo much and then I stepped back to snap a pic and was like… “really??? that’s it??”
I thought that maybe I would just do the top half of the fireplace and finish the rest another day, but once I started I just wanted to see it finished so I kept on truckin’!!
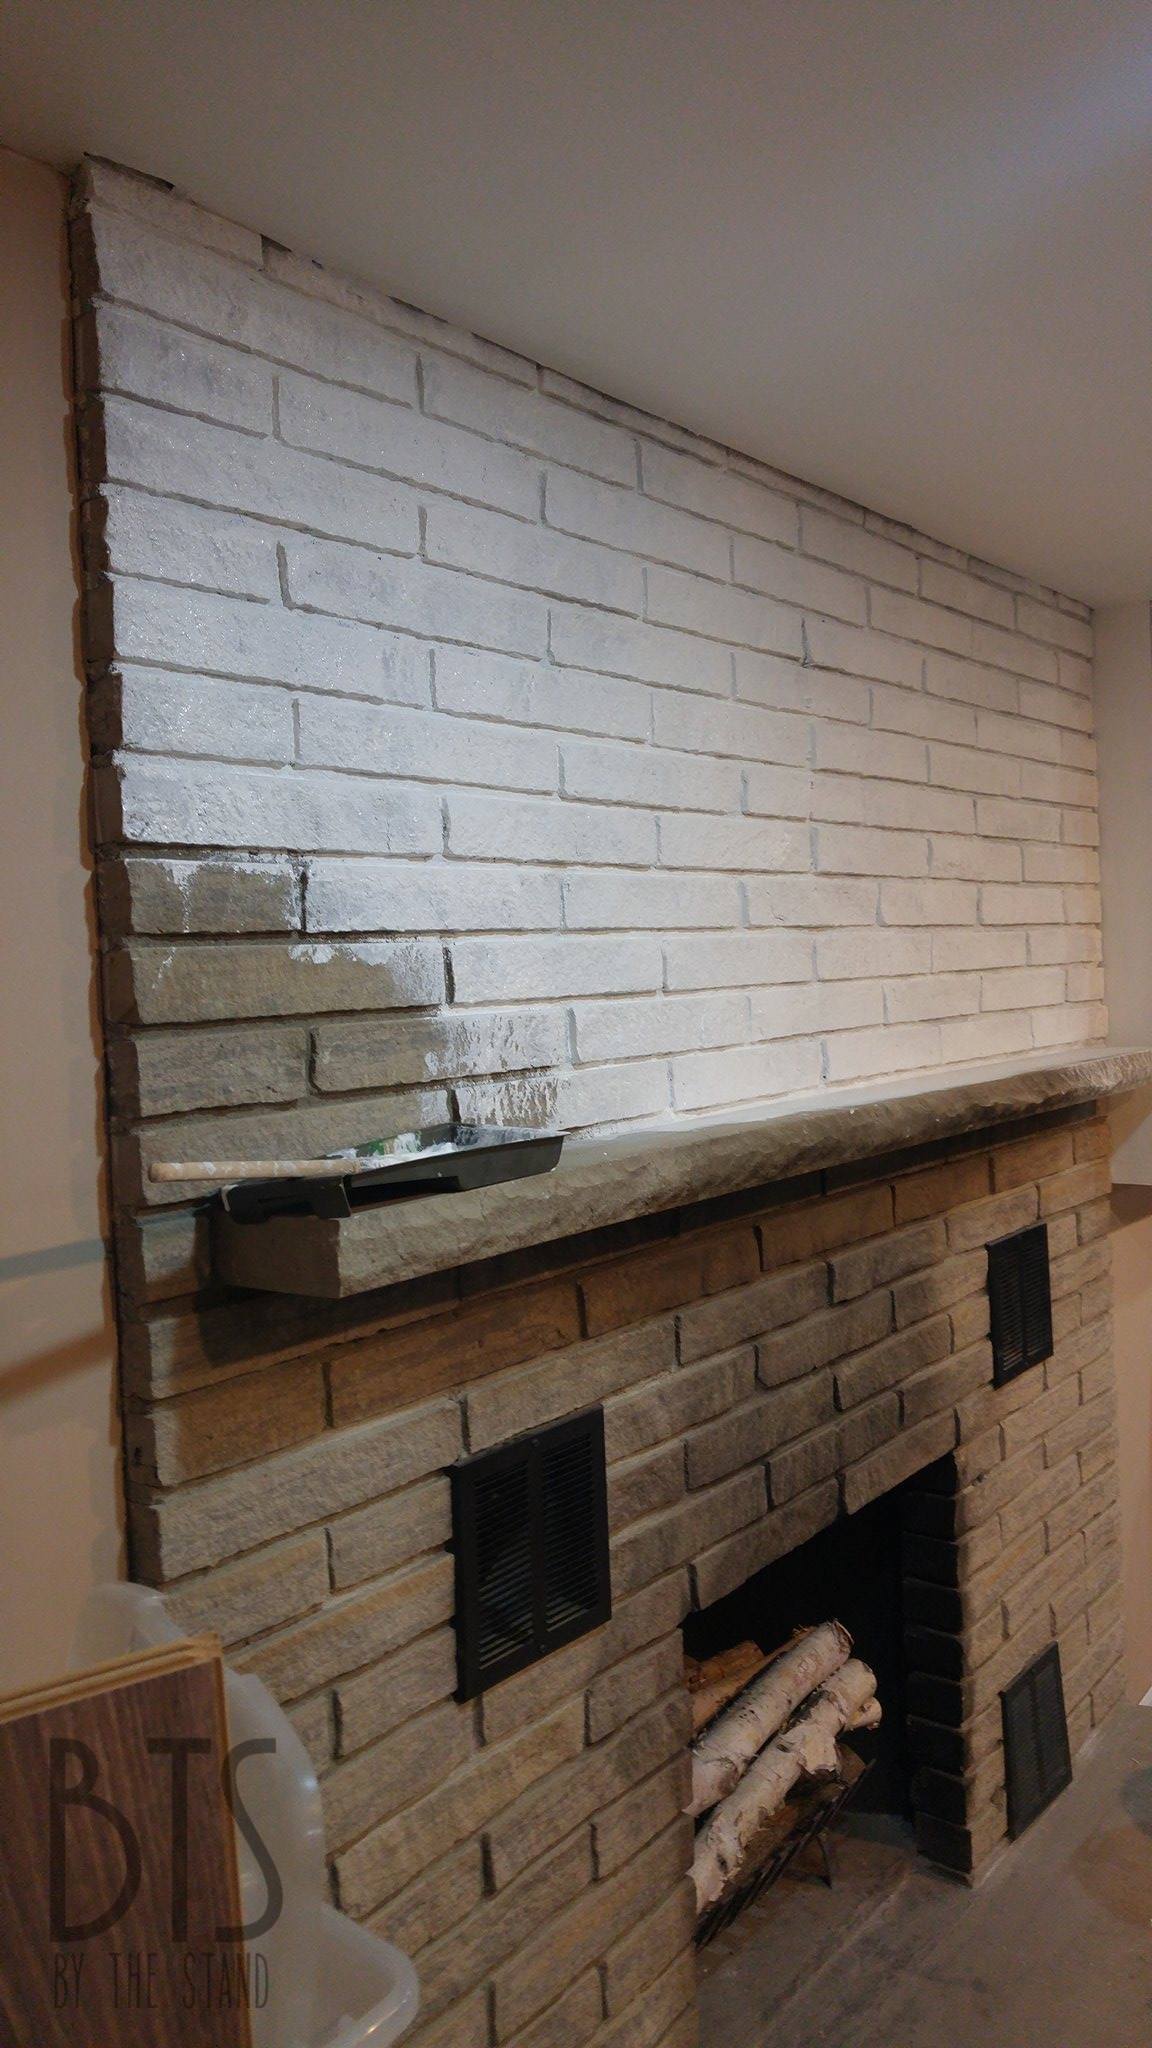
If I never have to paint another set of bricks in my life, I will be ok. LOL
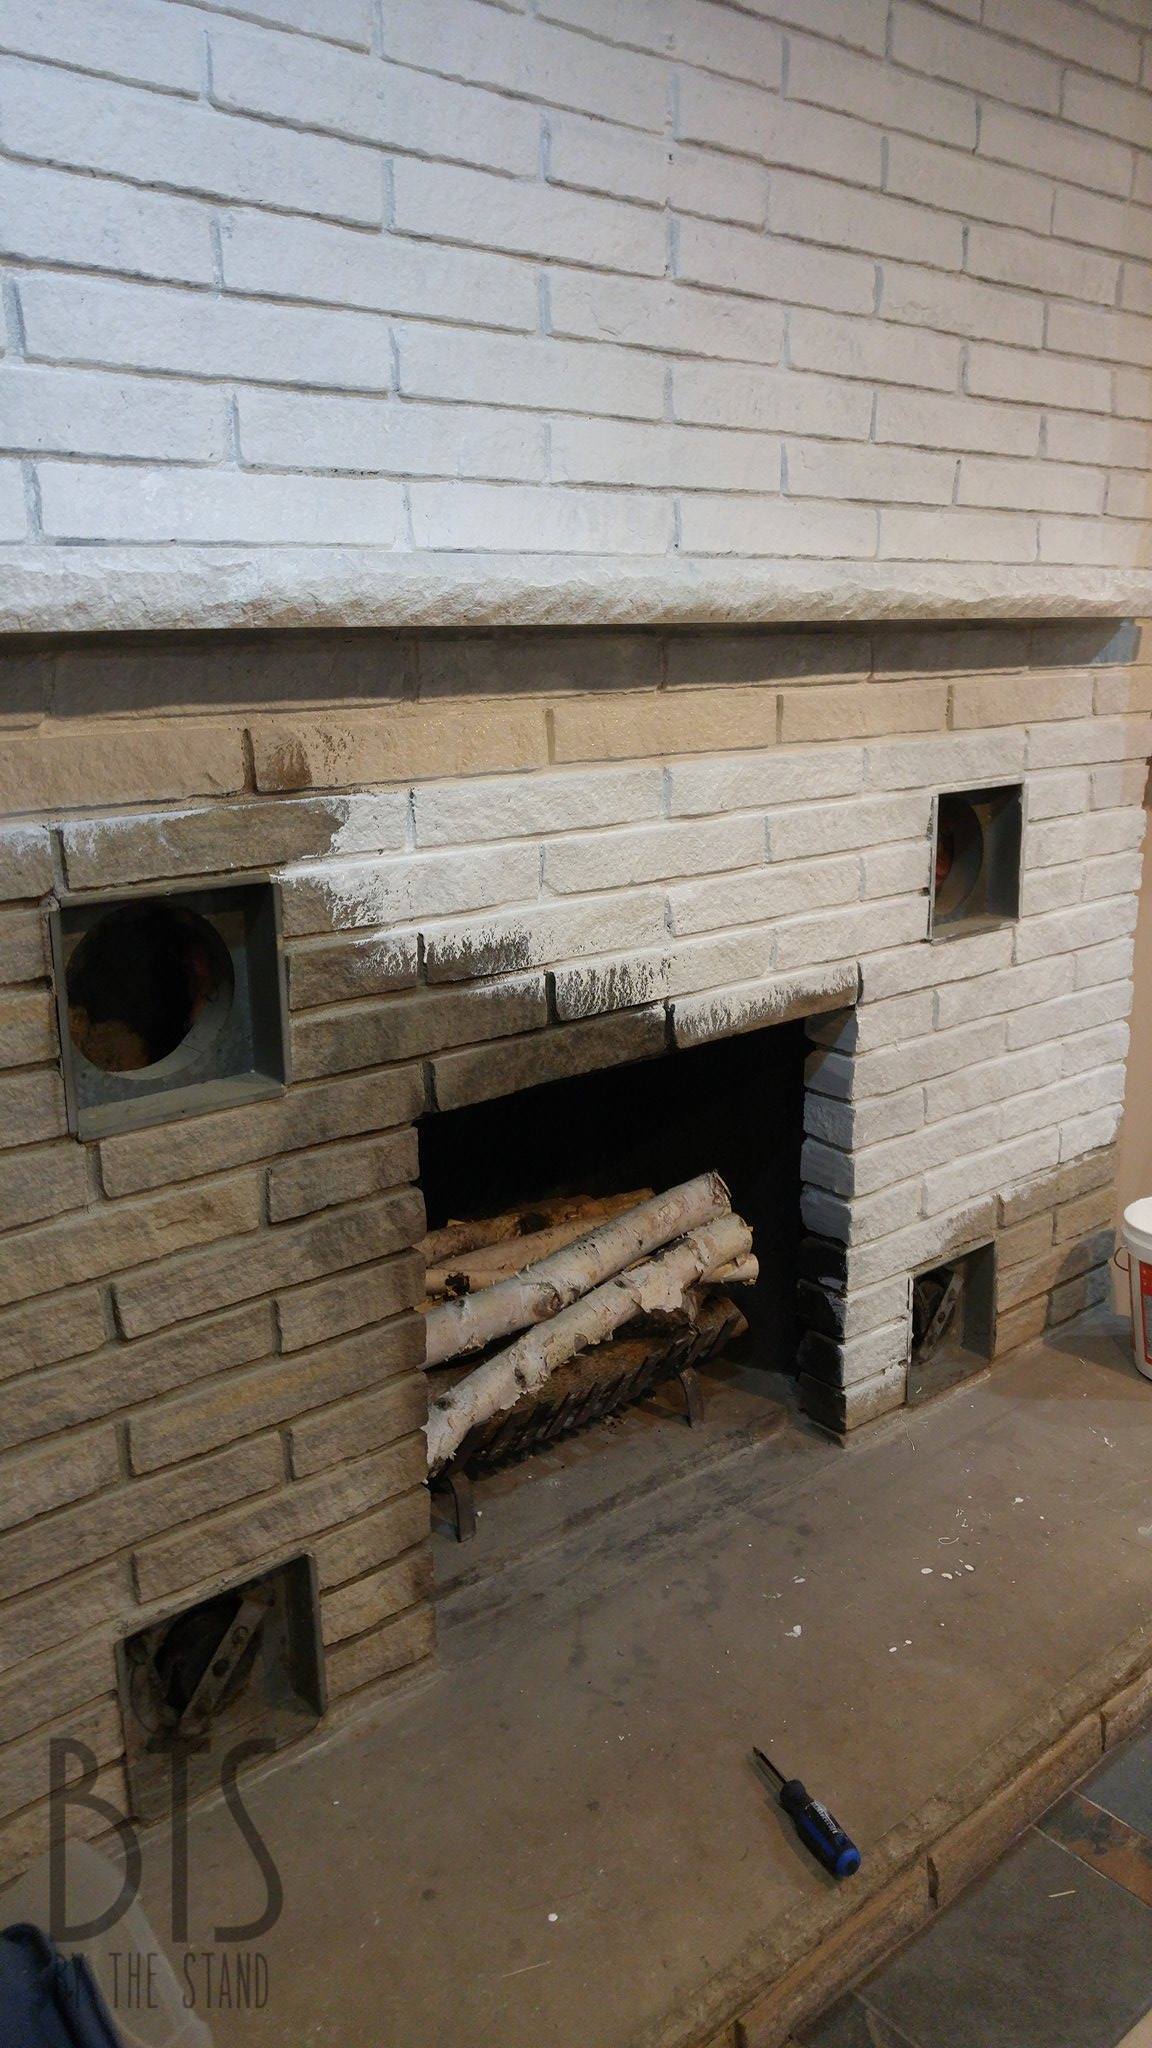
OH! I almost forgot to tell you? Do you know what type of paint I used?
Just a regular old tub of white flat primer paint. Yup. That’s it!

I had the primer left over from when we had to prime the walls back that we painted before we moved out of our rental townhouse. It was one of the stipulations if you chose to paint their walls. So we just bought this big bucket and I barely used any of it, so I thought why not use it here!?
It worked great.
I’m not concerned about the heat from the fireplace since we can’t actually use our fireplace due to insurance reasons… bummer, right? But the insurance cost would be just too high.
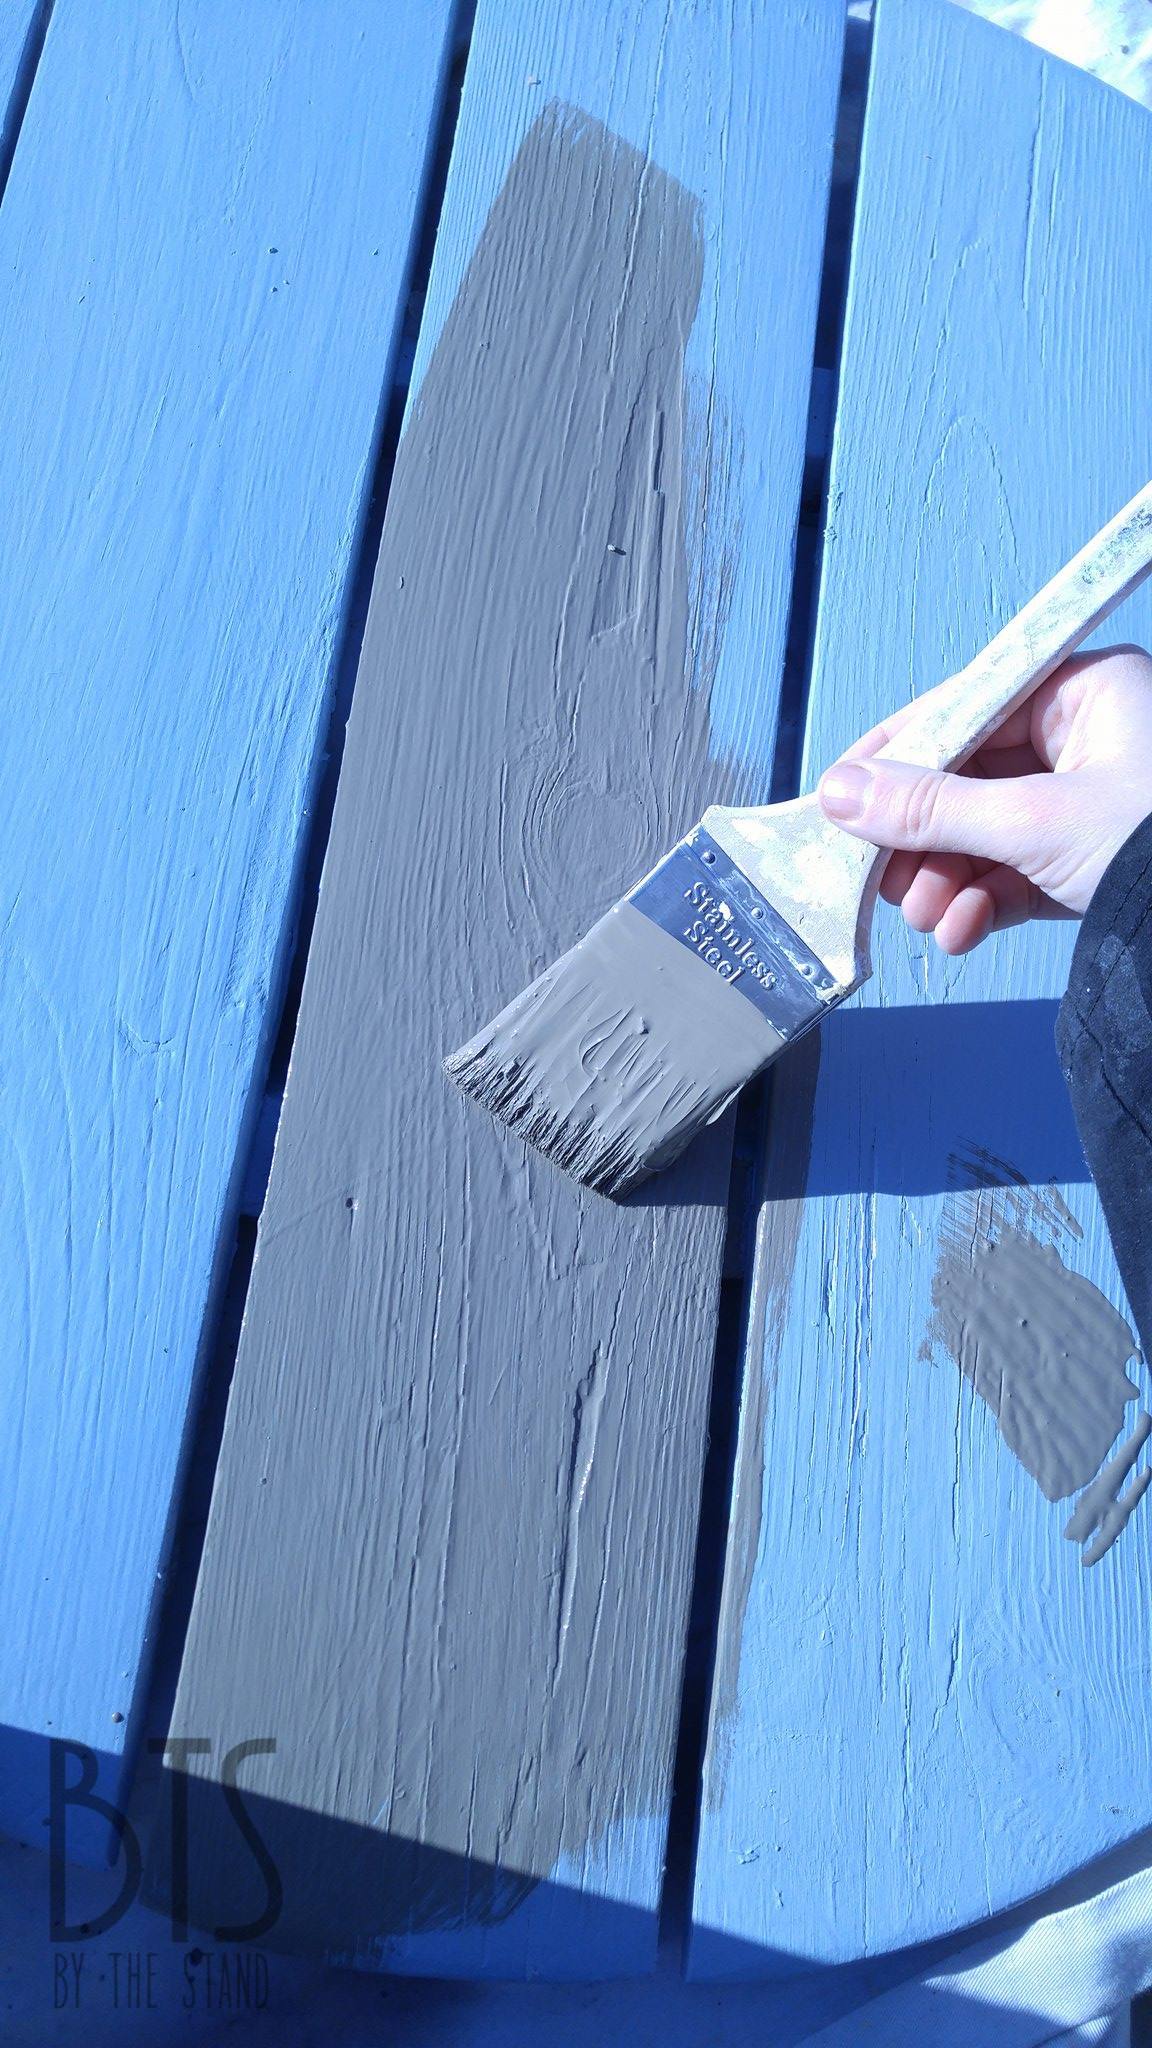
For the base of the fireplace I wanted something that would stand out a bit so I used this greeny-grey color.
Again, more left over paint that I just had kickin’ around.


Once all the paint had dried, I couldn’t wait to decorate!!
Lucky for me the weekend that I finished was spring cleaning day in Thamesford!!! You know what that means — free junk by the side of the road fa la la la la la la!!!
(Yes, this day is like Christmas to me)
My mother and I did three full car loads and her SUV is huge! I scored so many cool things! I can’t believe the stuff that people throw away.
I made a gorgeous clock for my mantle — I made it out of an old table top.
Take a look at this!

I painted it with the same paint that I used for the base of the fireplace.
Next I cut out some roman numerals using my Cricut.

To make sure I apply my vinyl straight I use contact paper from Dollar Tree. This is a super easy technique and the contact paper is super cheap!

Place the contact paper over your cut vinyl and then use a flat scrapper to smooth out any air bubbles.

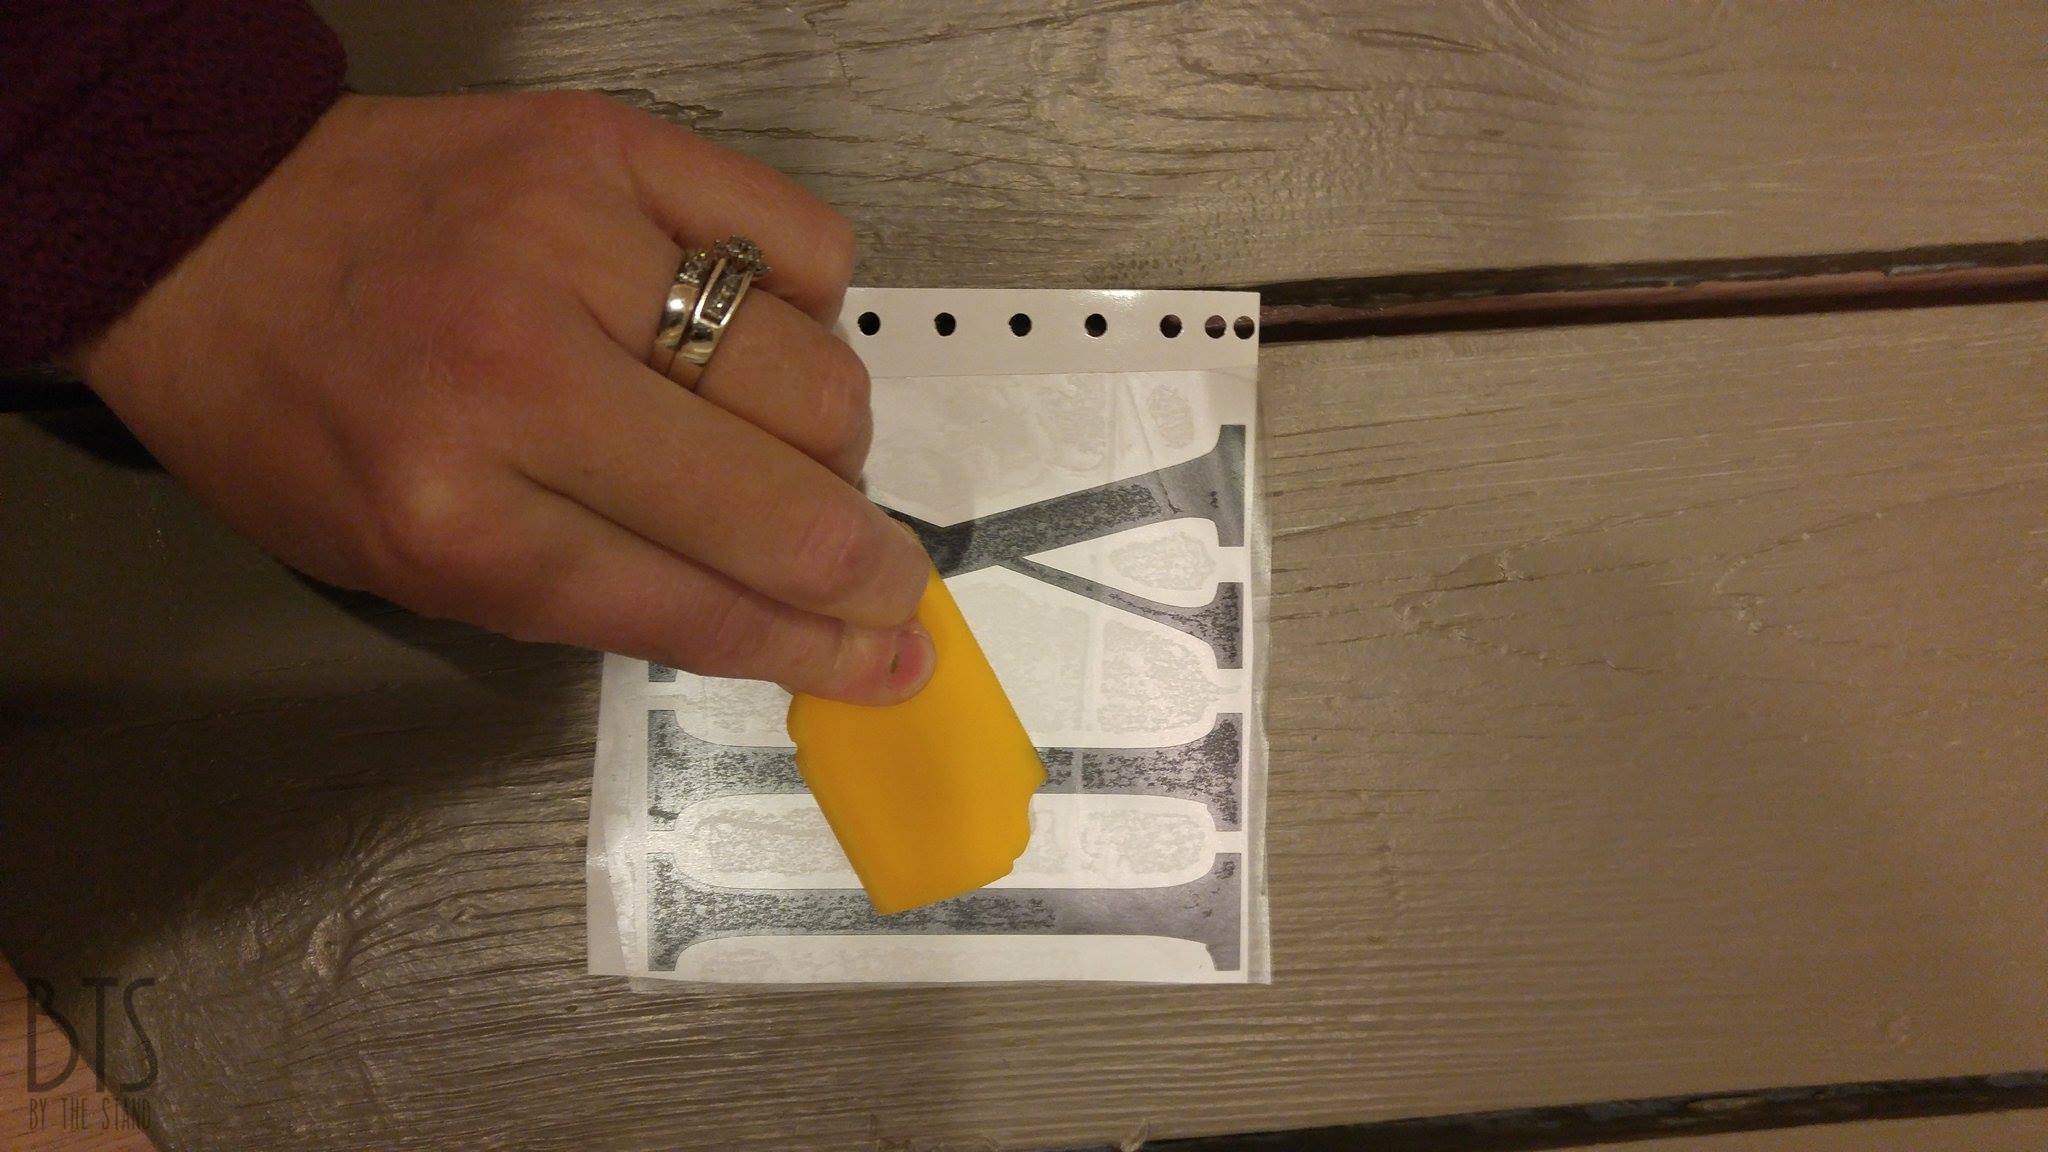
Once you have all the air bubbles removed, pull up the contact paper and your vinyl will be stuck to it.
Lay it on your surface, and then use your scrapper again to smooth out any air bubbles. Peel up the contact paper and your vinyl will remain on your project.


To make sure I had them evenly spaced, I laid them all out before actually sticking the numbers down.
Ok, back to the fireplace because I am sure you all want to see it!!

What do you think?
I’m pretty proud of this baby!
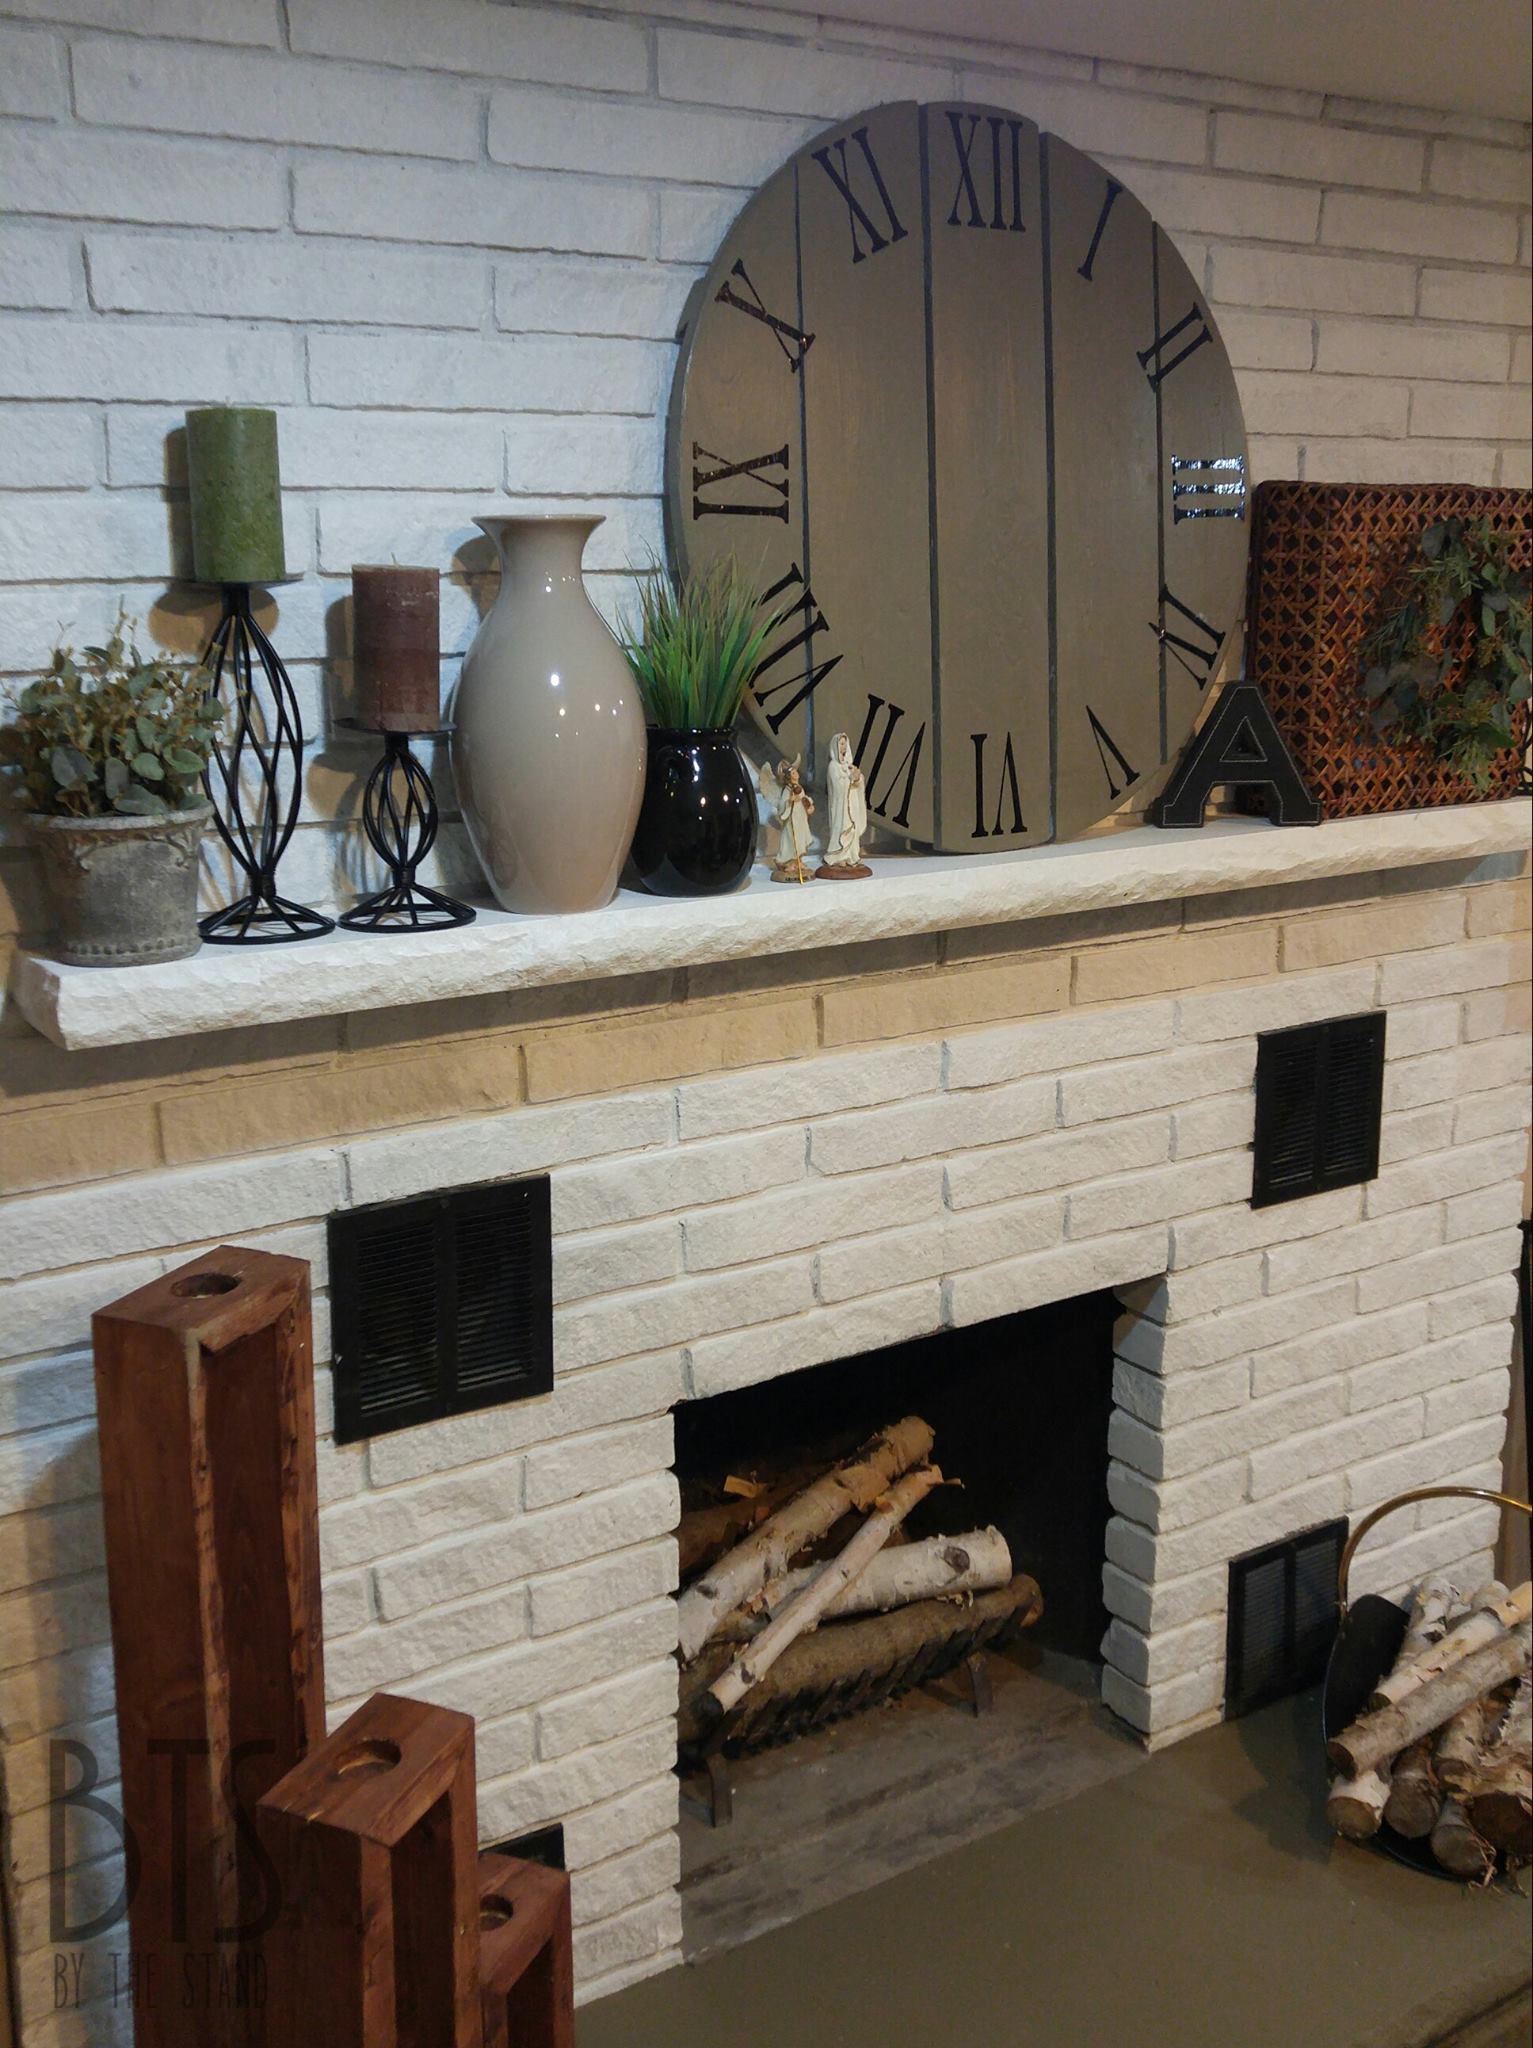
I love that the majority of the decor accents were either found by the side of the road or scored super cheap at a garage sale!
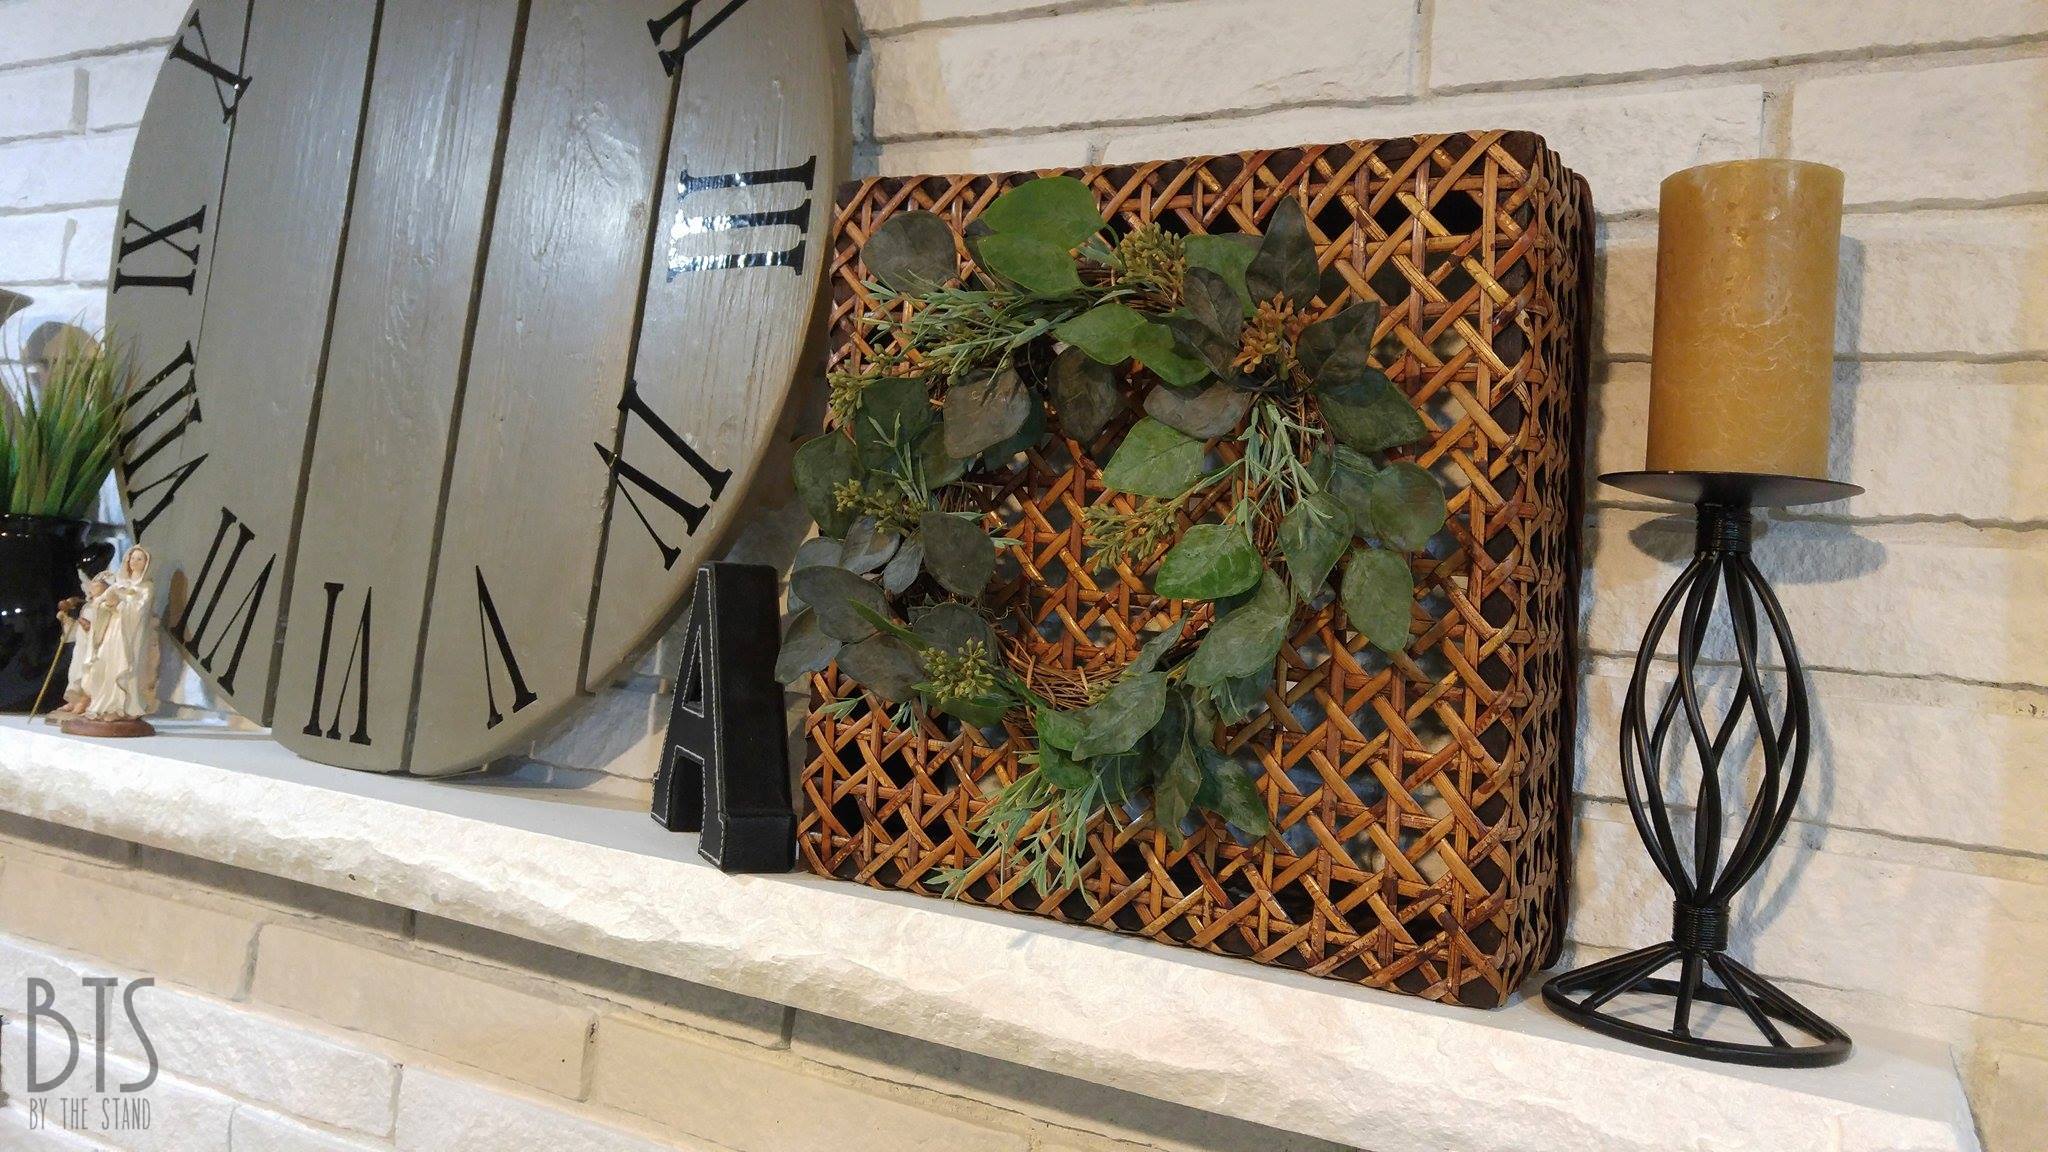
I scored that wicker basket for 75 cents and I added the tiny wreath. I just whipped it up with random artificial stems we had kickin’ around.

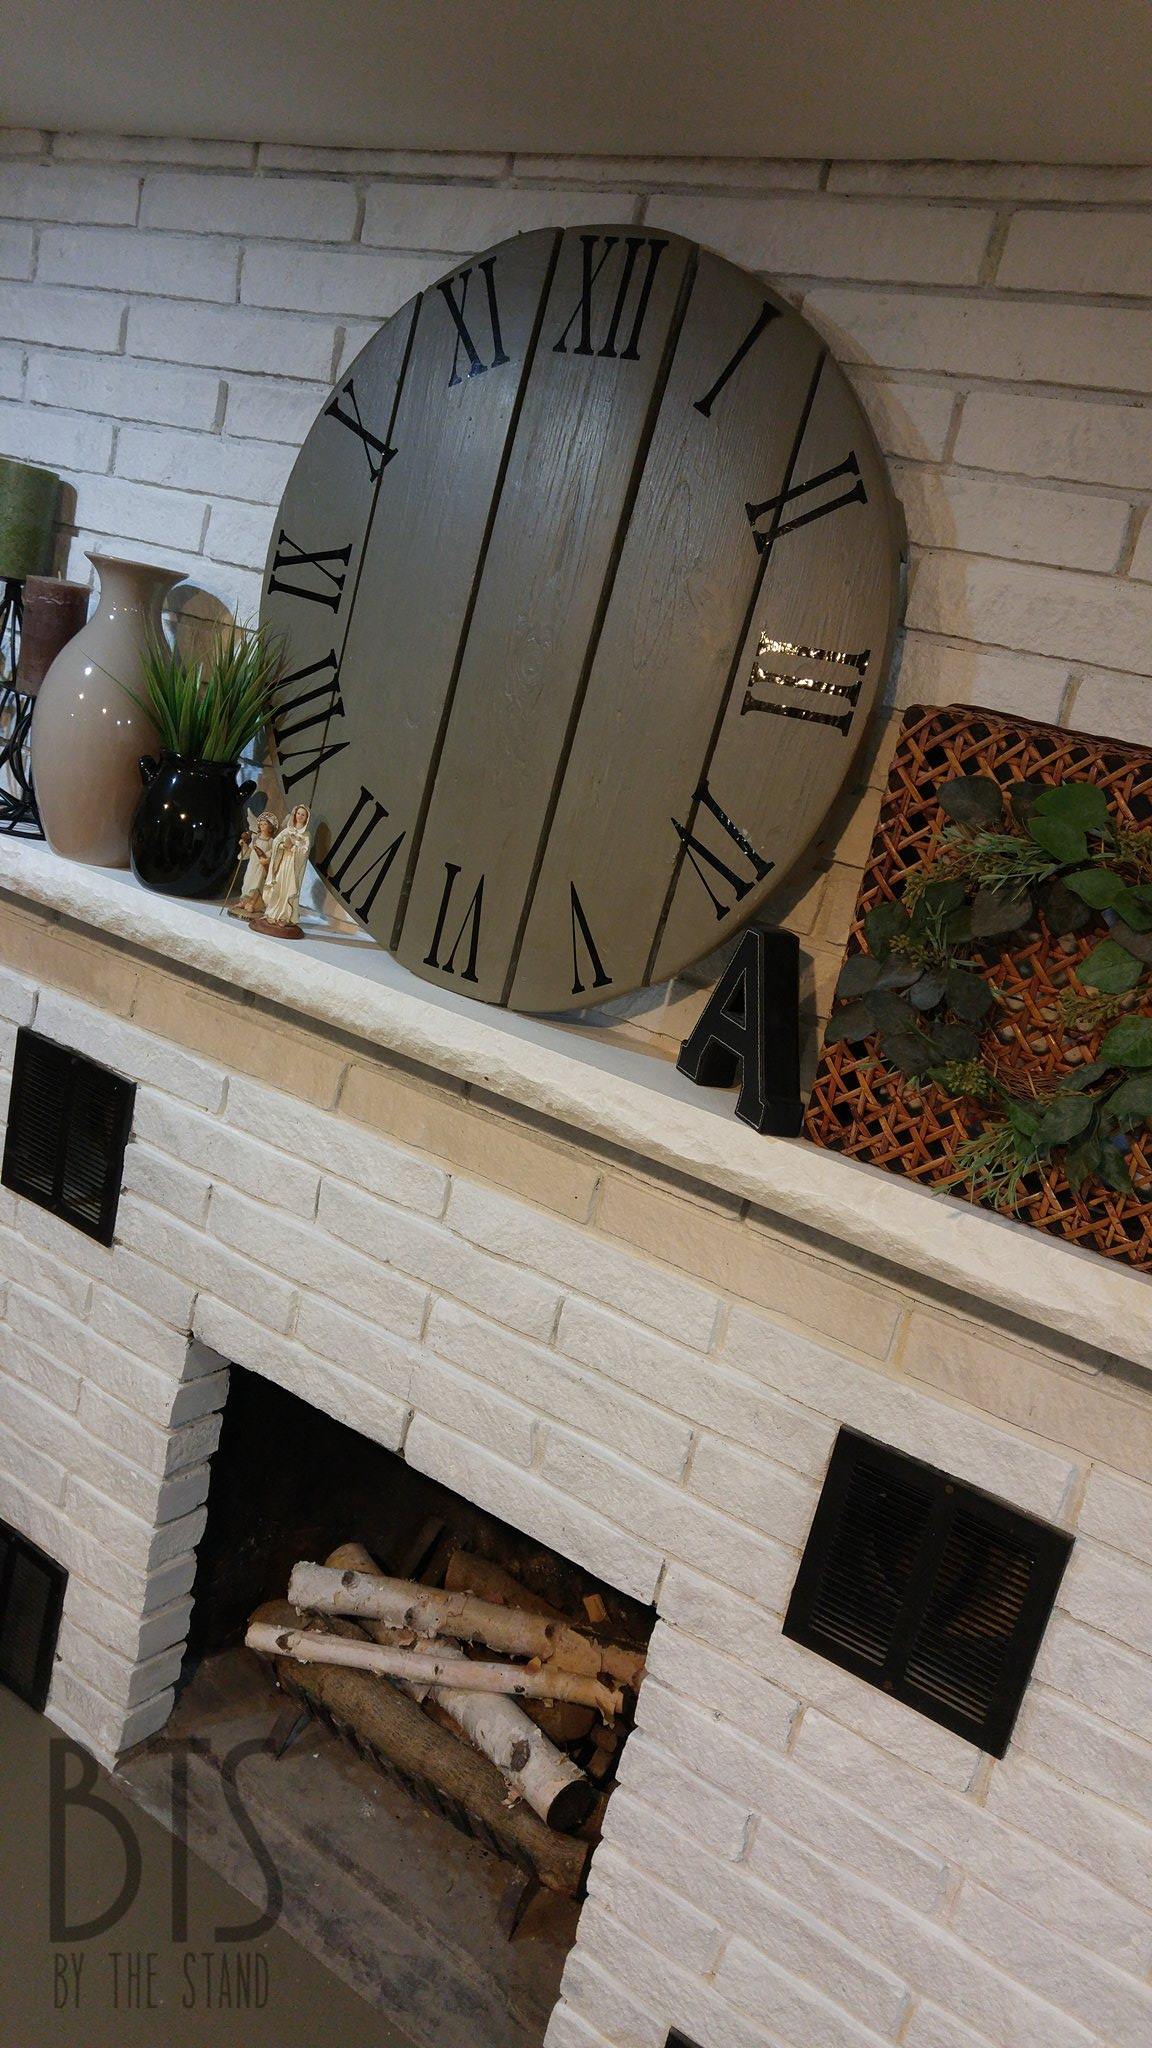
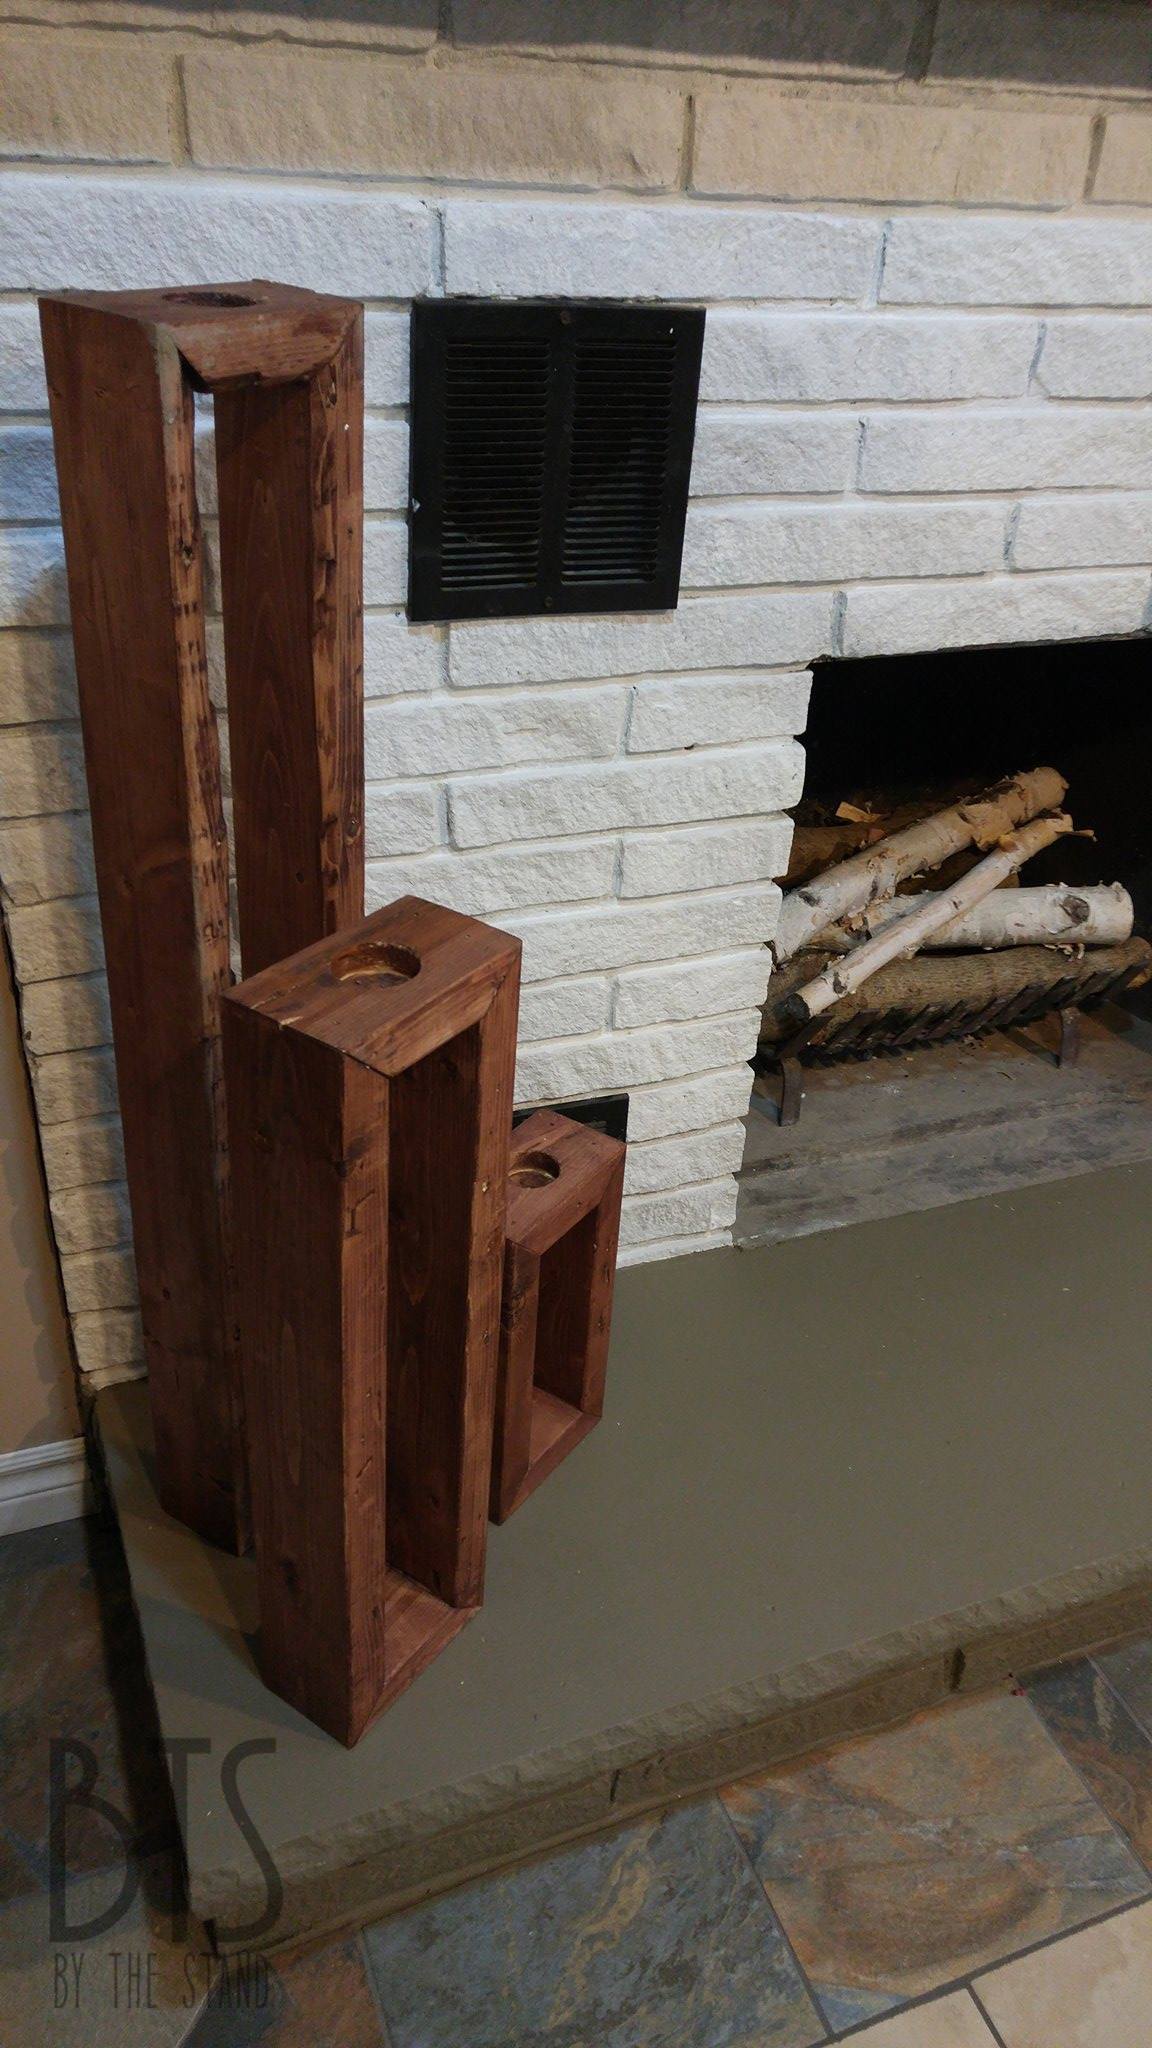
These hand crafted wooden blocks I scored for $5 for all three at a garage sale! They are soooo unique, I love them!
This fireplace makeover is the perfect example of how you don’t have to spend a ton of money to get a great look! Just work with what you got and keep hunting for great bargains or freebies — ie: junk by the side of the road LOL

If you love my makeover, feel free to share it with your friends!
Keep this look for later by pinning this image to your design boards, too!

If you have any questions, fire away in the comments below!!


Leave a Reply
Pingback: 35 Fireplace Design Ideas that Will Make You Feel Crazy – Yomad on May 16, 2017
7 COMMENTS
Ruth Ulett
9 years agoHolly I love what you create. If is beautiful. My question, did you have to use any kind of sealer on the brick? Also, on the bottom where you painted it gray, what kind of paint did you use? I am assuming from someone of the photos you primed the hearth first and then painted. Did you seal the hearth?
hollygrace13
9 years agoHi Ruth! The reason this was so cheap to do was because I used stuff that I already had laying around. All I used was some white primer on the brick and the grey paint was just left over house paint that I had. If it didn’t work out I would have gone and got some better stuff but for now this worked out really well!! 😀
Rae Nikolai
9 years agoHi Ruth, I have used two painting techniques that I thought you would like to try. One is whitewashing…you simple use your favorite latex paint (NOT oil) paint and mix in half water. You get the same great color but can see the grain The second technique is dry brush. You you a base color of paint and and let it dry completely. Then using a lighter shade of that color or darker shade. you paint it again but this time you dry you brush half way with a paper towel. This way you see the brush strokes so it is like adding the grain onto your project. you can go crazy and add a contrasting color as well or black or white. I like to use a polyurethane as a protective coat over top unless I think I will be trying to paint the same piece another color.
hollygrace13
9 years ago AUTHORGreat input, Rae! 🙂
Ivory
8 years agoPerfect!!!
hollygrace13
8 years ago AUTHORThank you!