I have a treat for you all today! I am super excited to share with all my fellow DIYers my butcher block island top makeover.

This island is cute as a button — vintage, antique and the perfect size for my kitchen. Luckily when we moved into our home the previous homeowners left it and we are so glad they did because it suits the kitchen perfectly.
But as much as we love this island, the butcher block top was an orangey shade that we weren’t totally in love with — also it was very dinged up and stained.

This is where the really cool part comes in. I made over this butcher block top with an amazing product called Oil Plus 2C from Rubio Monocoat.
Oil Plus is a plant-based hardwax oil wood finish that has revolutionized the way wood finishing is done. As the name suggests, it provides both color and protection to wood in a single application.

This product is versatile and can be used for flooring, furniture, cabinetry, millwork, and any other wood project one can imagine. The secret of Oil Plus 2C lies in its molecular bonding with the topmost fibers of the wood, which produces a strong finish with outstanding wear, water, and heat resistance, while still maintaining the natural look and feel of the wood.
The 2C in Oil Plus 2C stands for 2-component; Part A is the oil, while Part B is an accelerant and hardener. This product is 0% VOC and does not contain solvents or water, avoiding the production of lap lines.

Once I took a look at their site, read about the product and browsed their huge line of color options, I knew that this is exactly what I needed to give this island new life.
Supplies
- Sander and sandpaper
- Vacuum
- Raw Wood Cleaner
- Oil Plus 2C
- Mixing container
- Stir stick
- Applicator Set
- Supply of clean terry cloths/towel
- Nitrile gloves
Step One:
Sand the entire surface that you will be applying Oil Plus 2C to. I began sanding with 80 grit and worked my way up to 120 sanding grit.

I sanded both sides of the butcher block as I would be applying the product to both the top side and the underside. It is recommended to finish the top and the bottom to mitigate moisture differences between top and bottom, which can lead to warping, etc.

Step Two:
Once I sanded the butcher block down completely to the natural wood. I brush off the sawdust and used a vacuum to make sure I got rid of all dust and debris. It’s important to note that no existing finish should be left on your surface. Any existing finish can inhibit the Oil Plus 2C from forming a molecular bond with the wood fibers.

Step Three:
I cleaned the entire surface with Rubio Monocoat’s Raw Wood Cleaner. The technology of Oil Plus 2C enables it to make a molecular bond with the wood fibers in 3-5 minutes. If dust is present, the oil will bond to the dust instead of the wood fibers, creating microscopic paste on the working surface.

I allowed the cleaner to dry for about 15-20 minutes.

Step Four:
Next, I mixed up the Oil Plus 2C. For my project I went with Mist. However I did test samples of Natural and Dark Oak but settled for the subtle light hue of Mist — you’ll see at the end just how gorgeous this shade is.

I shook the Oil Plus 2C Part A container well to suspend any settled pigment and then poured the bottle into a mixing container. I next added in Part B. I used my full containers that were already pre measured correctly but it is a ratio of 3:1 (A:B).

I then stirred the two components thoroughly. Once mixed, it’s important to note that you have 4-6 hours to use the product and also that a little goes a long way.
Step Five
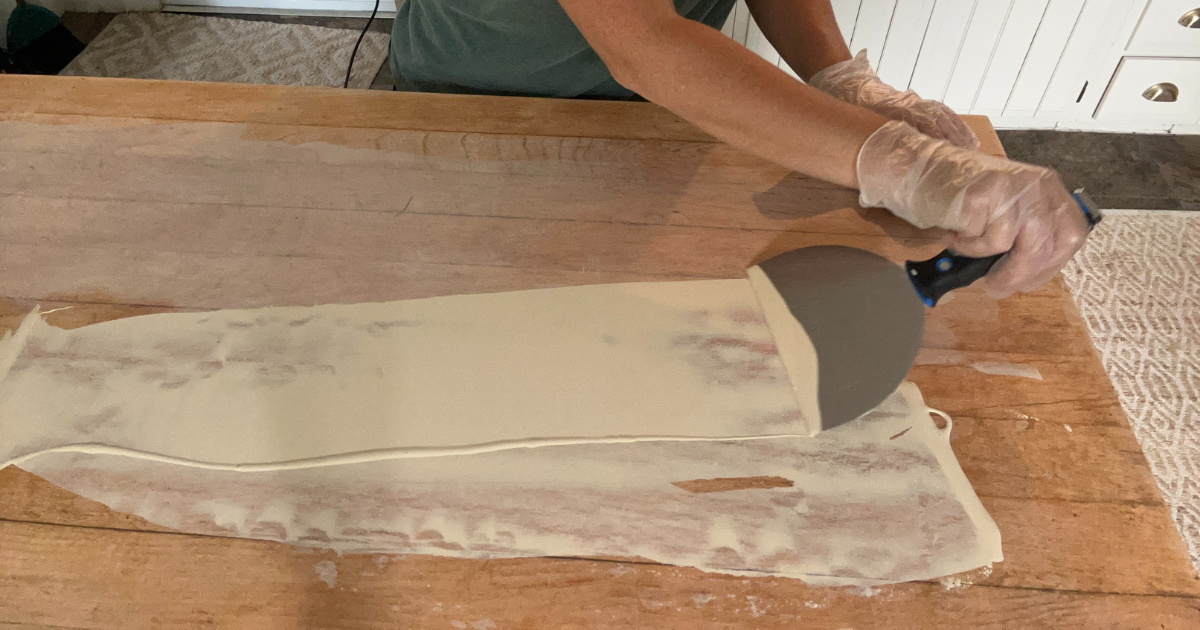
I applied my Oil Plus 2C to my surface and then spread it out — remembering again that a little goes a long way. You do not want to apply the mixture too heavily as it will just be more to remove and then will be wasted.
When spreading your mixture a scotchbrite style applicator pad or a application blade typically work best.
I worked in sections that allowed me to apply the oil and remove the excess within 15 minutes.


Step Six
I allowed for 3-5 minutes from the time of application for Oil Plus 2C to molecularly bond with the wood.

After 3-5 minutes, I used a clean terry cloth to remove the excess oil within 10-15 minutes.

Important Cure Times:
- Under favorable application and drying/conditions, the furniture may be lightly used or handled after approximately 24-36 hours.
- After 48 hours, the oiled furniture is approximately 80% cured.
- Full cure takes place within approximately 5 days.
I can’t believe how great our island looks now! This color is far more suited to our kitchen and really complements our whole country/kitchen farmhouse look.

Gone is the hard orange wood look and awful stains!

Oil Plus 2C is super easy to use and apply and I love the feel of it and how beautiful it looks — it really does penetrate the wood. I highly encourage you to take a look at their website to see their full line of colors. There are so many beautiful shades it was hard to choose just one!

I am already looking around my home and seeing what I can makeover next with Rubio
Monocoat!
For more information about their products you can check out their website here.


2 COMMENTS
Kathy
3 years agoI don’t see on their website where this is food safe sealant. Can you provide this information?
Jennifer harbert
3 years agoFabulous makeover for the chest and kitchen island! Will try both as I have a box and an island which are too good to ditch but perfect for an upcycle!