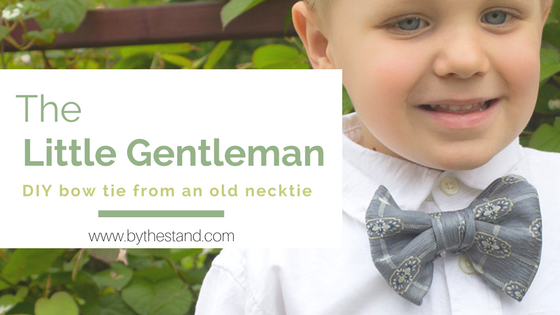
OK, I know I say this a lot — but I am BEYOND excited to share this tutorial with you guys!
Two years ago, I lost a man who was very special to me — my grandpa. I’ve wanted to do something special with something of my grandpa’s belongings for a while now and just didn’t know what.
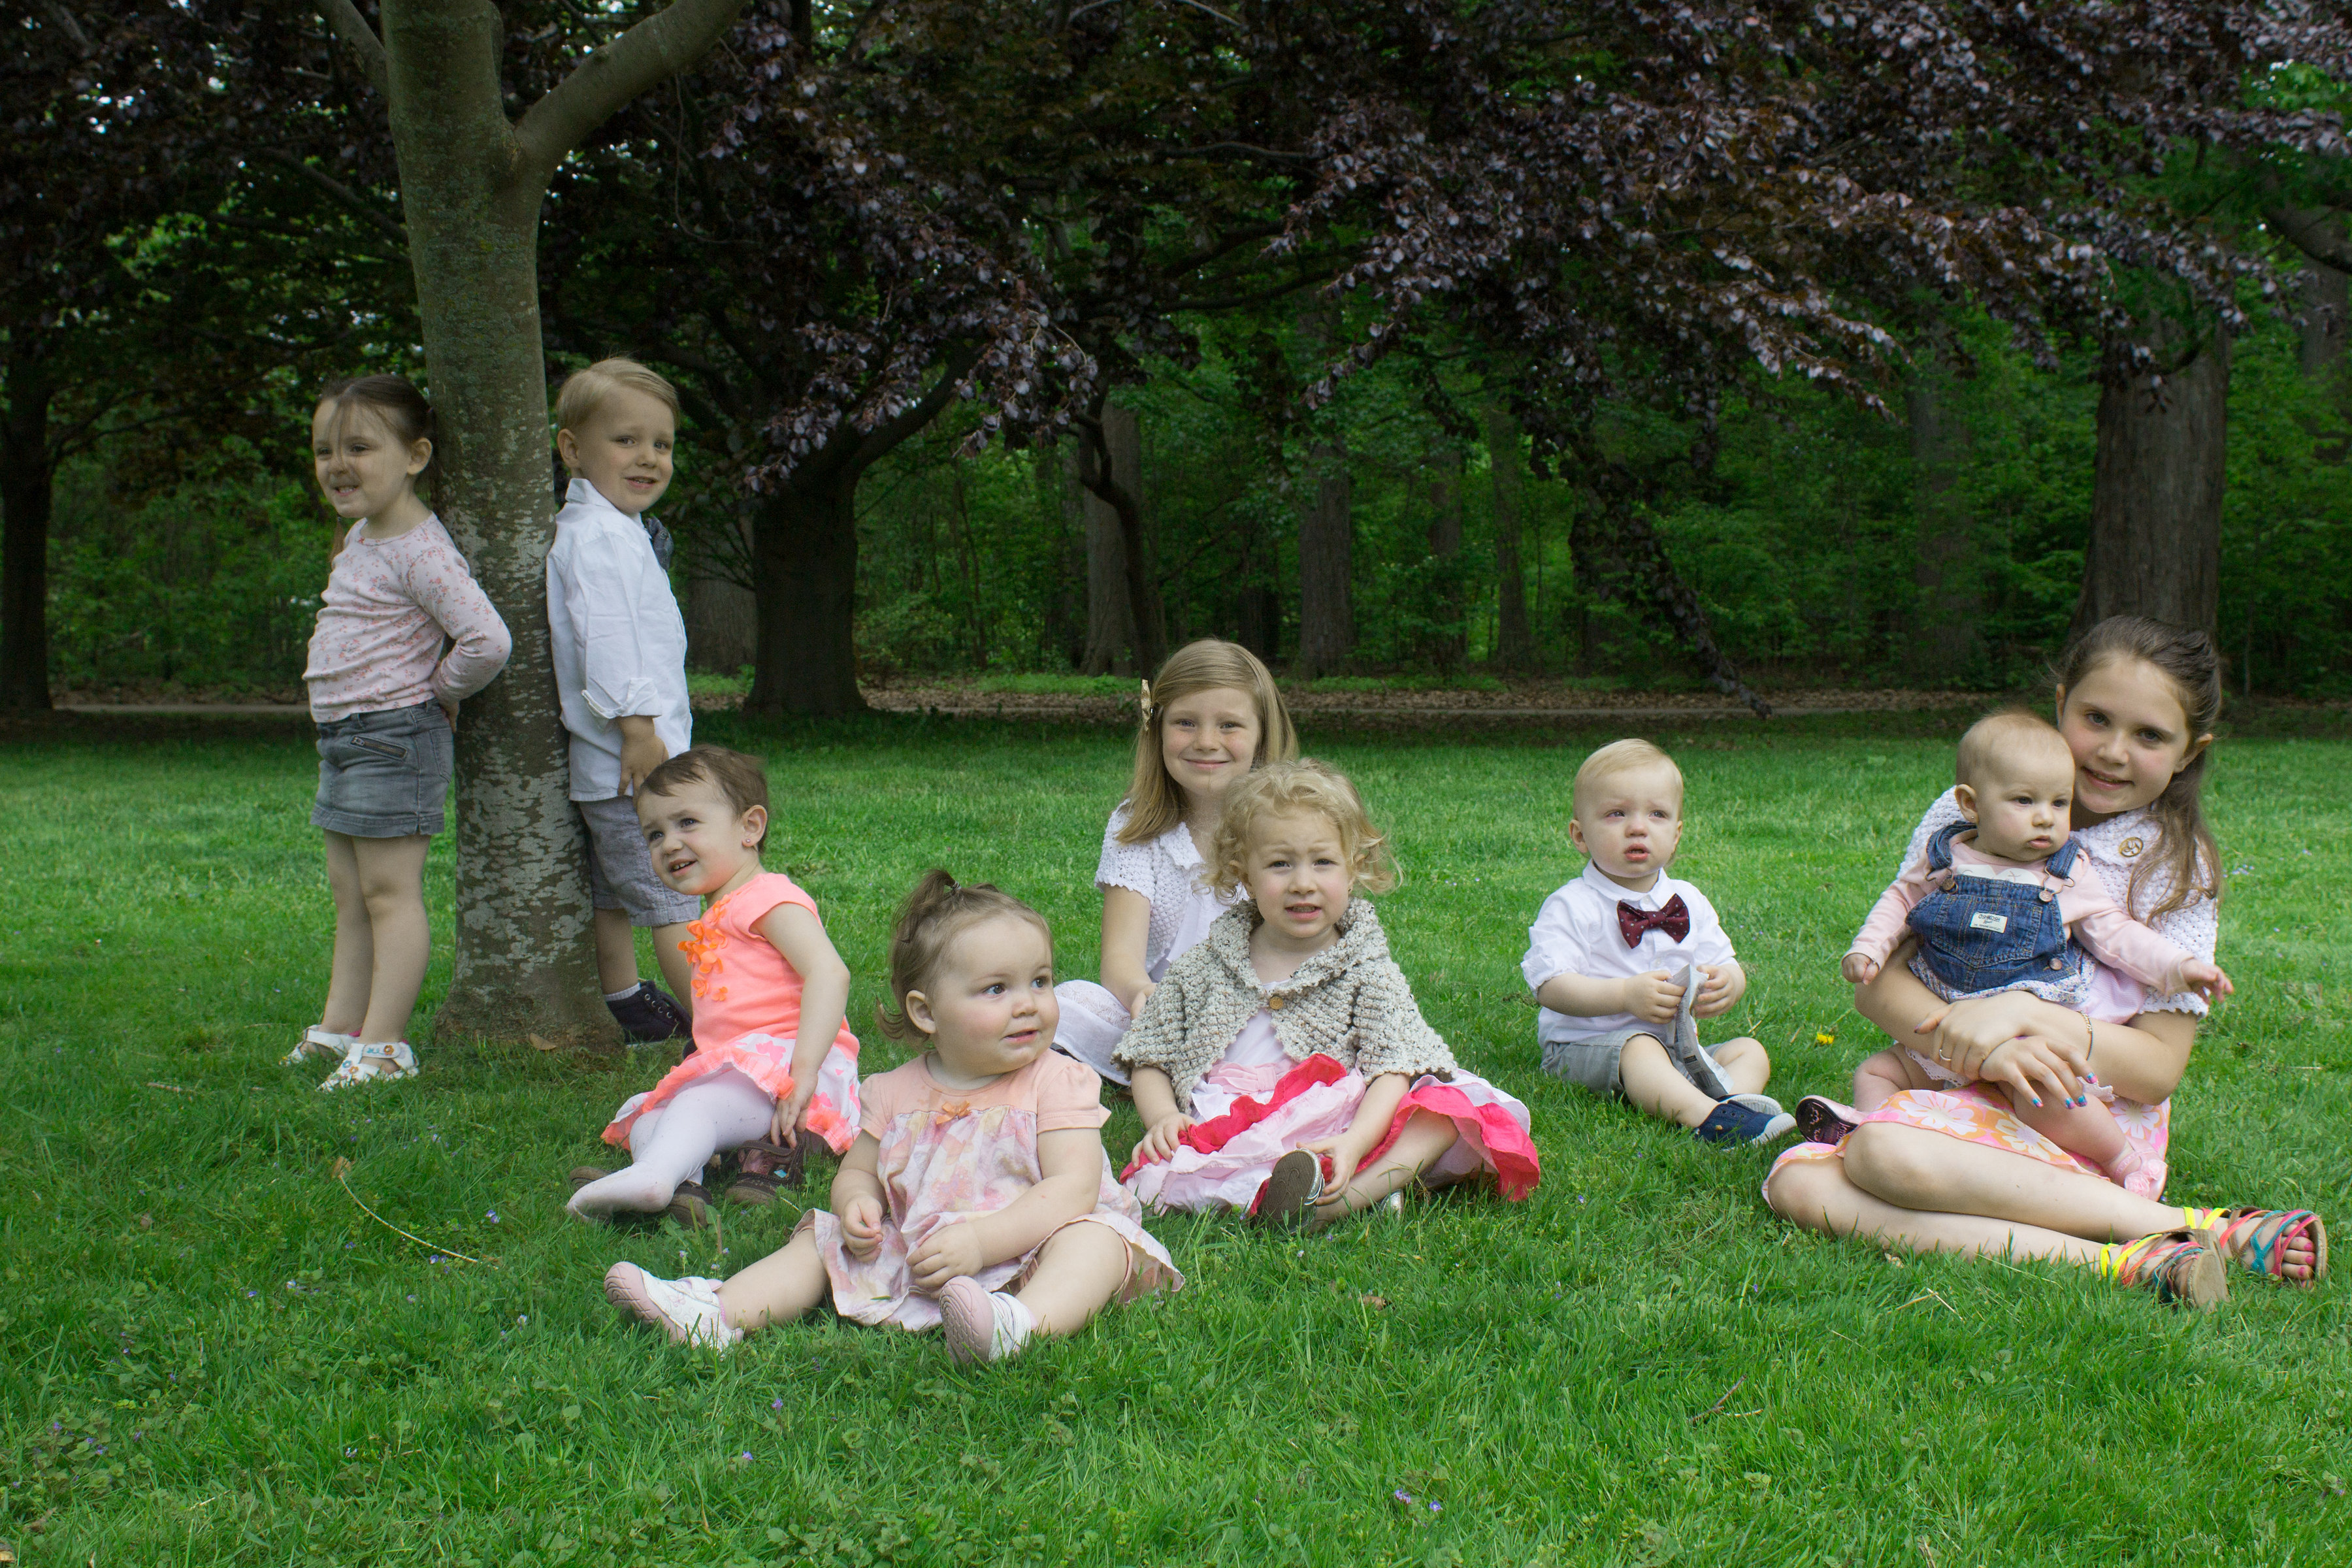
This past weekend, I had pictures taken for my grandma of all her great-grandchildren and I thought, what better than to incorporate something about my grandpa into the photos.
My grandpa loved all his great grandchildren but my son Dougie was his “little tiger” as he used to call him. Because of this I also wanted to do something special for my son, too.
I made some adorable little bow ties out of my grandpa’s old neck ties. That way, my son will always have a piece of his grandpa.
My grandma also has some pretty nice pictures coming! 🙂
Want to see how I did it? Keep reading — I am going to show you and it’s actually quite easy!

Materials
- Old necktie
- Scissors
- Thread
- Needle
- Clip or velcro (For this tutorial I used clips)
Start by laying your tie out on a flat surface. Starting from the thick end of the neck tie, fold it into thirds.


Once you have folded it into thirds, you’ll know where you will need to cut your tie.

Now is a good time to thread your needle so it’s ready.
I just used regular black sewing thread.
If your tie unfolded while you were threading your needle, refold it into thirds again. Using your fingers, pinch in the middle of the folded tie.
Just like this.
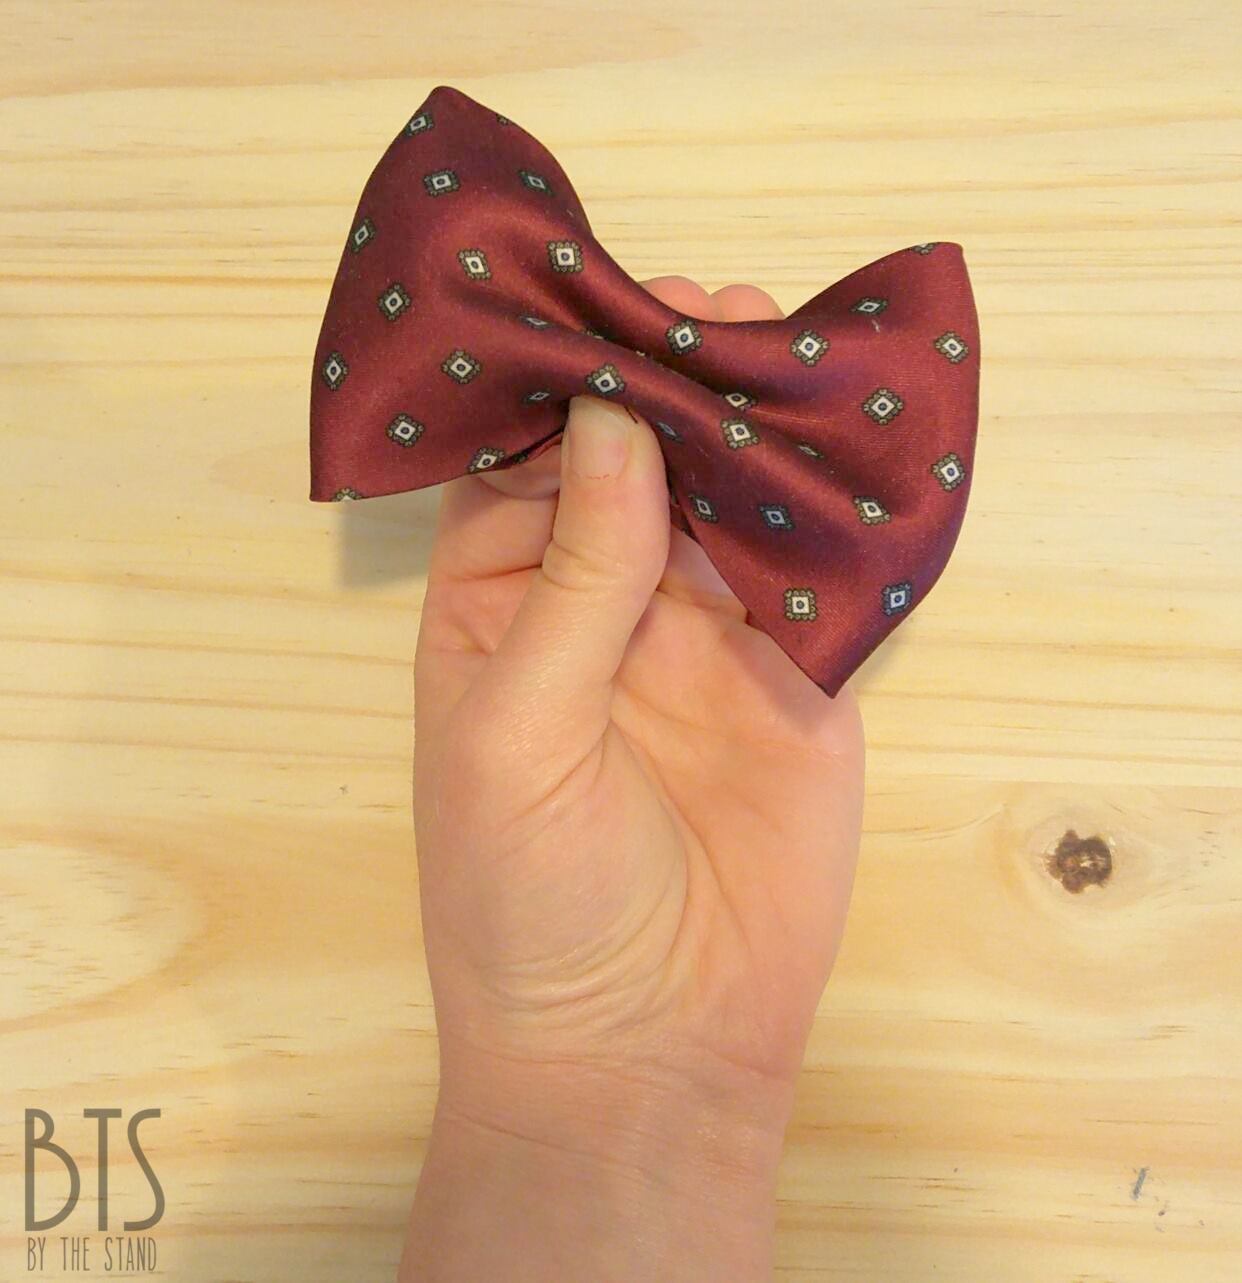
Tie a knot at the end of your thread and then starting at the bottom of your pinched fabric thread through your needle.

It doesn’t matter how much fabric you go through, just as long as you go through at least one fold.
You basically just want to anchor the thread into the fabric because the next thing you are going to to do is wrap your thread around the pinched up fabric.
Make sure you do this nice and tight.

Once you have wrapped your thread around a bunch of times, tie it off with a knot.
Cut off another piece from the neck tie, but this time from the skinny end.
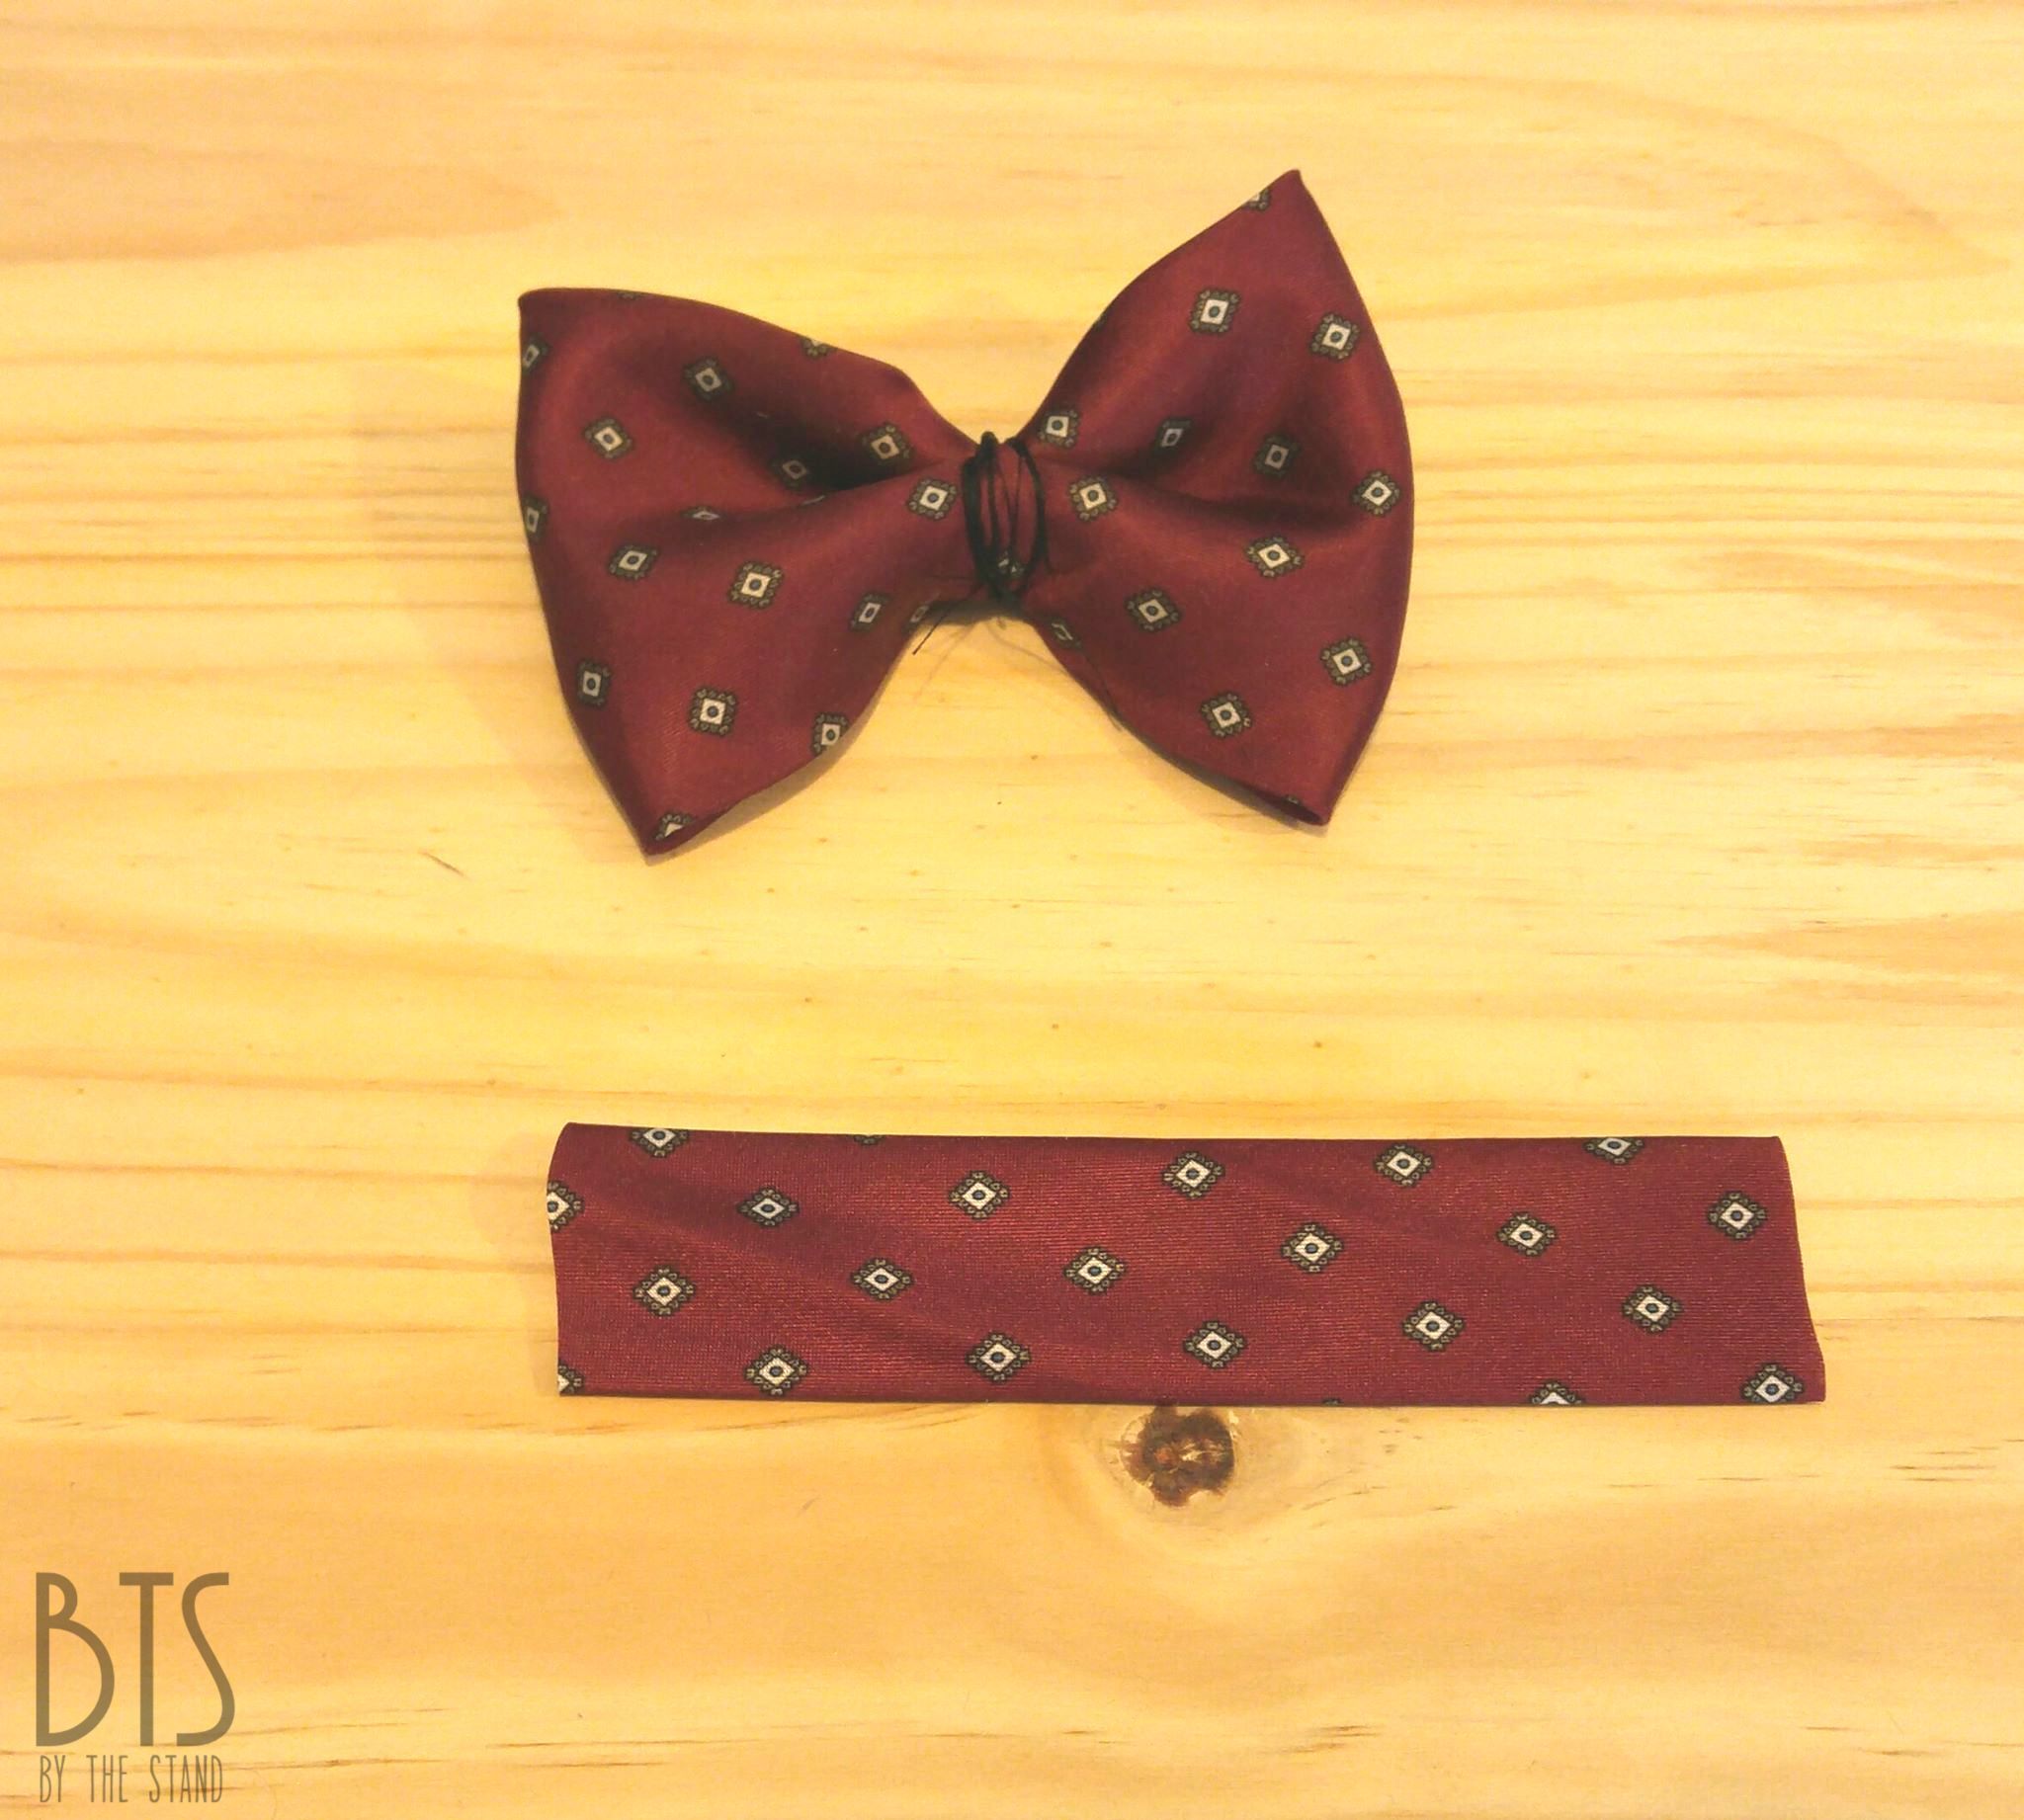
Wrap this piece around the middle of your bow tie. This will cover the thread and make your bow tie look — well, like a bow tie.

You can either use fabric glue and glue this piece, or you can sew it together on the back side.
You can can cut another piece off the neck tie to go around the neck and then add some velcro to secure it — or you can take the easy route and sew on a clip.
I went with the clip cause I like things to be easy. I just got these clips at the dollar store and just simply sewed them on.
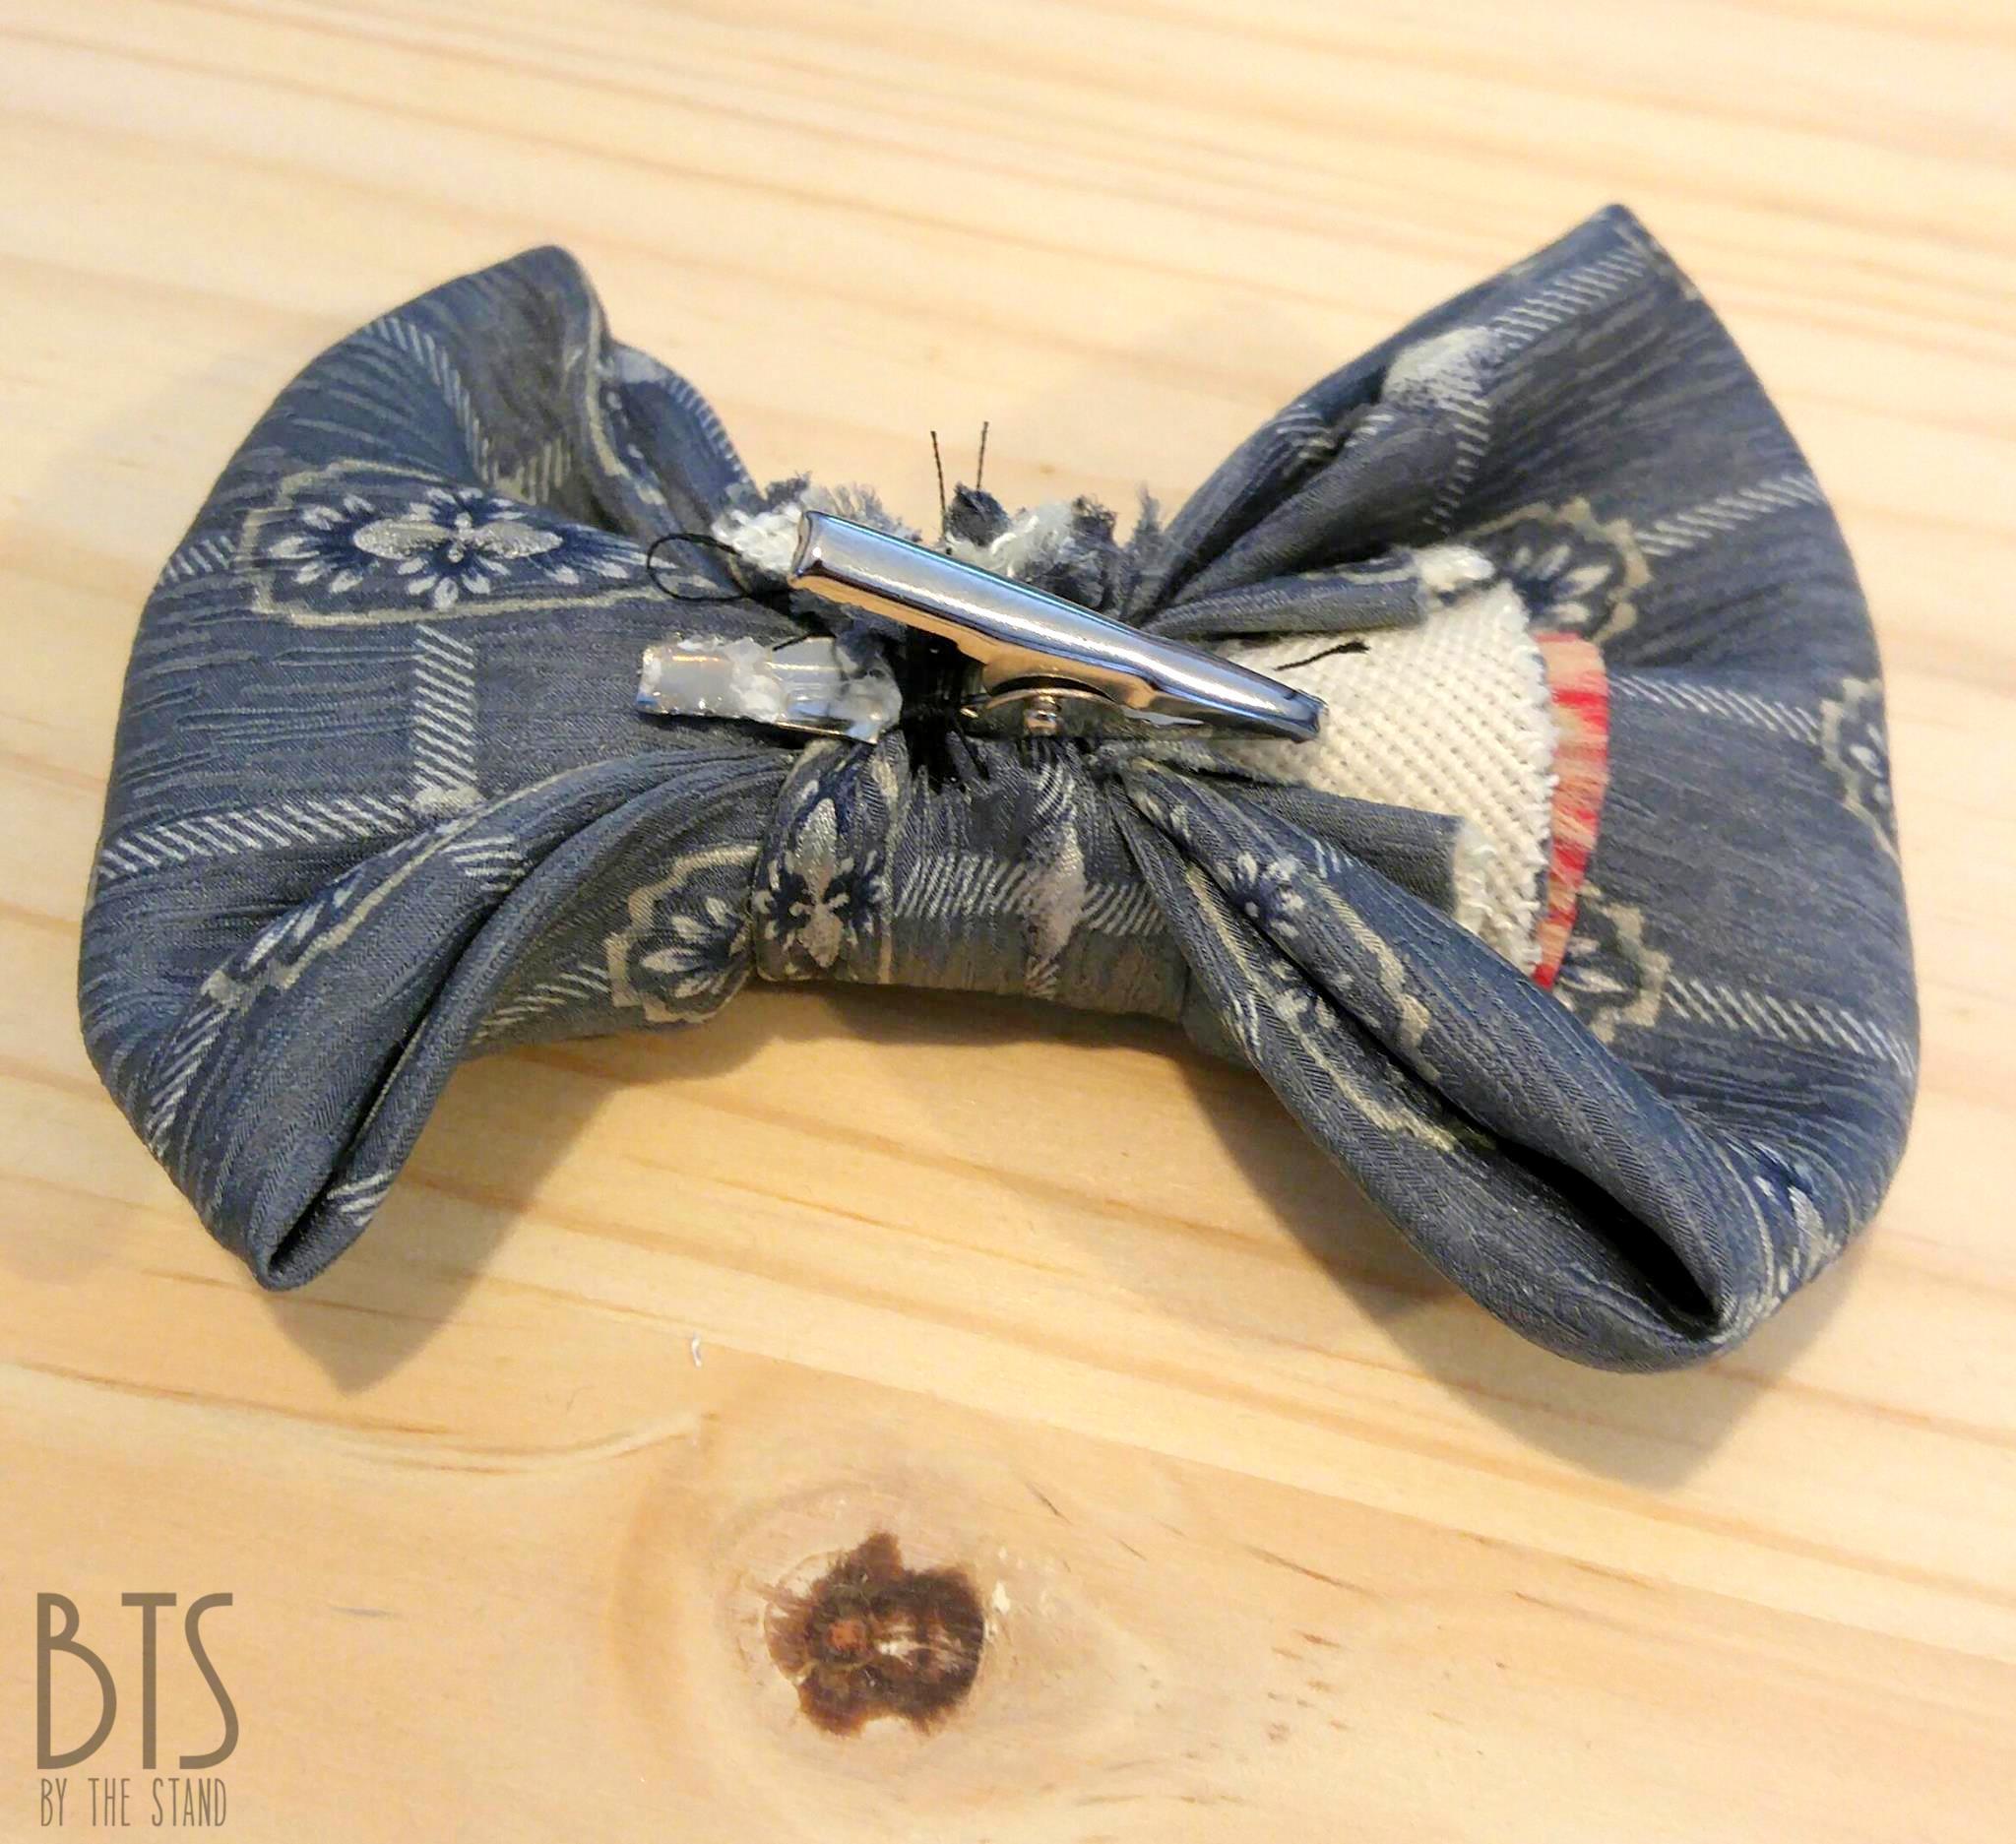

I also was making a bow tie for my nephew and was unsure of his neck size, so I thought the clip was a safer option.
OK… now take a look and see just how adorable these bow ties are!!


I can’t wait to give my grandma her pics and I am so glad these little bow ties turned out!!
Here is a shot of all her great grandkids!
If you want this DIY for later, make sure you pin this image to your board!

Let me know what you think about this in the comments below!!


Leave a Reply
Pingback: 7 clever DIYs you can make using an old necktie - DIY on May 29, 2017
1 COMMENT