Disclosure: some of the links below are affiliate links, meaning, at no additional cost to you I will earn a small commission if you click through and make a purchase.
Hello!! Have you been following my Facebook page!? If you have, you must have seen by now my video showcasing my Aged Looking Christmas Coasters?
If you’re not following my Facebook page then head over (after reading this post, of course) and give it a like! You don’t want to miss all the great stuff I put on there.
OK, enough about that! Let’s get into the tutorial.
So I have no rhyme or reason to how I came up with this and honestly, it was one of those things, where I was just trying to use up old craft and DIY materials that I had kicking around.
Let’s get right into the steps and make sure you watch the video at the end to see this all come together!
This is a super easy project to make. It doesn’t cost a lot of money and it makes a wonderful handmade Christmas gift!
There’s nothing better than receiving a labor of love for Christmas.
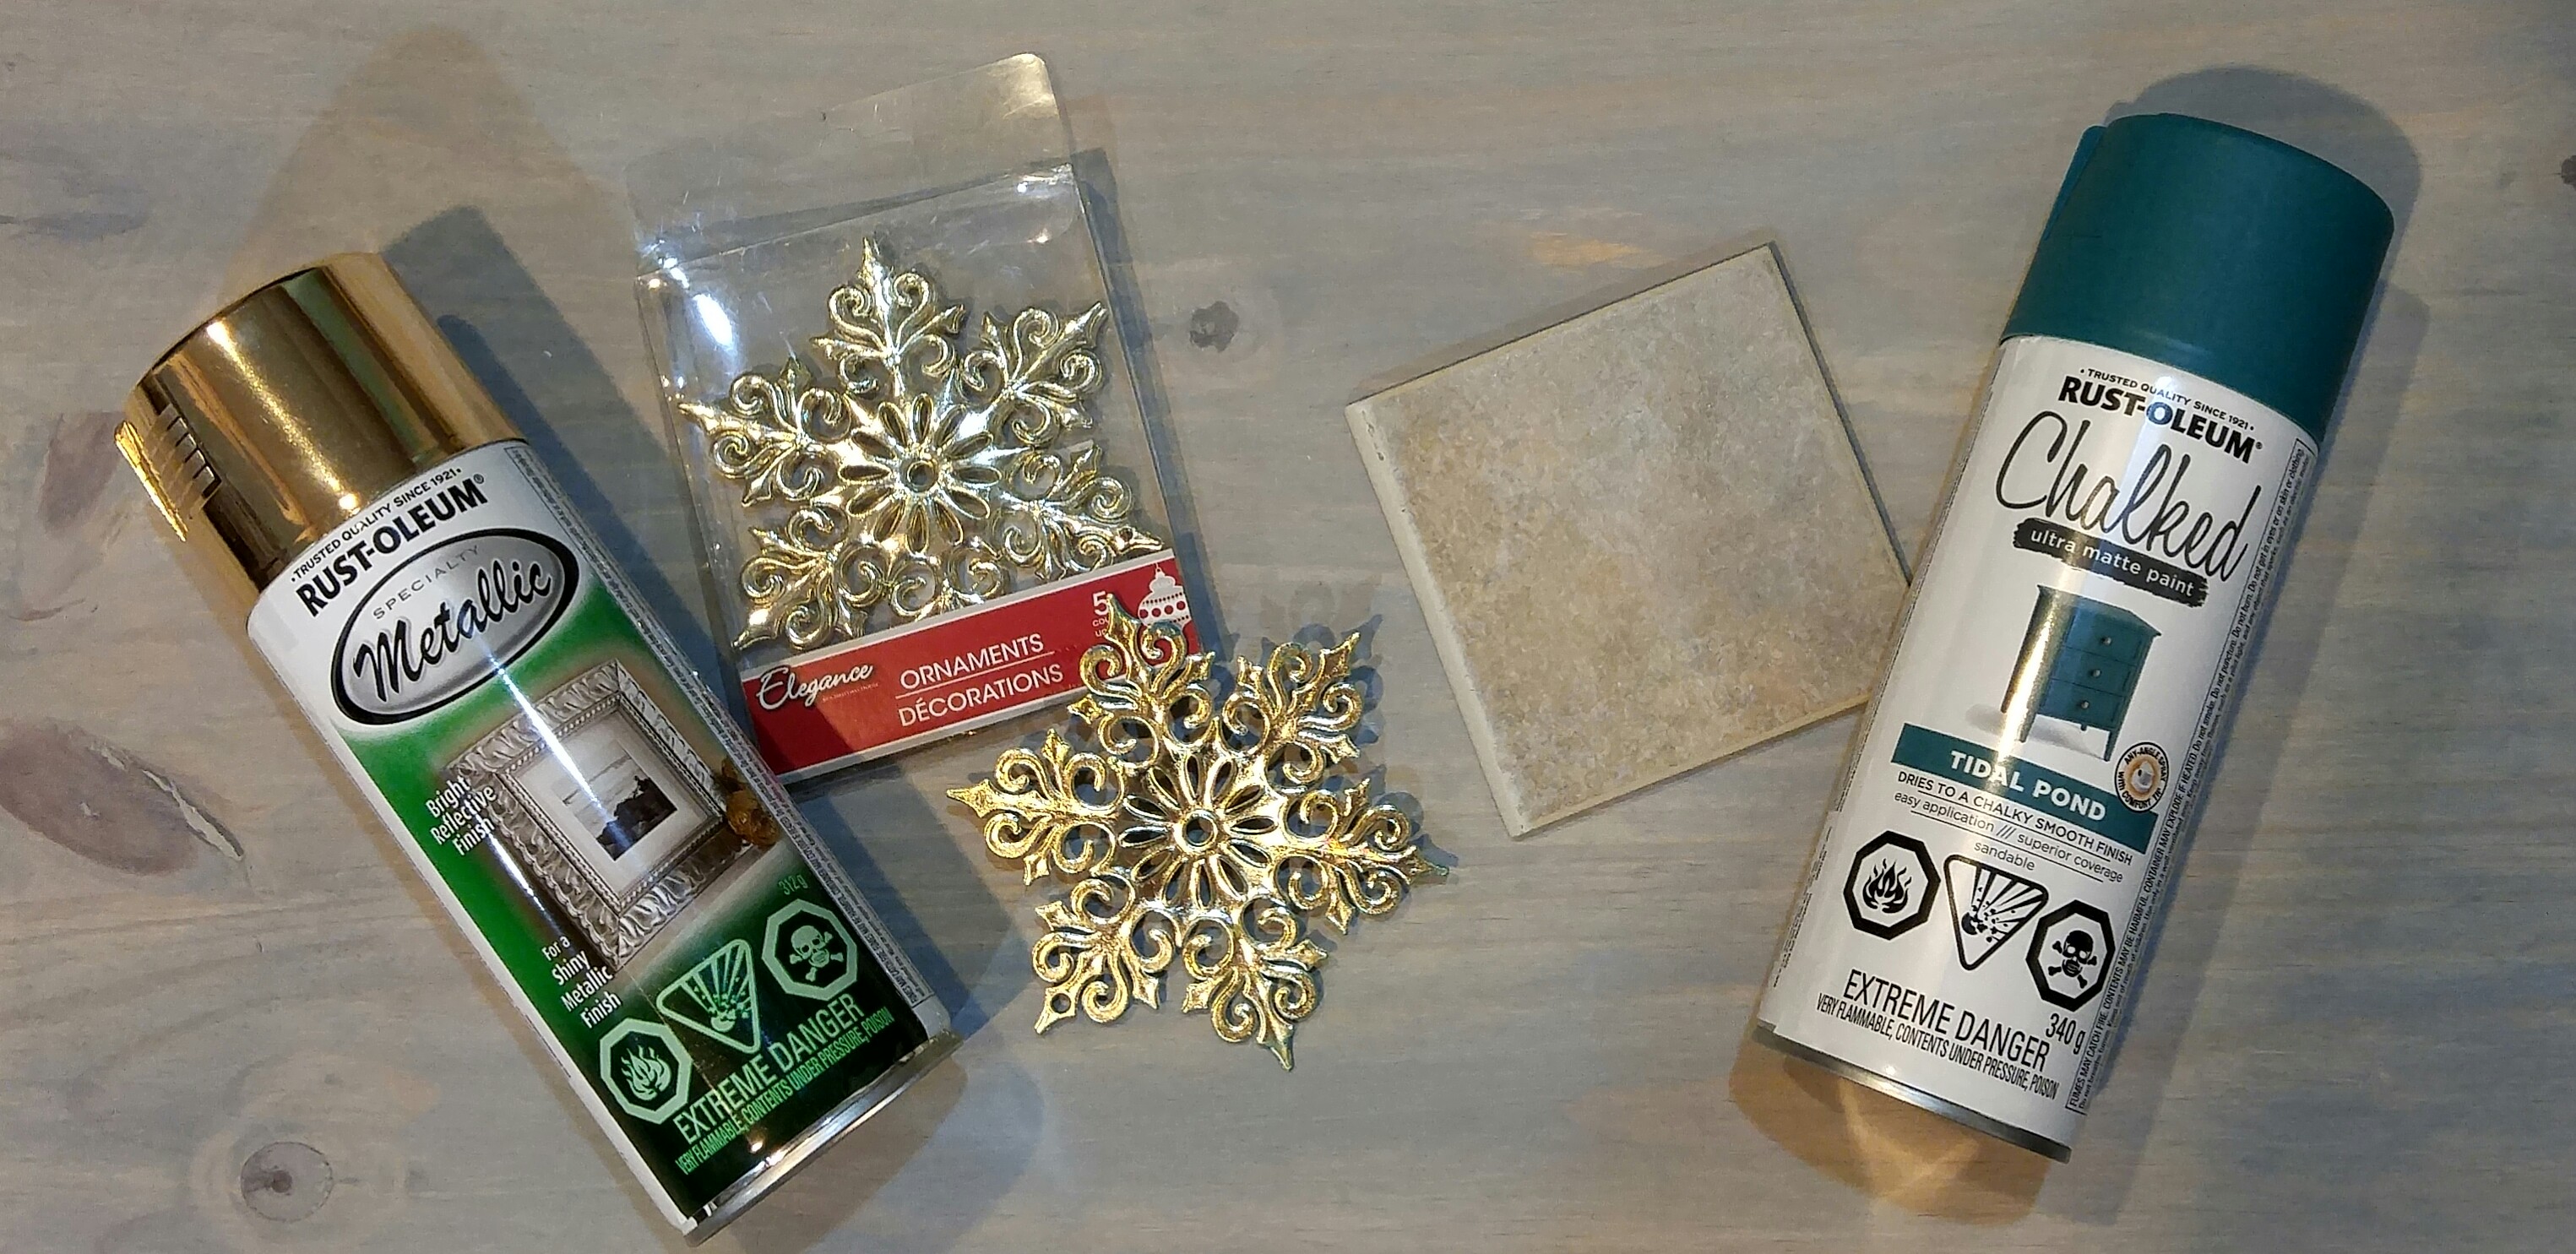
To complete this project you will need:
- Square tiles (I got mine at the Habitat for Humanity ReStore)
- Rust-Oleum Metallic Spray Paint in Gold
- Rust-Oleum Chalked Spray Paint in Tidal Pond (or you could use a different colour of Chalked Spray Paint)
- snowflake Christmas ornament (I got mine at Dollar Tree)
- Rust-Oleum Clear Gloss (optional but will seal your project)
- Hot glue gun
Step 1
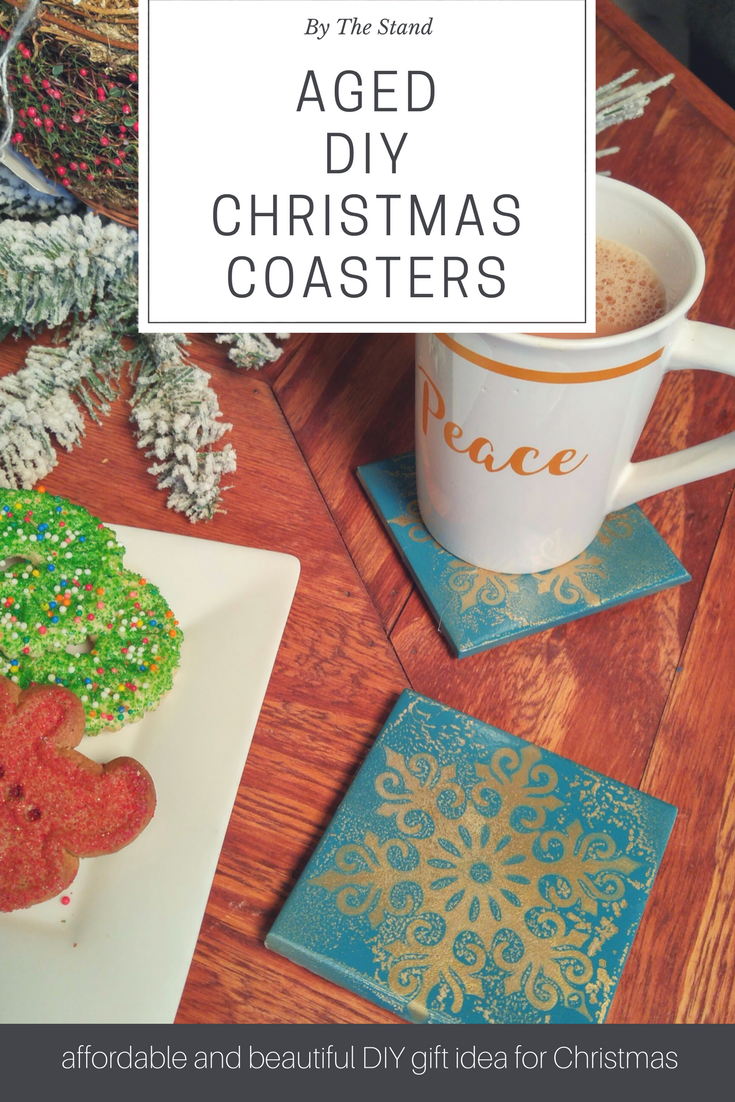
Spray paint your tile with the Rust-Oleum Metallic Spray Paint in Gold and let it dry completely.

Step 2
Place your snowflake ornament on your gold tile and then spray paint over top with Rust-Oleum Chalked Spray Paint in Tidal Pond.


Step 3
After your layer of Tidal Pond has dried, remove your snowflake and you will see the gorgeous snowflake on your coaster.
What makes these coasters look aged is the reaction between the Metallic Spray Paint and the Chalked Spray Paint. As it drys you will start to see little flecks of the gold showing through the Tidal Pond colour. This is a really cool effect!

I am going, to be honest, and let you guys in on a little secret — I am not a scientist or chemist of any sort. I had no idea that the two paint would react like this together, but it’s really cool, right?

This is why messing around and creating is so much fun! You never know what you are going to come up with!
If you are going to recreate this project, it’s important that you use the metallic spray paint and the chalk spray paint. It might not turn out the same if you don’t. I always go with Rust-Oleum. It never fails!

Step 4
Once the paint is completely dry, you can spray your coaster with a coat of clear gloss. This will just protect your coaster from being damaged. Also, if the bottom of your coaster is a little rough, I recommend using a hot glue gun to create some little feet.
To do this, just flip the coaster over so the bottom is facing up and expel a little bit of hot glue into the four corners, let dry and you will have some “rubber feet”. Another alternative is that you can cover the bottom of the tile in felt or cork.
Give this video a quick watch to see the whole process from start to finish
Now you have a great idea for some fun DIY gifts for your family! 😀
You’re welcome!
Share this tutorial with someone who loves to make Christmas crafts!
Don’t forget to pin this idea to your Christmas Pinterest Board!

Also before you go — did you know that you can buy stuff from Dollar Tree online!? That’s right! Mind blown!
If you’re going to make any purchases, please click here before going to the site! It doesn’t cost you anything extra and I make a little money to keep my blog going!
You might even be able to find the snowflakes that I used for this project there!
Also, if you order anything this week, Dollar Tree has a $4.95 flat rate for shipping! Yay for saving money!


Leave a Reply