Who’s not ready to say goodbye to the gnome trend just yet!?
For the Christmas season, gnomes were everywhere and I was loving it. Were you? I made evergreen gnomes, fabric gnomes, and even teeny tiny gnome ornaments. Who’s to say that we can’t carry gnomes into other holidays, though?
Boy oh boy, do I have a treat for you! Not only am I going to show you how I made some adorable gnomes for Valentine’s Day but I am also going to share with you my gnome pattern template that you can download and print for free! So let’s jump right into it!

The first thing you want to do to begin your gnomes is to print out my template patterns. You can find the download link at the bottom of this post.

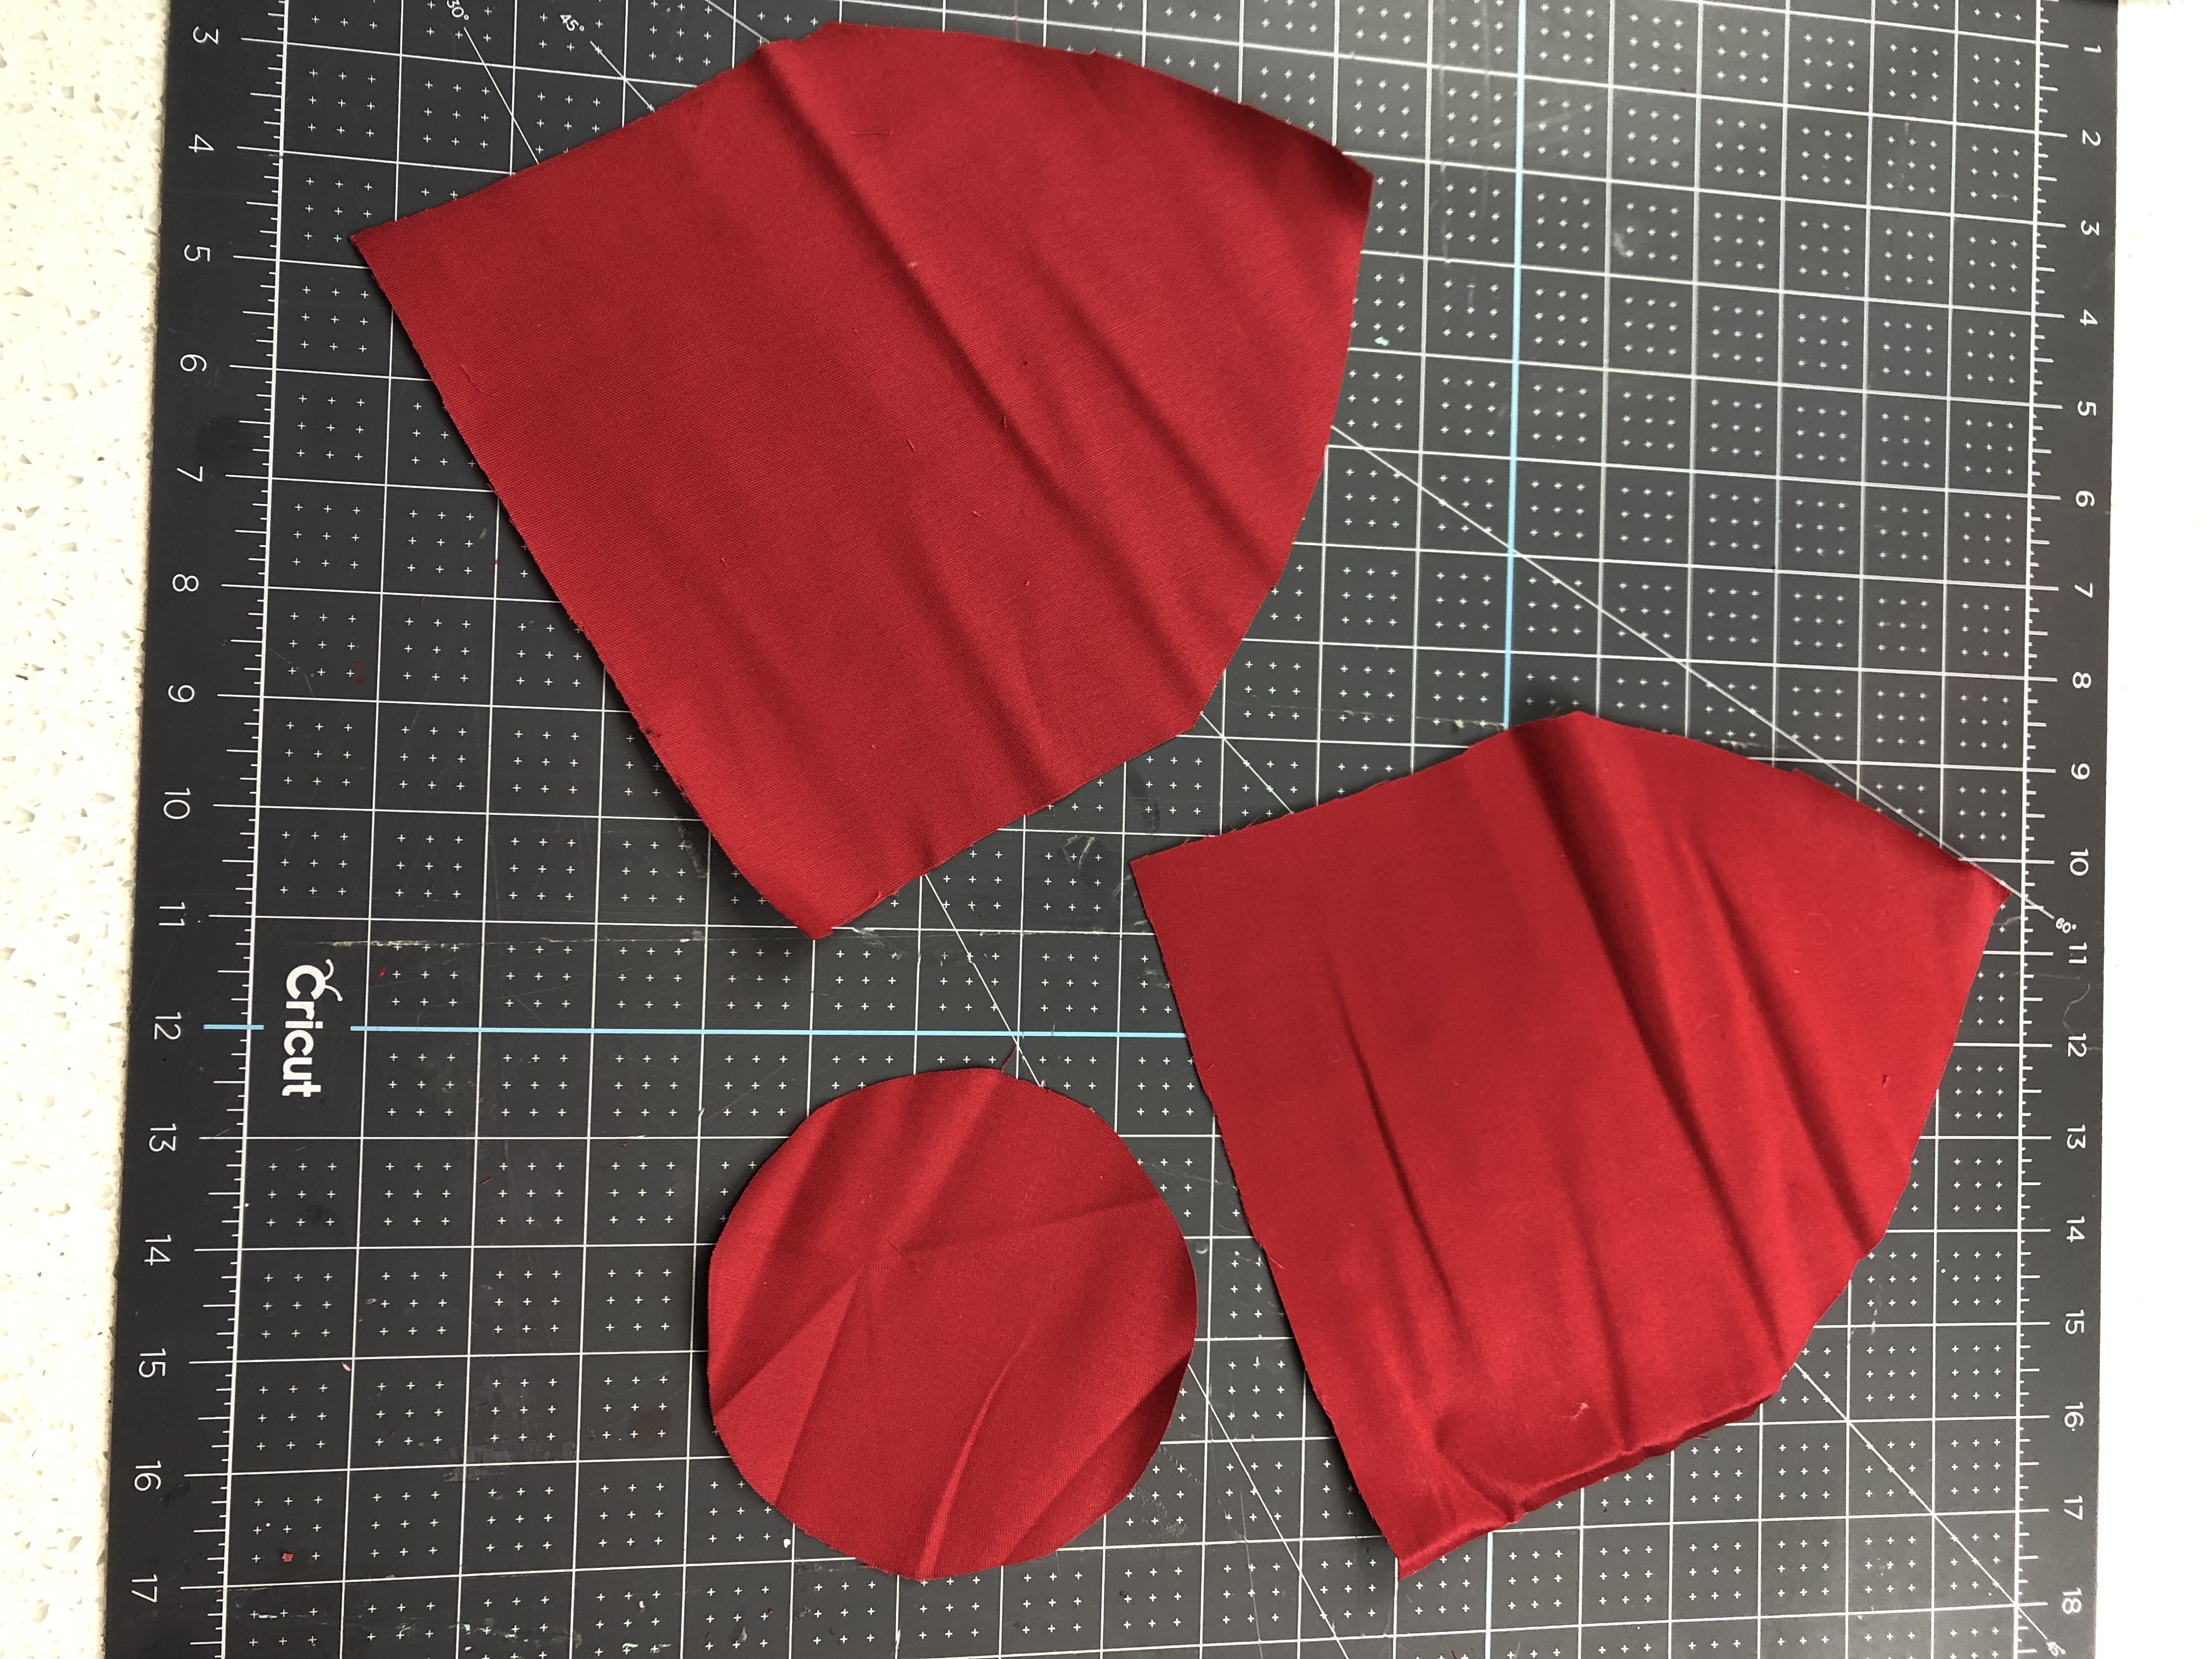
Begin with the gnome body. Using the body template cut out the template twice and using the circle template cut out one. You are going to use all the same fabric for these two templates.
Using a sewing machine, or if you are not so inclined to sew, you can use hot glue, sew together with the right sides in the two body templates. You will sew up the sides to the peak, stopping just a half of an inch below the peak.

Then sew the circle halfway around the bottom opening of the body pieces. Set this aside while you make the legs.

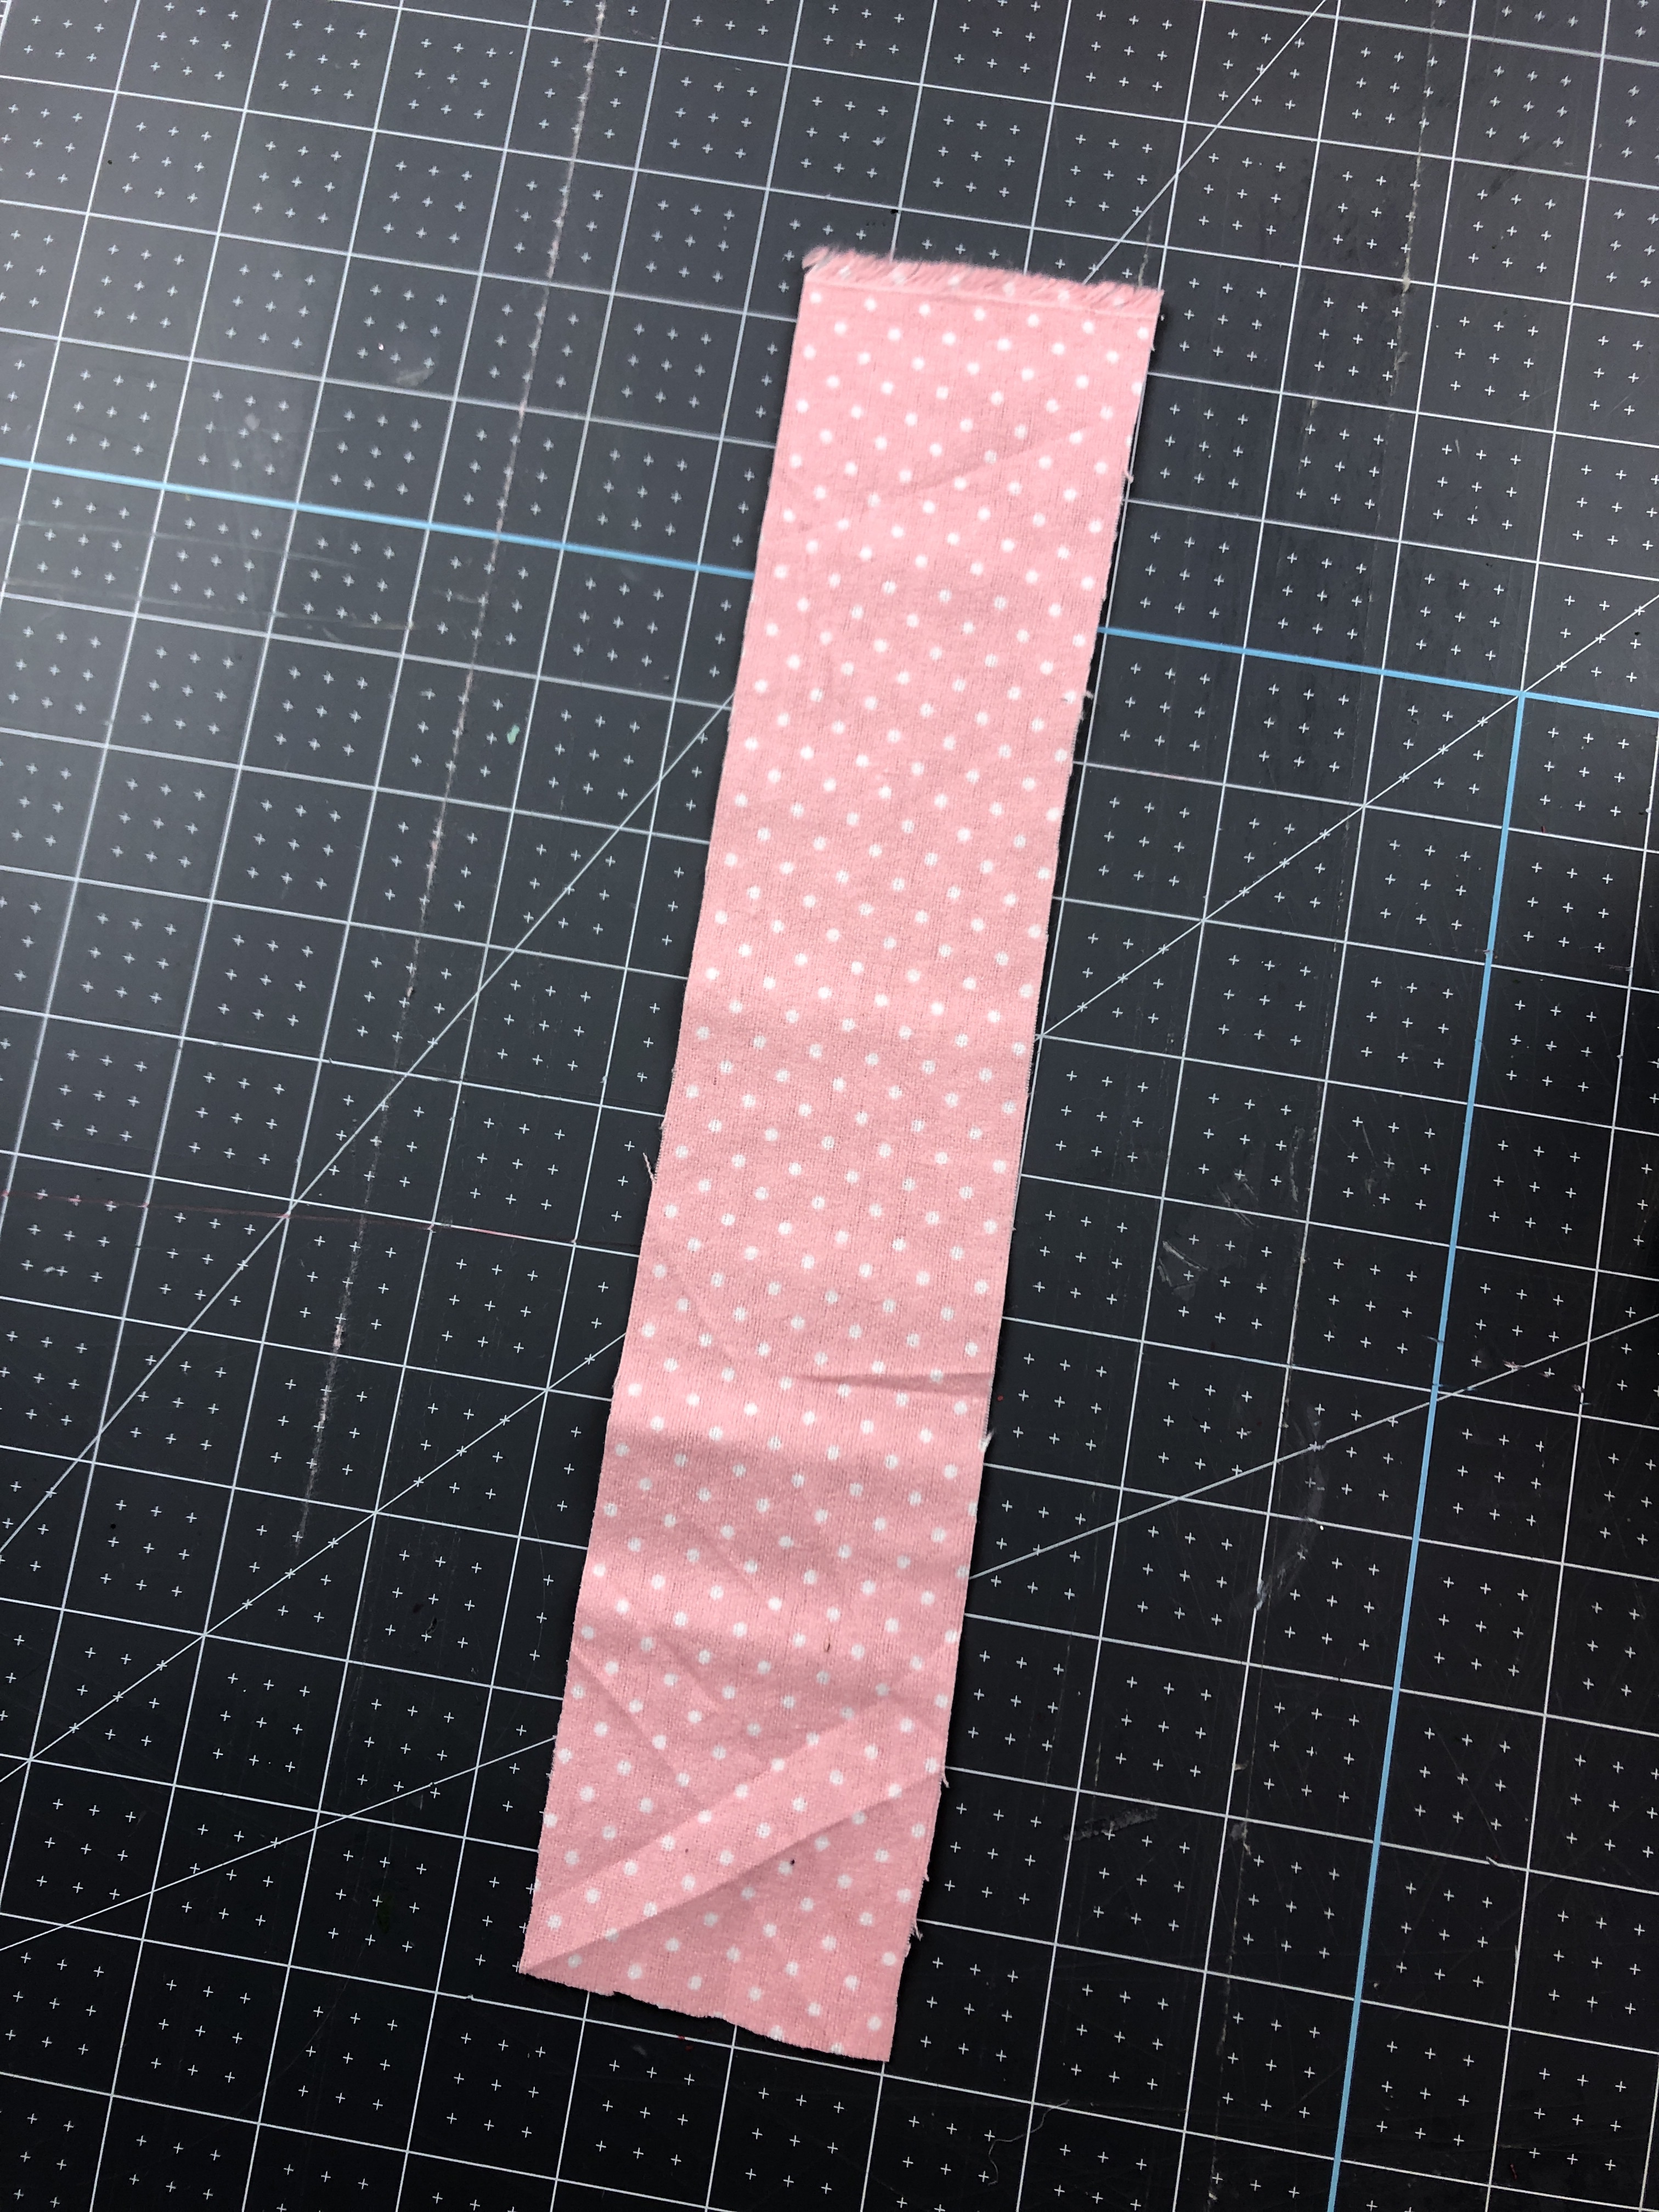
For the legs, cut out the template twice in whichever fabric of your choosing. Fold the strip in half and then sew up the long side leaving both end open. Repeat this with your other piece of fabric.

Put the legs inside your gnome body, leaving about a quarter of an inch out. Use pins to hold your legs in place and then sew the rest of the circle around the body.
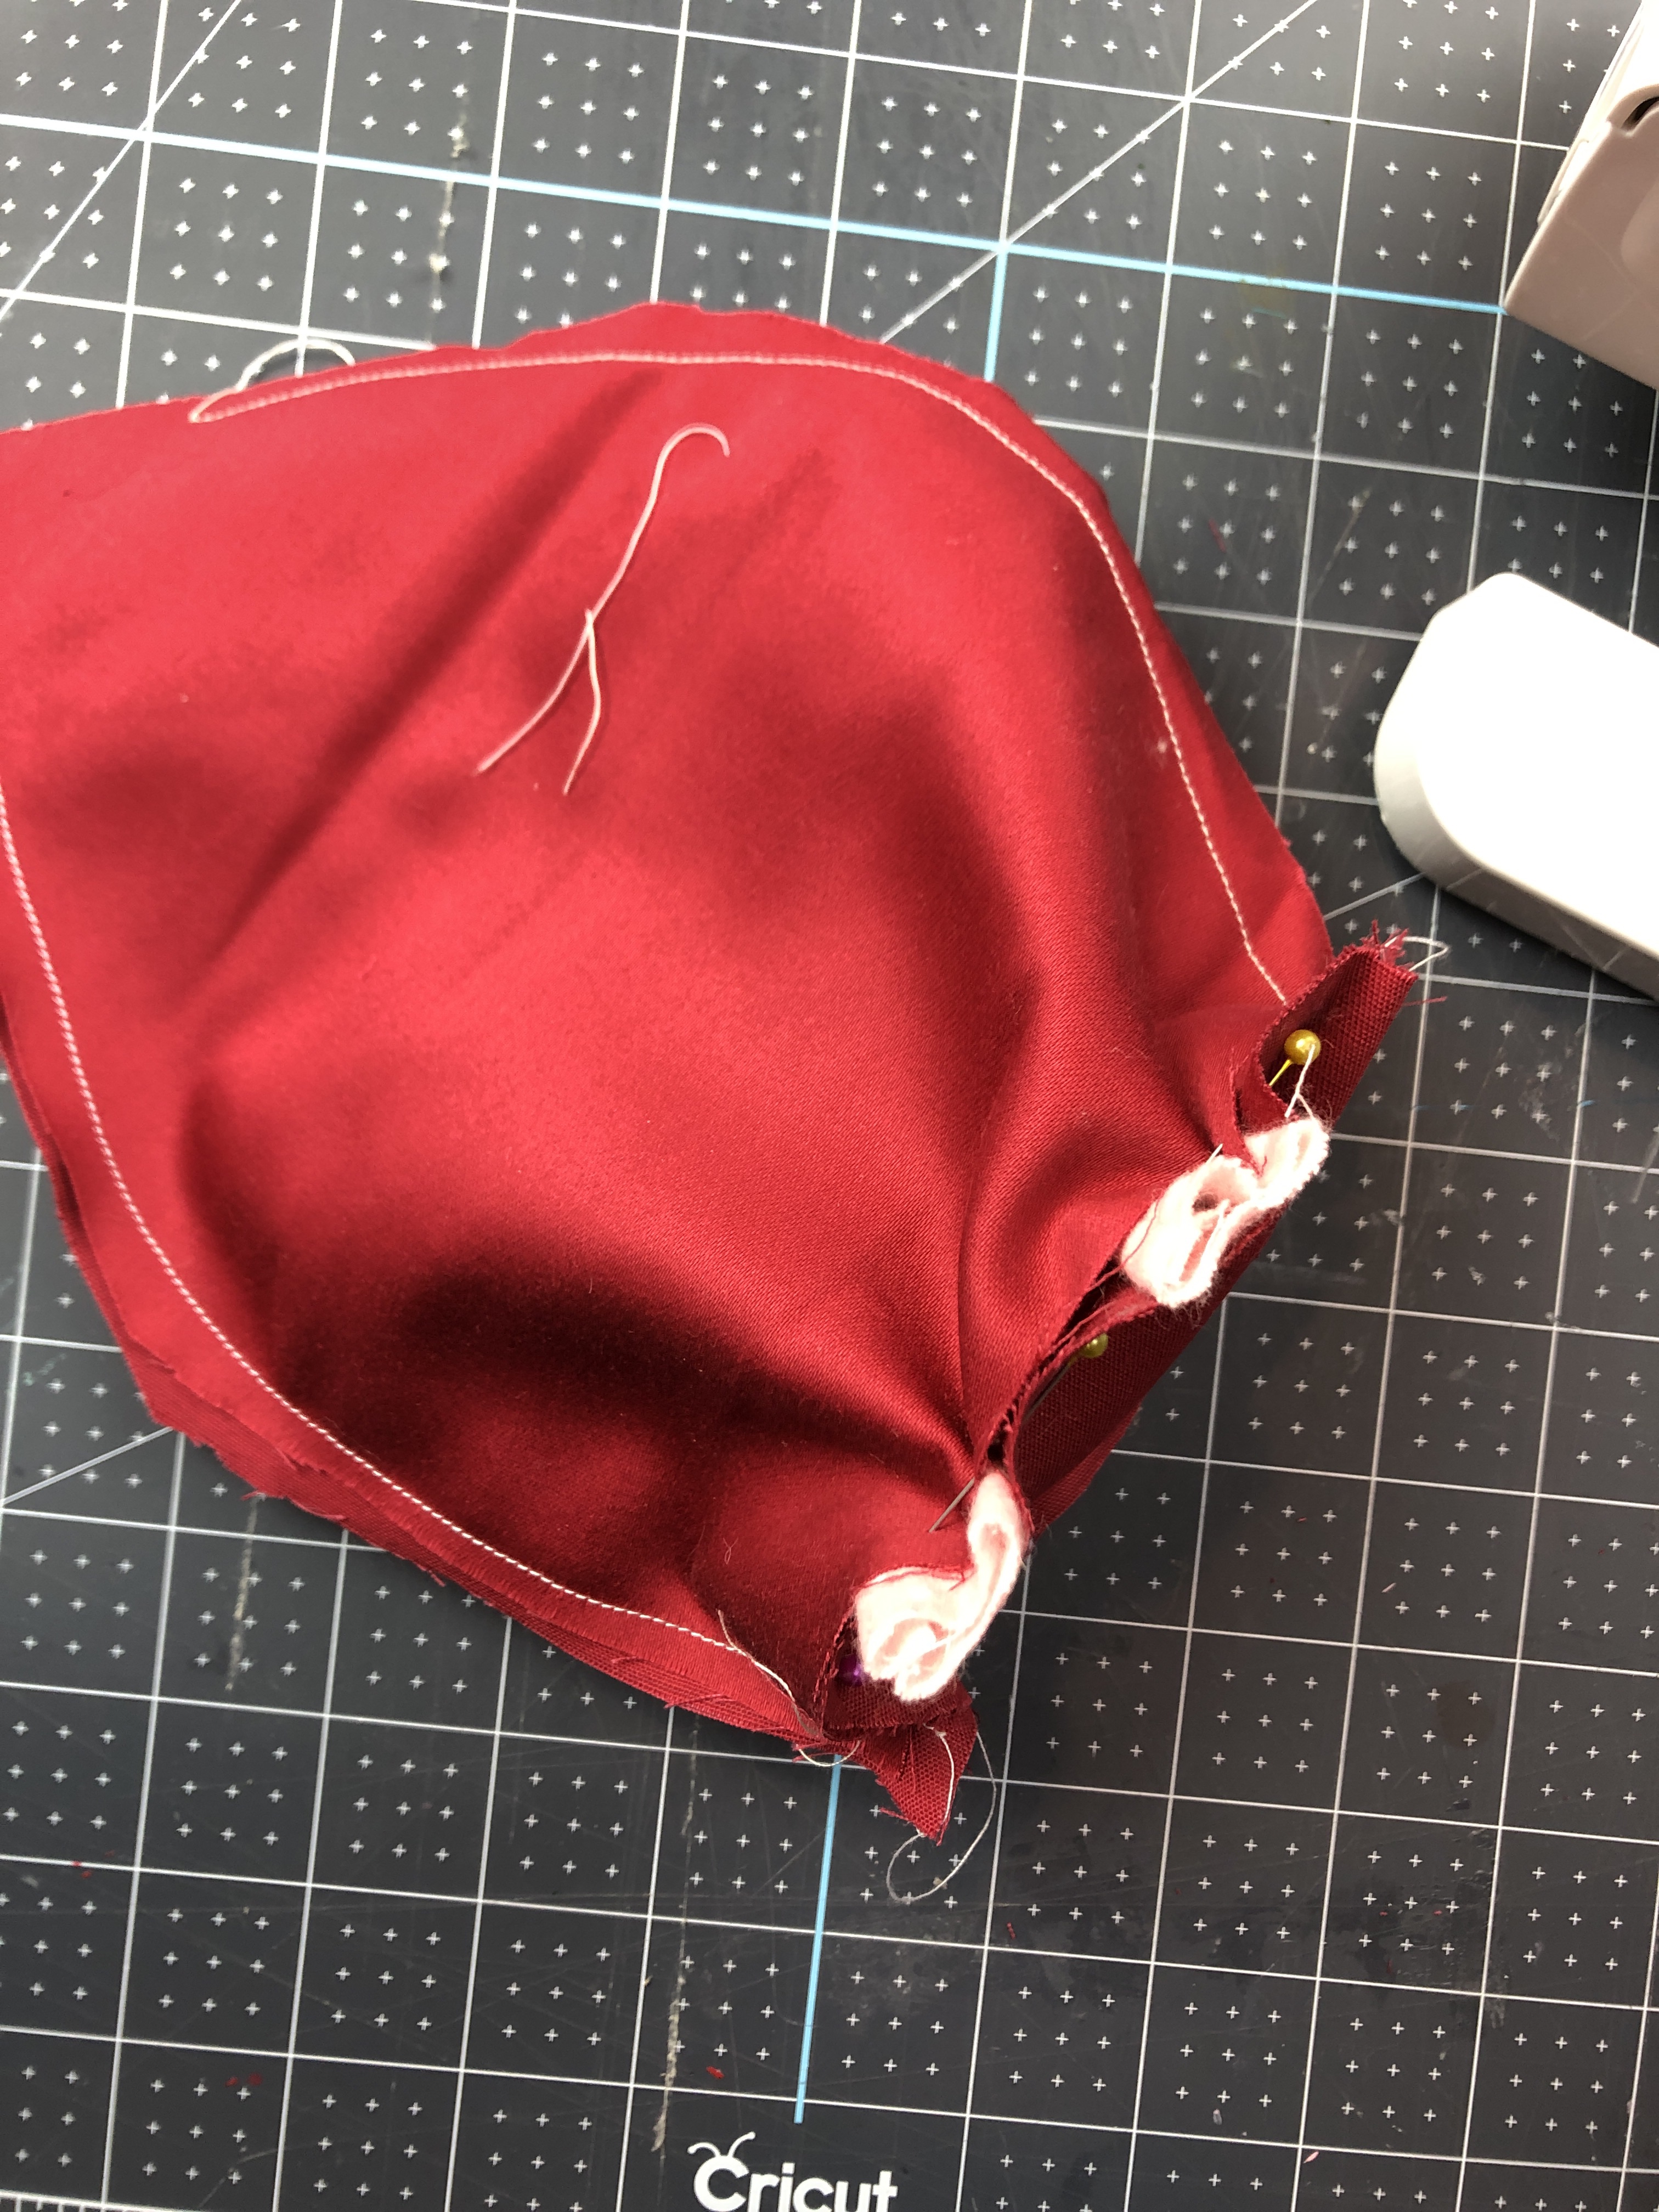
Once the legs are sewn in, flip your gnome inside right by pulling the legs out through the opening of the peak.

Working from the top opening you left at the peak of the body, place some small deco rocks at the bottom of your gnome body. This will allow your gnome to sit up nicely when he is on your shelf.
Then fill the rest of the gnome body with fluff.

Fill the legs with rice. This also provides the gnome with a little more structure so that he will sit nicely on your shelf.

Use hot glue, or sew across the bottom of the leg to keep the rice from falling out.
To make the hat, cut out the hat template twice. The hat is large and won’t fit on a standard size piece of printer paper so you will need to tape the template together.

Cut out your hat pieces in the fabric of your choosing and sew up the long vertical lines of the triangles, leaving the bottom lines open. Make sure you sew your pieces inside right so that the seam will be hidden.
Before putting your hat on your gnome, you will want to make sure that you can bend and form the hat. I used a wired stick from an old floral pic, but you can use thick craft wire if you don’t have an old wired floral pic.

Place your bendable stick or wire into the gnome’s body, place some stuffing into your hat and then place the hat over top of the stick and onto the body.

Cut a piece of fur of your choosing for the gnome’s beard and glue it onto the body so that it sits nicely tucked under the hat.

Use a large wood bead for the gnome’s nose and glue it just above the beard. You can use hot glue to secure the hat around the body and even add a couple of drops on either side of the nose to secure the hat nicely around the nose and make it look more realistic.

Using felt or a fabric of your choosing, cut out the gnome’s boots. You will need to cut out 4 boots. Glue one boot onto the backside of the leg, place a tiny amount of stuffing on the boot and then glue another boot over top. Repeat this process for the other leg.

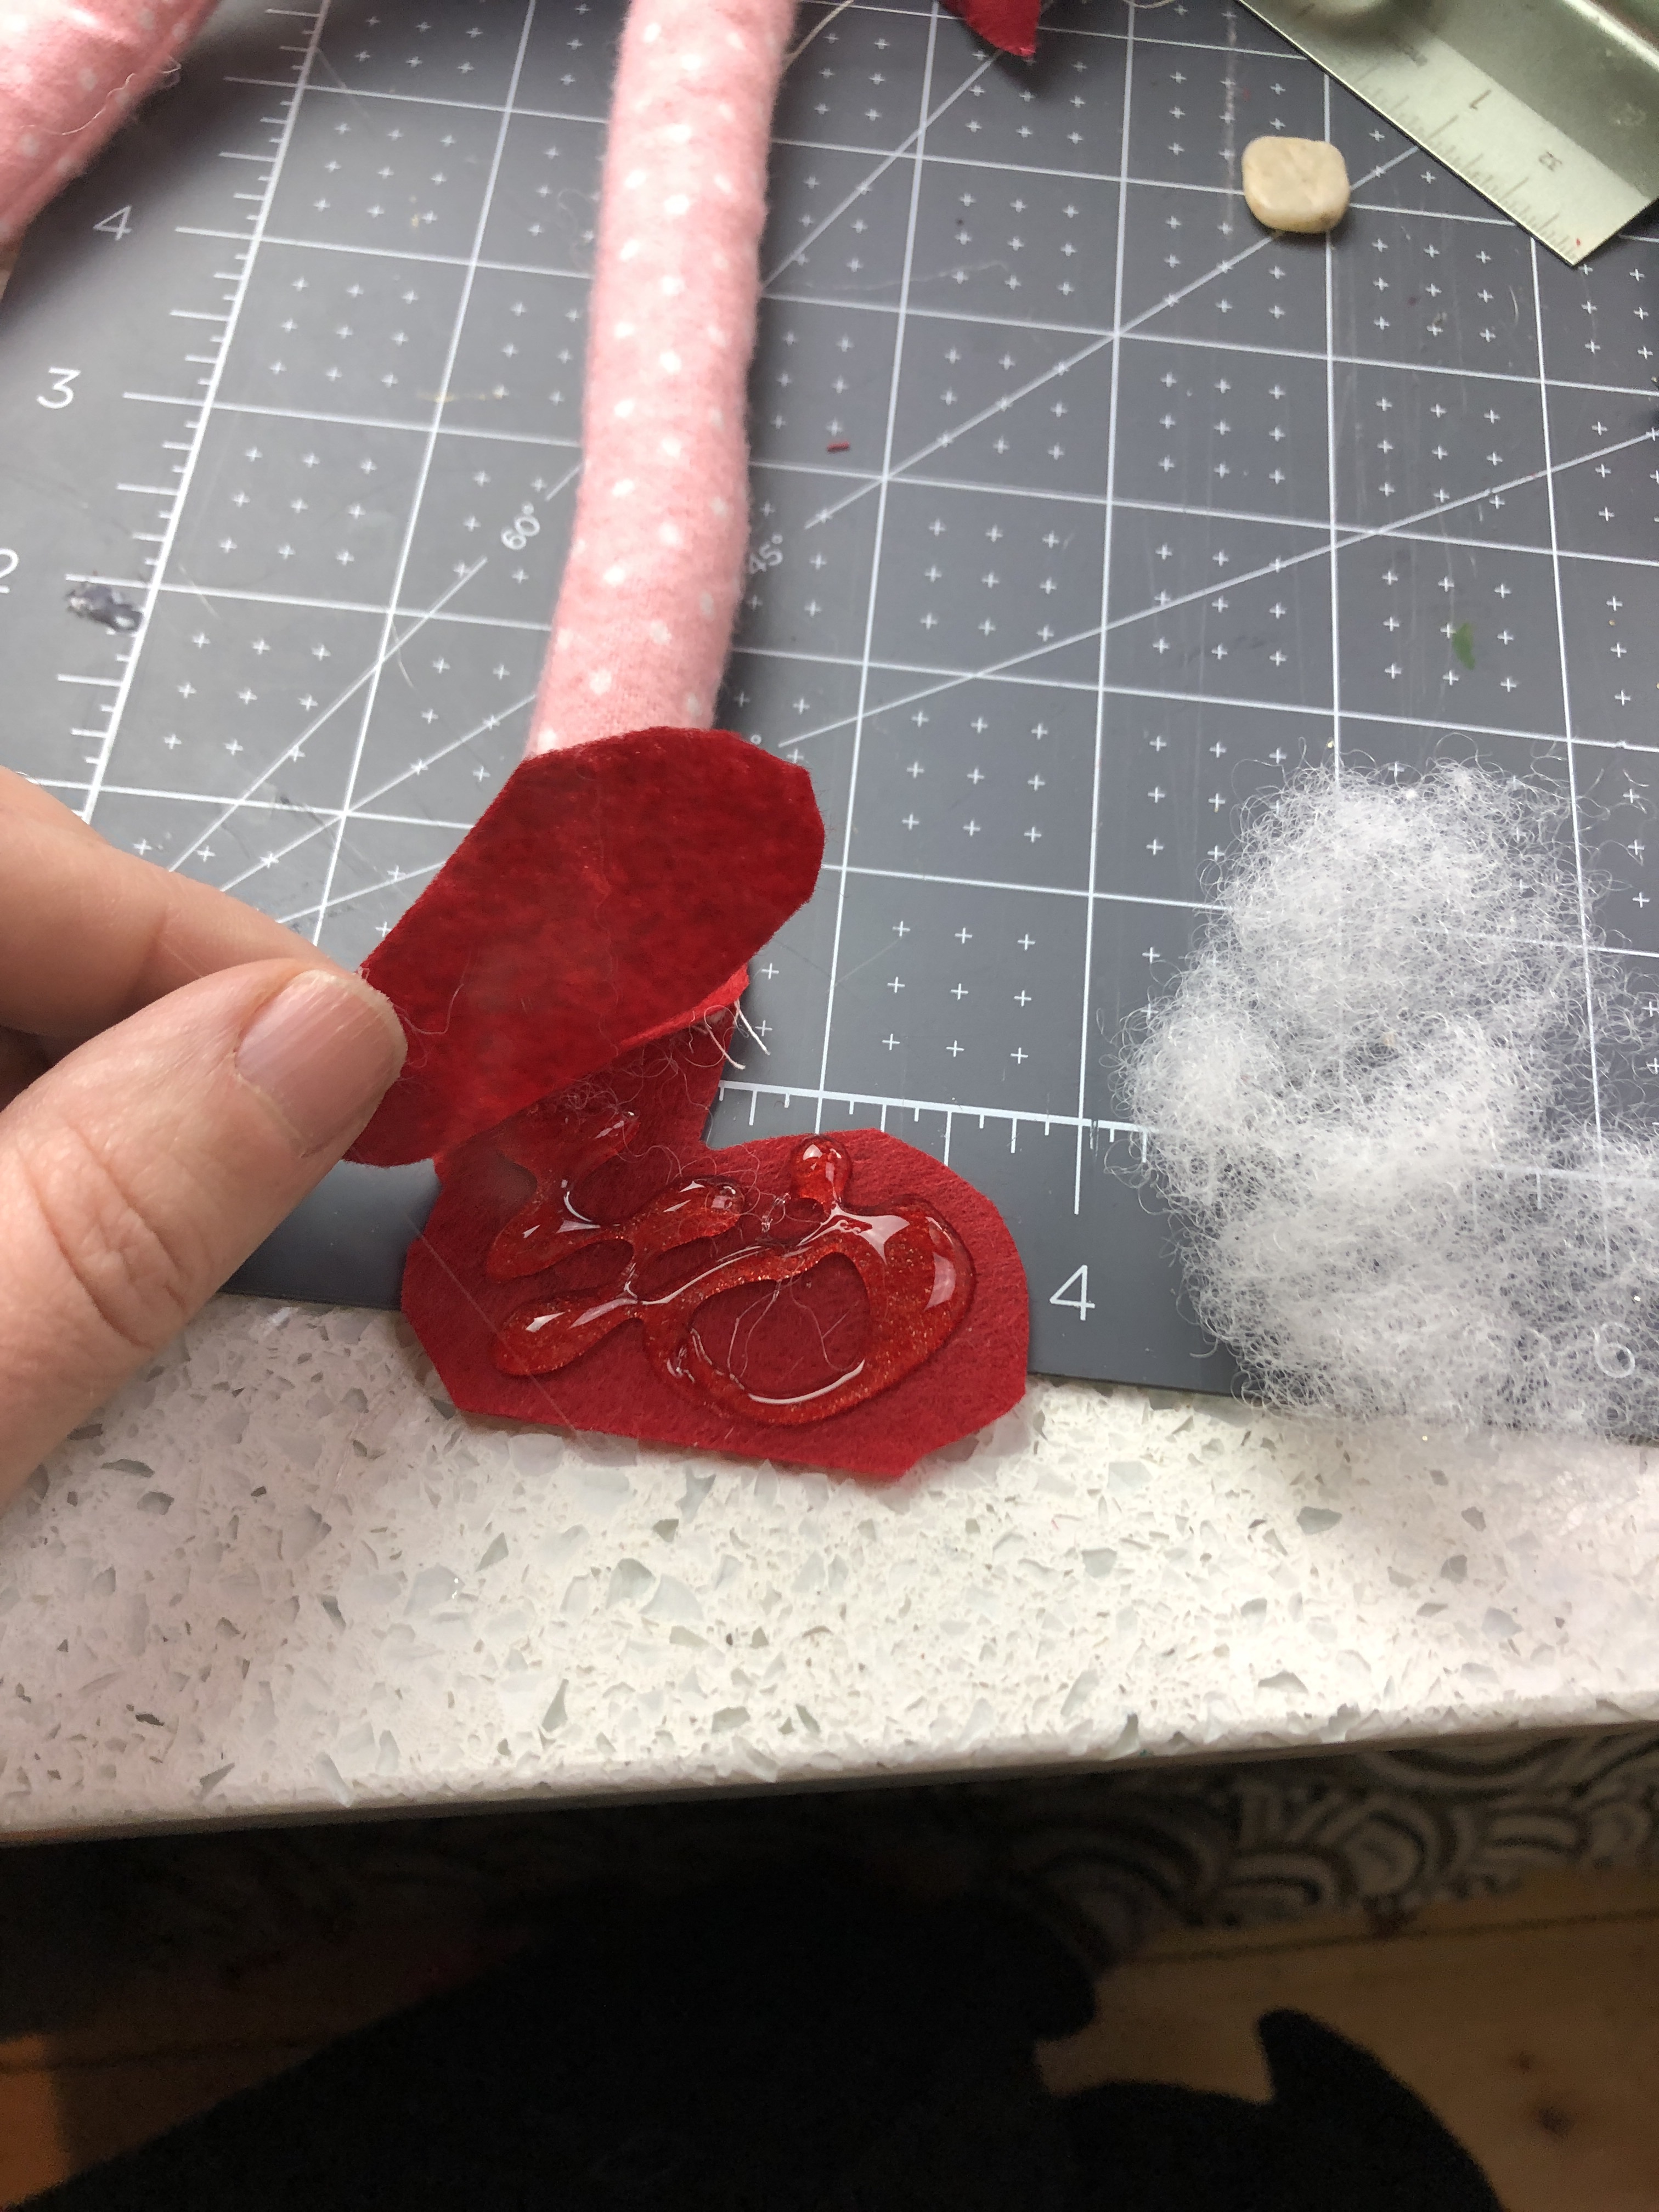

Using the heart template, cut out a felt heart and glue it onto your hat. You can feel free to really get creative with this step and deck out your hat in any way you wish.

That’s it! You’re done and you know have a cute V-day gnome! The best part about this project is that you can use this template to make a gnome for any holiday — just choose different fabrics to suit your needs!
I hope that you guys will try this project and if you do, I would love to see your photos! Feel free to tag me on Facebook and Instagram – @hollygraceblog
Don’t leave before printing out the FREE TEMPLATES!


Leave a Reply
Pingback: Easy Valentine’s Day Decor Made with Cricut on January 20, 2020
Pingback: Free Gnome Sewing Pattern: 11 Fun Patterns For You on January 20, 2020
2 COMMENTS