This post is sponsored by Glen-Gery. All opinions are my own.
Hello everyone! I am beyond excited to share my Kitchen Backsplash renovation project with you today. When we purchased our dream century home over a year ago, I loved the spacious kitchen. It’s what drew us to the home BUT something in the kitchen was definitely lacking.
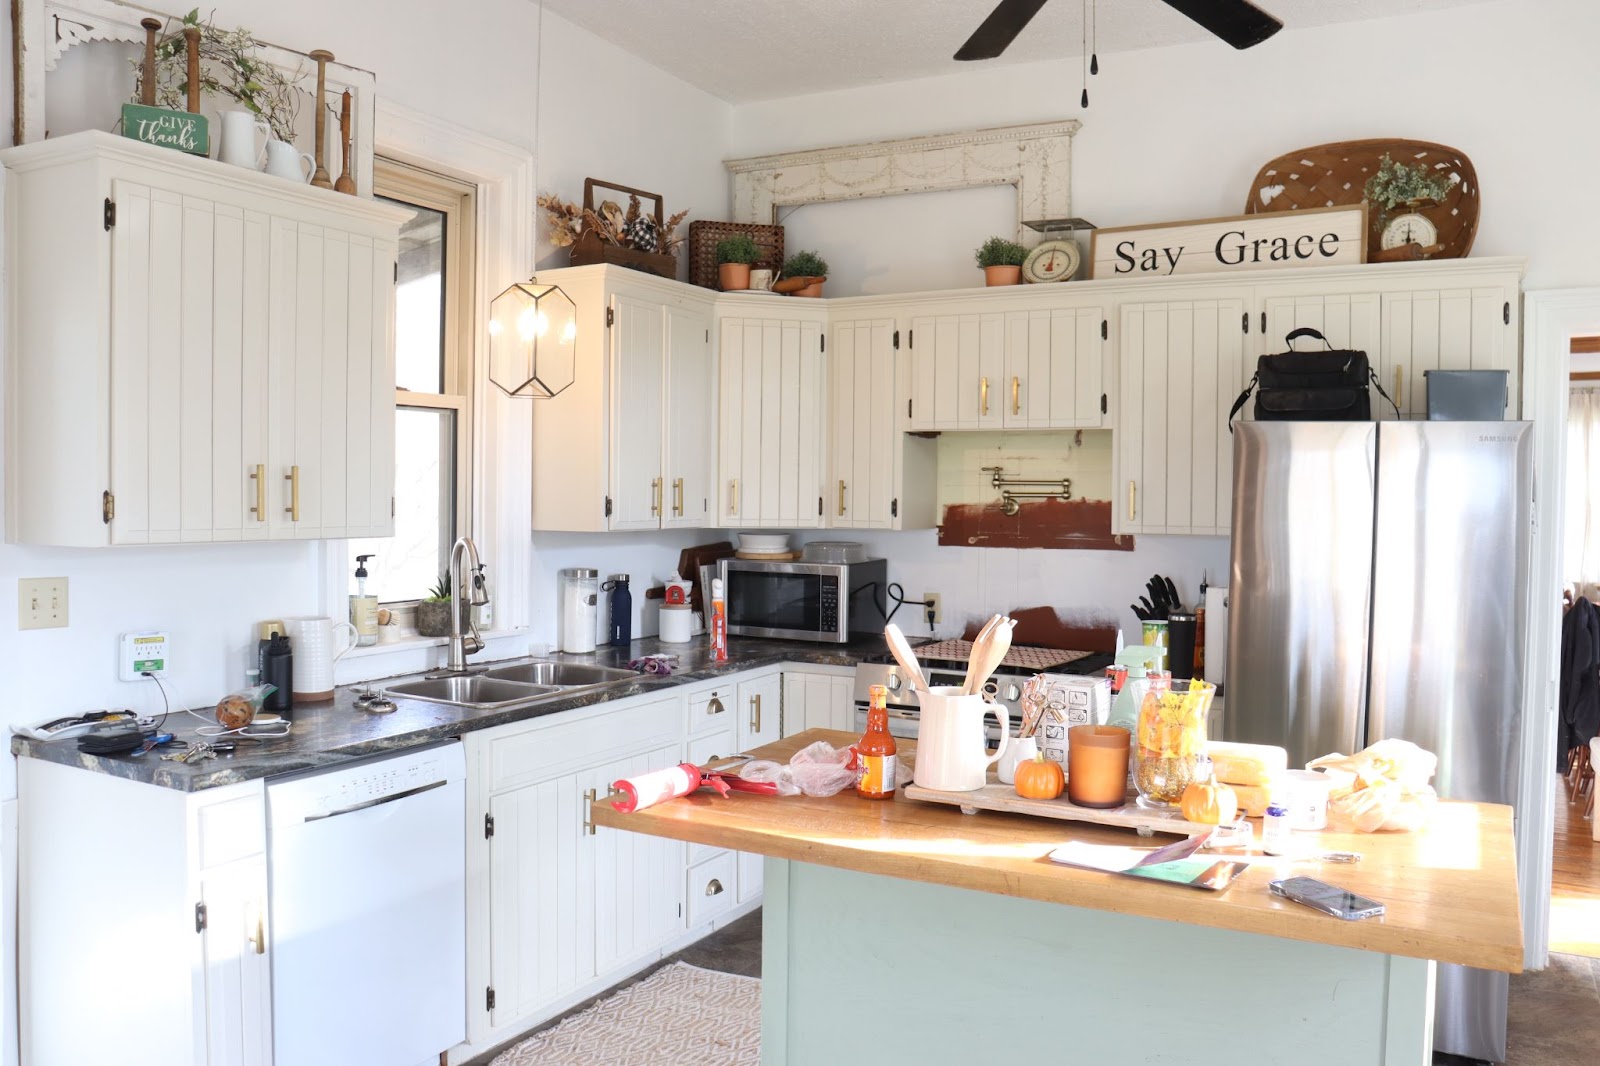
There was no backsplash — just plain old walls. This kitchen definitely needed a huge glam up and the Thin Brick from Glen-Gery did just the trick! Let me walk you through the process and show you just how easy it was to install this backsplash.
Step 1
To begin, we made sure to remove everything off our countertops to give us a clean working space. We removed any outlet and lightswitch covers where the backsplash was going to go and we covered our countertops with a painting tarp to protect them.
Step 2
For our backsplash, we chose Thin Brick in the color Stonewall. We started working from the base of the counter working up toward the cupboards.
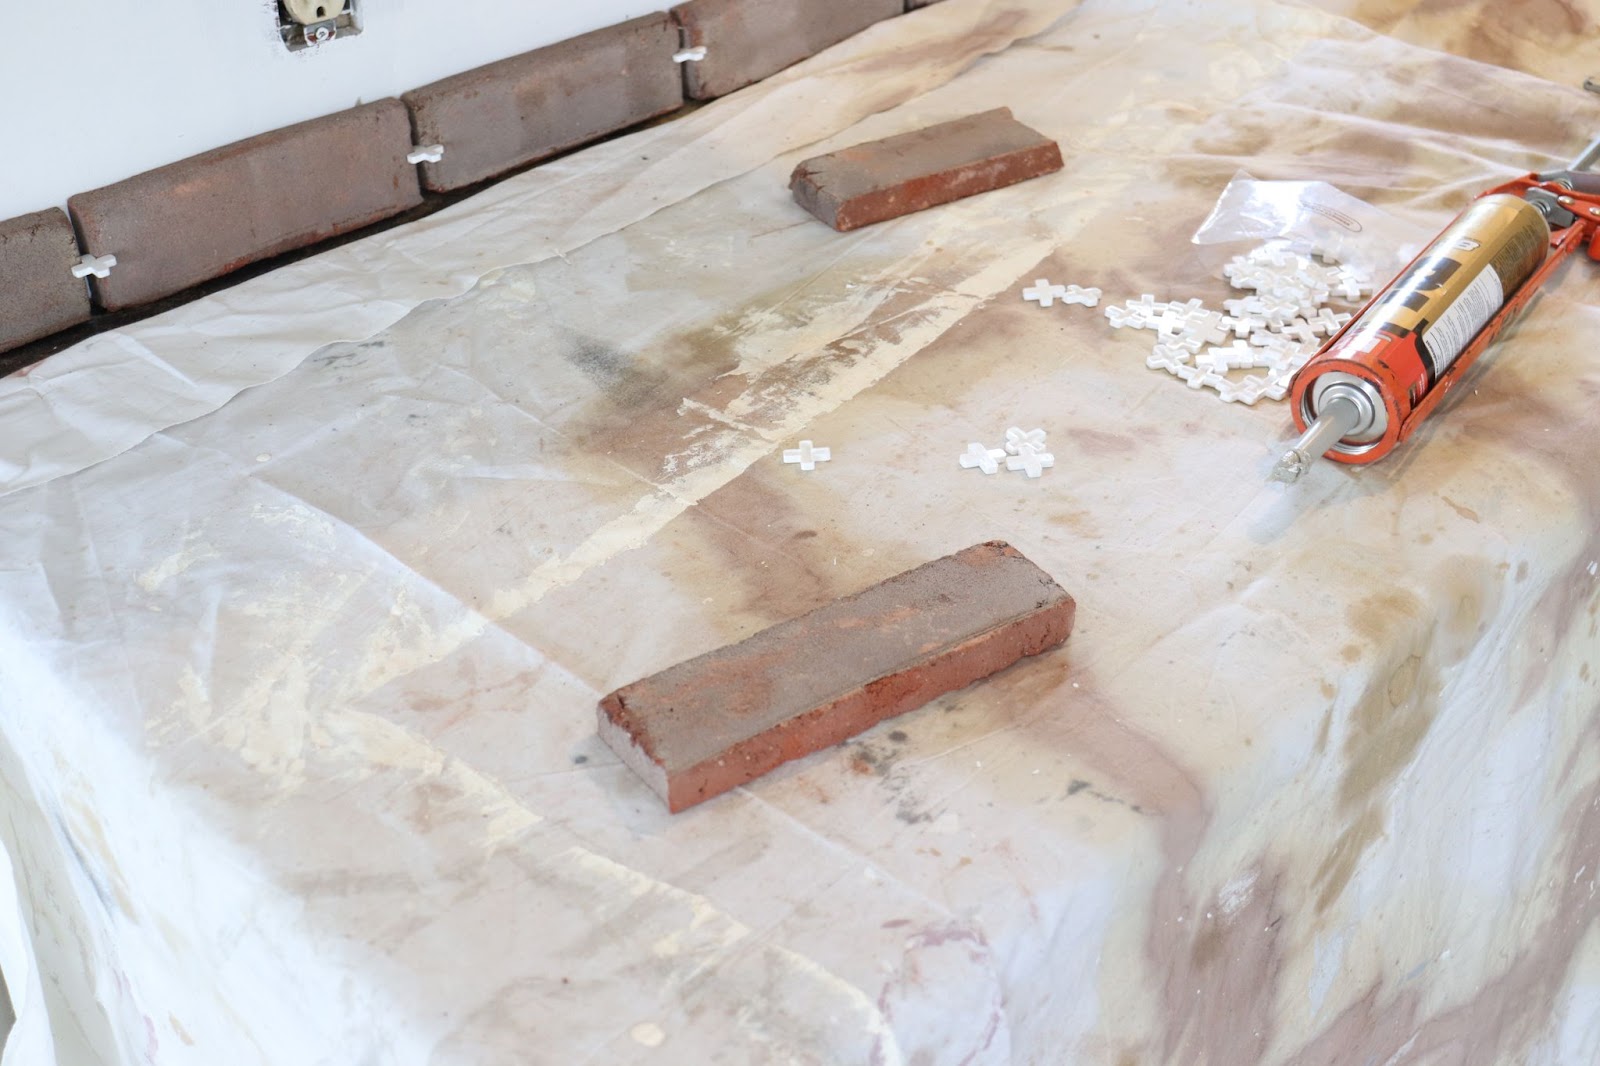
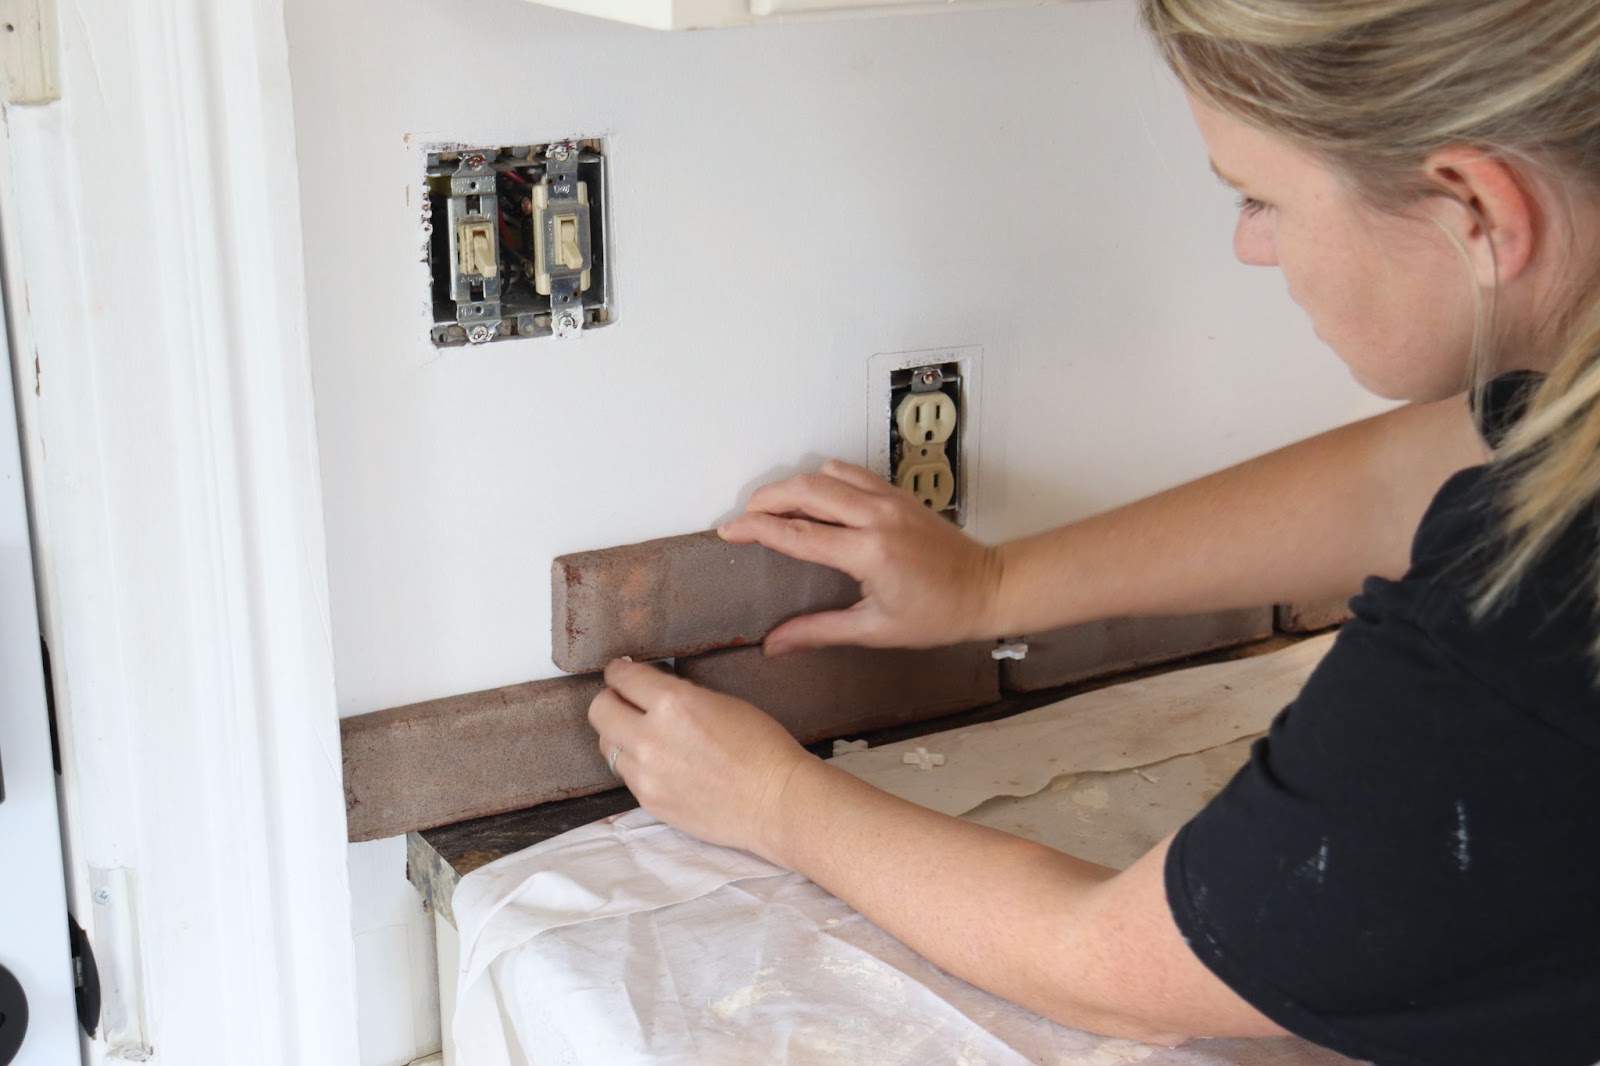
To apply our brick to the wall, we used a construction grade adhesive. We began by starting from the edge of the wall and working our way down the counter for our first row of bricks.
We applied a liberal amount of adhesive to each brick and then pressed it against the wall for 5-10 seconds. When placing the next brick beside, we used a ¼” spacer.

Step 3
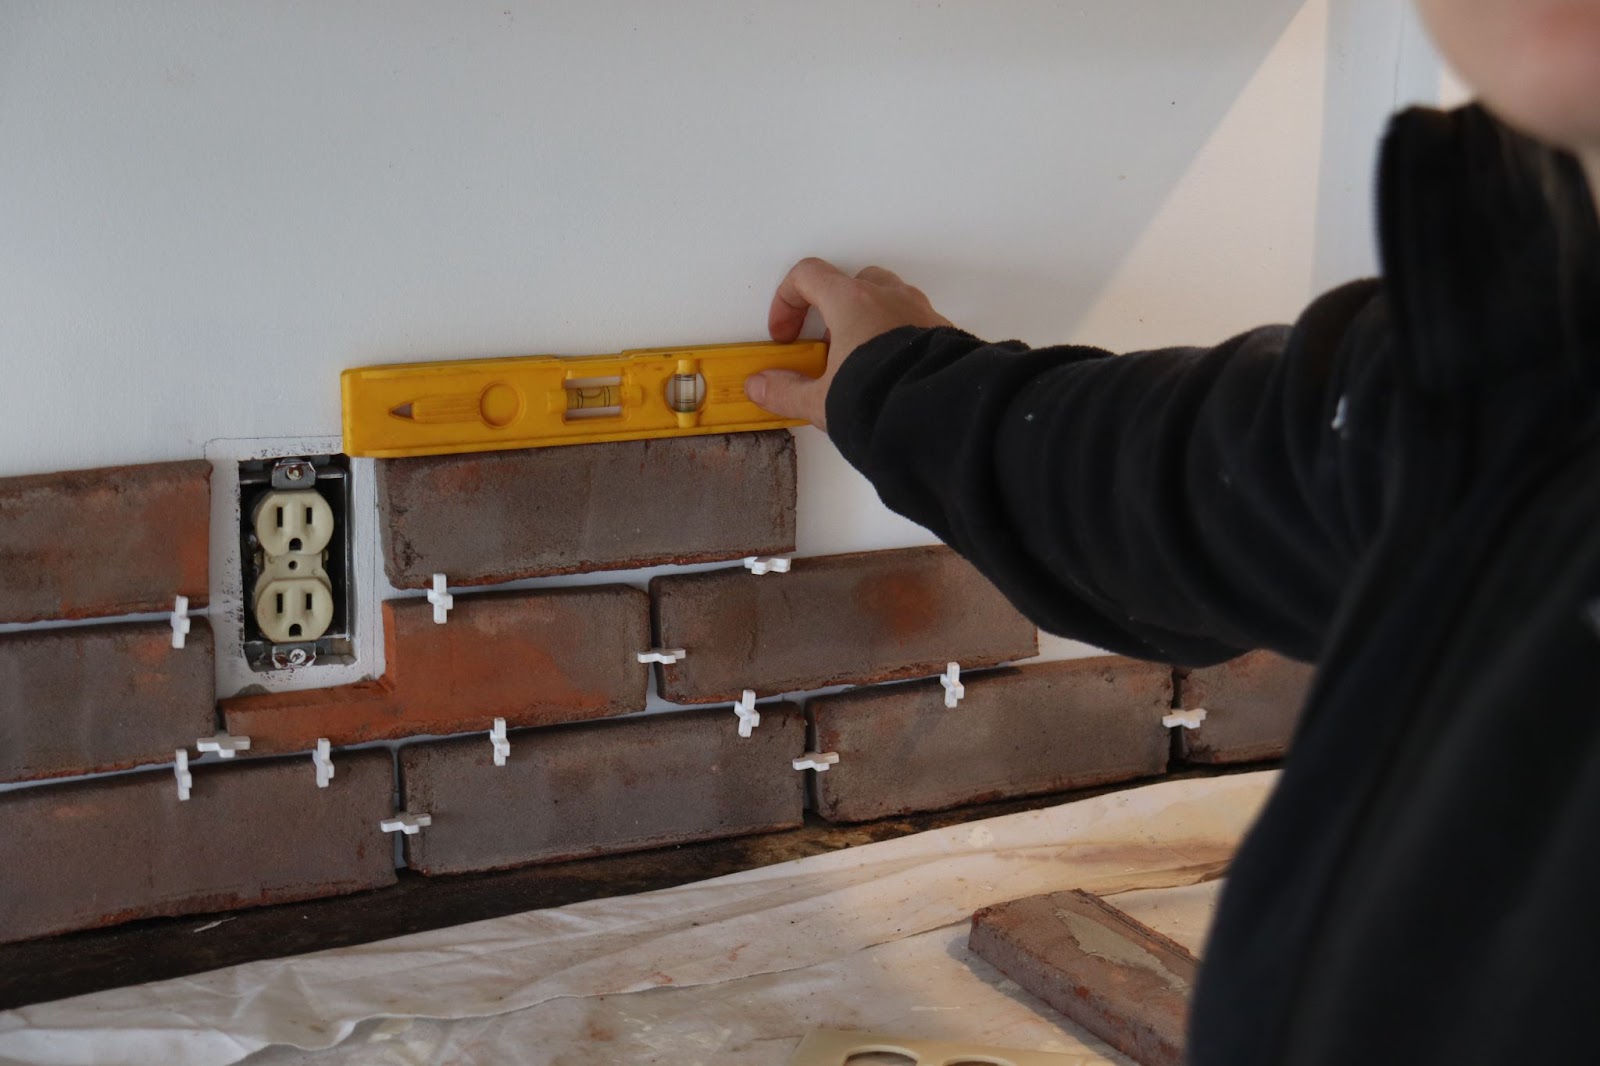
Once we did the entire first row, we started our second row. We staggered the vertical grout lines so that they weren’t directly in line. This gives a more traditional brick look.
When we got to a spot where we would need to cut a brick (ie: edge of the wall or around an outlet cover) we made the marking directly on the brick and then cut with diamond blade in our jigsaw. The bricks were super easy to cut through with a jigsaw but you could also use an angle grinder with a diamond cutting blade as well.
Note: You want to apply the bricks directly up to the beginning of your outlet hole. You will place so your outlet covers back directly over the brick so you won’t want any gaps.
Step 4
We continued working in this fashion, until we reached the bottom of our upper cabinets. The bricks fit perfectly in our space and luckily we didn’t need to make any horizontal cuts down the brick.
We used a level to make sure that our bricks were straight.
Step 5
After we had applied all the bricks to the wall, we let the adhesive fully harden overnight. We didn’t want any of the bricks to move while we were grouting so we decided it was best to be patient!
Step 6
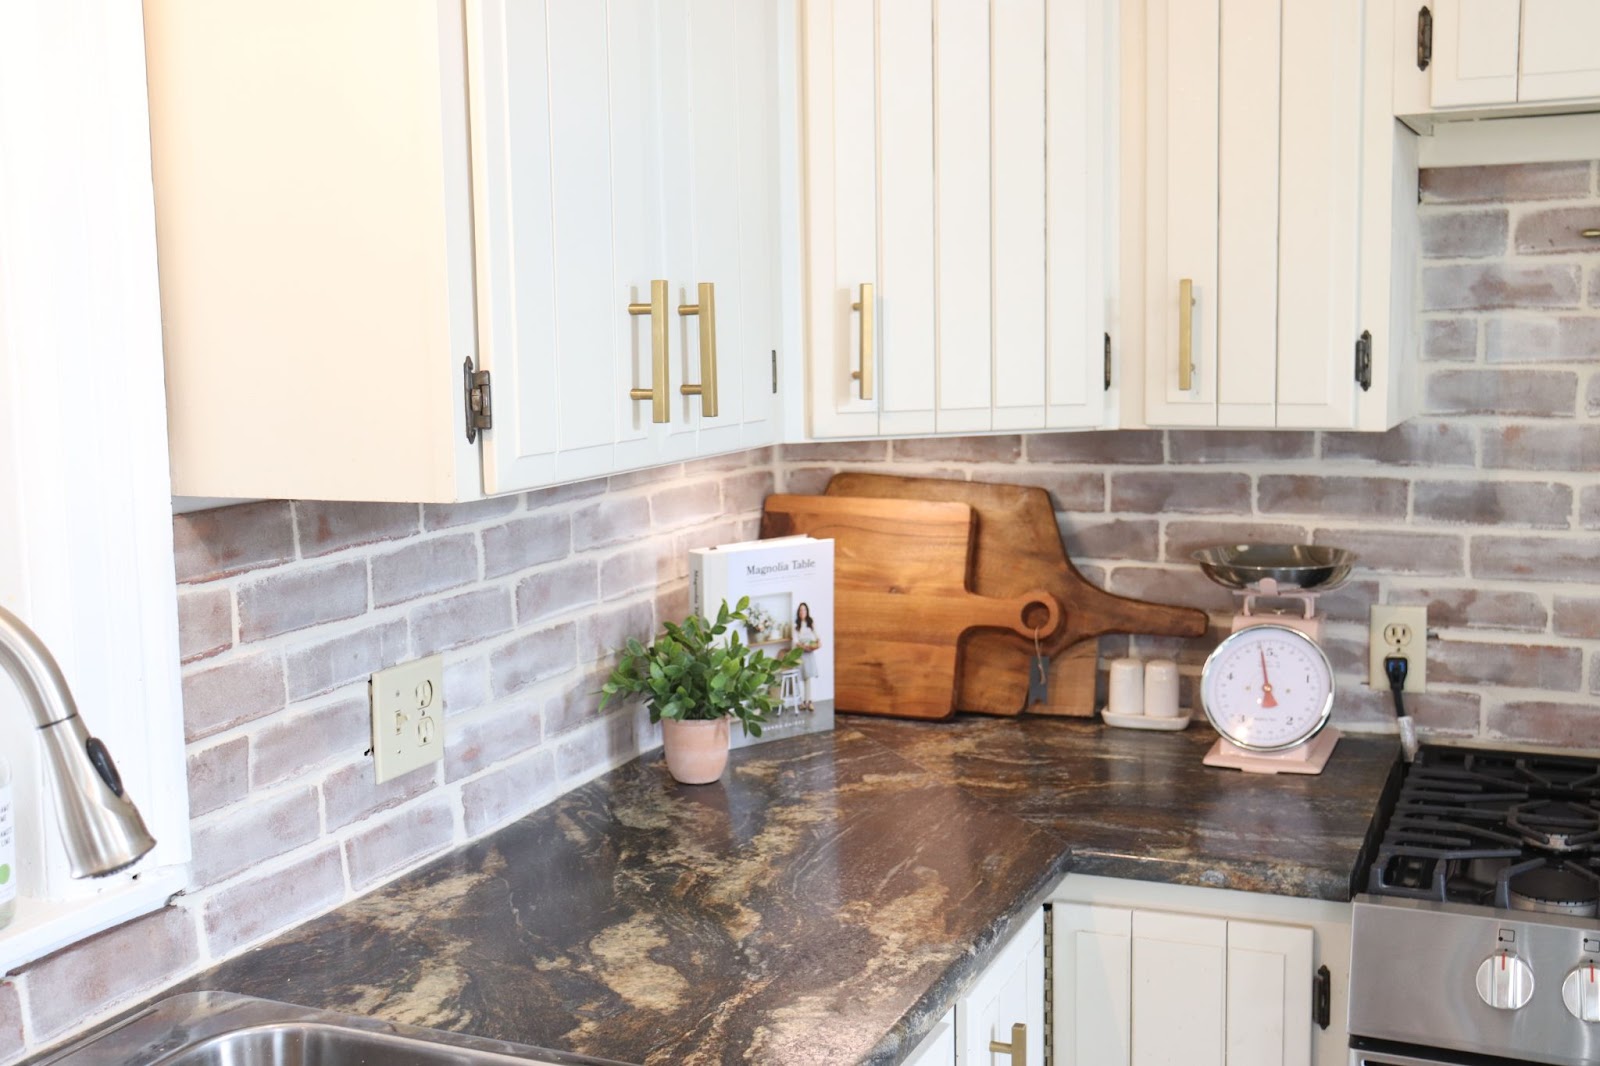
For our grout, we went with an antique white color which complemented the Stonewall Thin Brick so nicely. We mixed up our grout according to the manufacturer’s instructions and then applied our grout to the brick with a float.
You want to make sure that you really push the grout in between the bricks and fill the grout lines completely.
Note: We worked in small sections, placing the grout and then cleaning. We found it was easier this way so that the grout wouldn’t get too hard and unworkable.
Step 7
After applying the grout, we waited 10 minutes to let it firm up a bit and then we came in with a large damp sponge and wiped away the excess grout.
When working with the sponge, you want to do 1 pass flip your sponge and then pass over the same area again. This will help you to not spread around the grout that you just wiped off.
Step 8
We continued repeating this pattern until we had grouted the entire backsplash. We left the grout to fully set and harden for 12 hours and then we replaced our outlet covers.
Note: Since the Thin Brick is a little thicker than traditional tile, we did have to place an extender in behind our outlets to push them out to be flush with the brick.
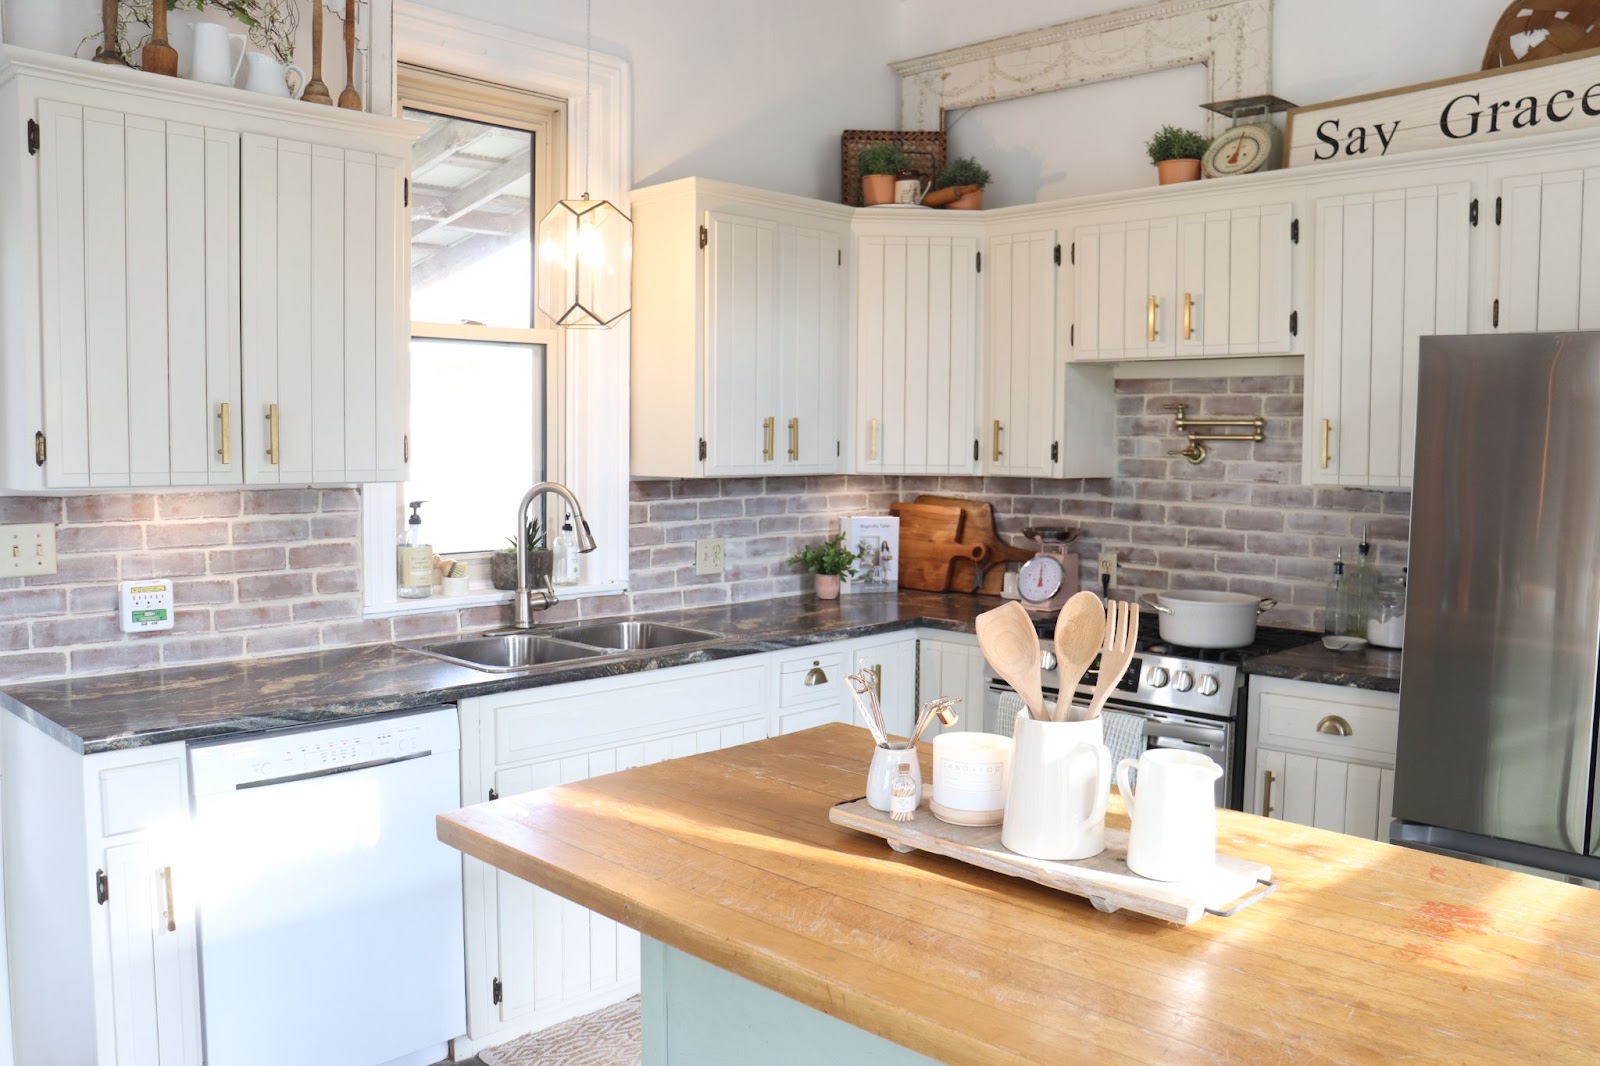
Here is our finished Kitchen Backsplash! Isn’t she a beauty!? We are so happy with the Thin Brick from Glen-Gery. It is exactly what our space was missing! What we love most about this Thin Brick is that rather than traditional tile, this brick gives our kitchen the country vibe that we love.
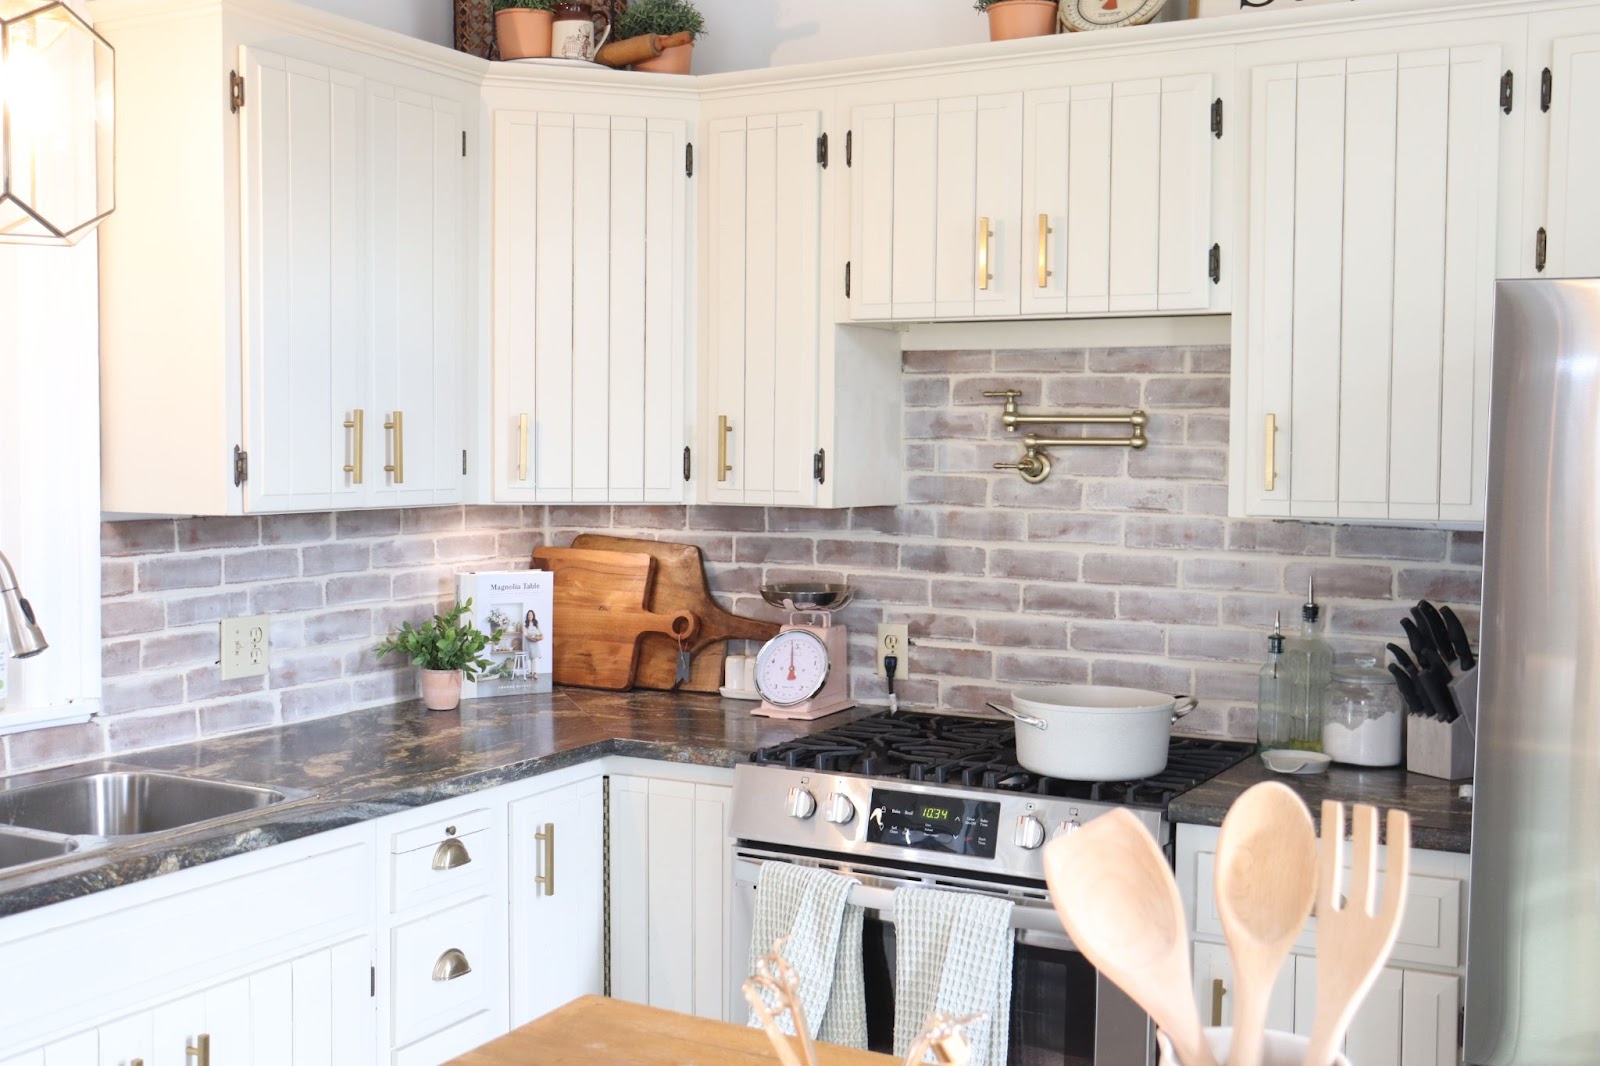

It complements our century home so nicely and it’s as if it was always here! If you’re looking for a beautiful upgrade to your kitchen, I highly suggest a brick backsplash! The warmness and coziness it provides is beyond compare.
Thank you so much for checking out my post and I hope you love what you see here enough to replicate this in your own home!


Leave a Reply
Pingback: Our Will have to-Have Kitchen Accent: The Pot Filler - TOP DECOR on December 2, 2022
Pingback: Our Must-Have Kitchen Accessory: The Pot Filler – TrendsXHome on December 2, 2022
Pingback: Our Must-Have Kitchen Accessory: The Pot Filler – shopidea.net on December 2, 2022
Pingback: Our must-have kitchen accessory pot filler | Woods Map on December 2, 2022
Pingback: Our Must-Have Kitchen Accessory: The Pot Filler – The Kitchen Radar on December 2, 2022
Pingback: Crafting Your Dream Kitchen: A Step-by-Step Guide • Holly Grace on December 2, 2022
6 COMMENTS